   Material
1 Main Tube of your choice 1 Misted Landscape of your choice 1 Decorative tube of your choice. WordArt: tituloSIMPSP_ForeverFriends_Inacia  Plugins
FM Tile Tools > Blend Emboss Carolaine and Sensibility > CS_LDots Filter Factory Gallery "V" > Lonely Heart Mura's Meister > Copies AAA Frames > Foto Frame
TUTORIAL
1- Open the
material on the PSP, duplicate and close the original.
Activate the misted landscape and choose two colors. Foreground: #f4d889 Background: #ac6936
Form a Style Gradient: Linear > Angle: 0 > Repeats: 0
Edit
> Copy the Misted Landscape.
2-
Open a new
transparent image of 1000x6000 px.
Paint
the transparency with the Gradient.
Layers
> New Raster Layer.
Selections > Select All.
Edit
> Paste Into Selection.
Selections > Select Nome.
Effects
> Image Effects > Seamless Tiling > Default.
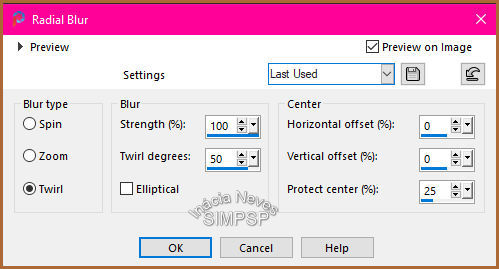
3- Adjust > Blur > Radial
Blur:
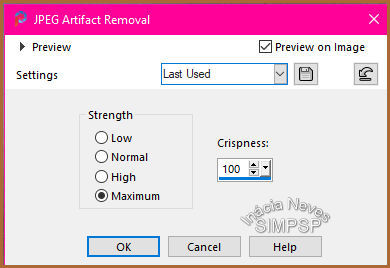
 4- Adjust > Add/Remove Noise
> JPEG Artifact Removal:
 Effects
> Plugin > FM Tile Tools > Blend Emboss: Default
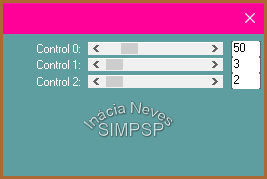
5- Effects > Plugin >
Carolaine and Sensibility > CS_LDots:
 Effects
> Plugin > FM Tile Tools > Blend Emboss
Layers
> Duplicate
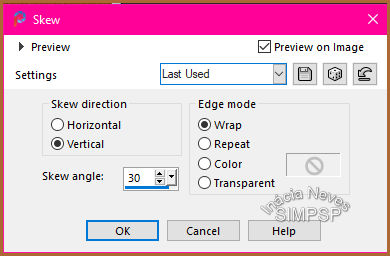
6- Effects > Geometric Effects
> Skew:
 Effects
> Image Effects > Seamless Tiling > Default
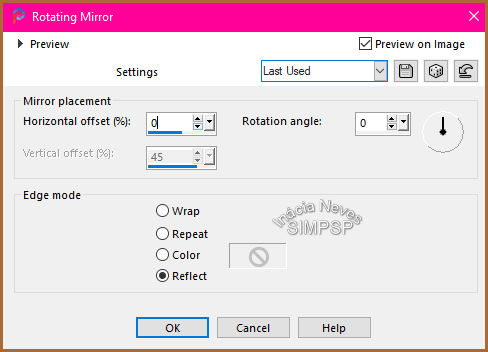
Effects
> Reflection Effects > Rotating Mirror:
 7- Layers > New Raster
Layer.
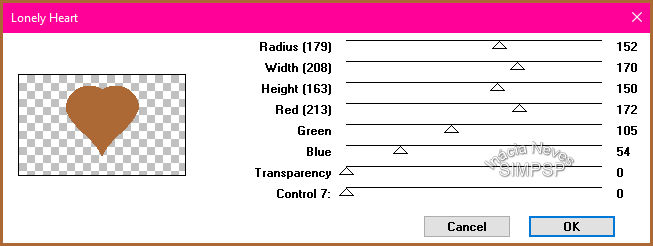
Effects
> Plugin > Filter Factory Gallery "V" > Lonely Heart:
(in Red,
Green and Blue, (use the RGB of one of the use colors)
 8- Selections > Select
All.
Selections > Float.
Selections > Defloat.
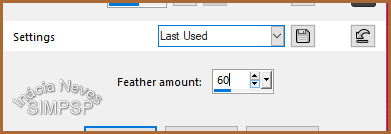
Selections > Modify > Feather:
 Press the
keyboard's Delete key.
Selections > Select None.
Effects
> Edge Effects > Enhance.
9- Layers >
Duplicate.
Close
the visibility of the Copy of Raster 3 layer.
Activate the Raster 3 layer.
Image
> Resize > 40% > All Layers unchecked.
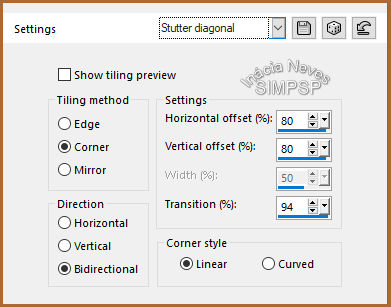
Effects
> Image Effects > Seamless Tiling > Stutter Diagonal:
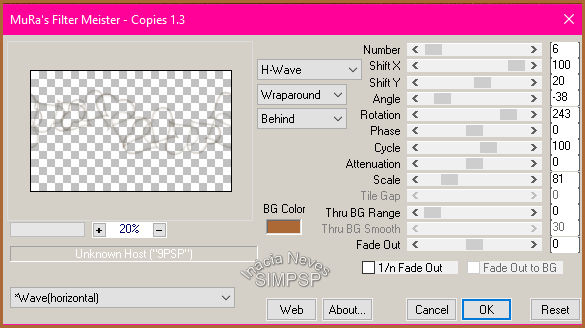
 10- Effects > Plugin > Mura's
Meister > Copies:
 Objects
> Align > Bottom
With
the Magic Wand tool > Tolerance: 10, select the part below the hearts:
 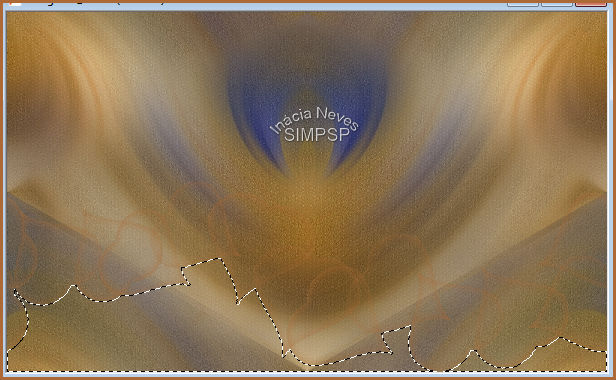 Selections > Modify > Expand > Number of
pixels > 5
11- Activate the Copy of Raster 2
layer.
Press the keyboard's Delete key.
Selections > Invert
Effects
> 3D > Drop Shadow:
Repetir > Effects
> 3D > Drop Shadow: 0 / 0 / 100 / 50
Selections > Select None
12- Activate the Raster 3 layer.
Layers
> Properties > General > Blend Mode: Screen, or another Blend
Mode of your choice.
Layers
> Duplicate.
Layers
> Merge Down.
13- Activate the Raster 2 layer.
Layers
> Properties > General > Blend Mode: Multiply, or another Blend
Mode of your choice.
14- Open visibility and activate
Copy of Raster 3 layer.
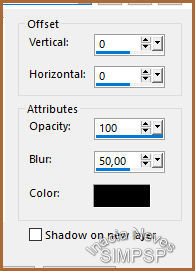
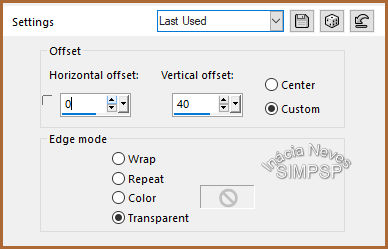
Effects
> Image Effects > Offset:
 Layers >
Properties > General > Blend Mode: Multiply, or another Blend Mode of your choice.
15-
Activate landscape misted.
Edit >
Copy
Activate the work.
Edit >
Paste As New
Layer.
Layers > Arrange
> Move Down.
With the Pick Tool
tool, adjust your choice the misted of the landscape in the center of
the heart.
Adjust > Sharpness
> Sharpen More.
16-
Activate the Main tube.
Edit >
Copy.
Activate the work and
top layer.
Edit > Paste As
New Layer
Image > Resize if necessary.
Adjust > Sharpness
> Sharpen.
Effects > 3D Effects
> Drop
Shadow: as you prefer.
Layers > Merge > Merge All
17-
Create the borders.:
Image > Add
Borders > 1 px > Symmetric > Color #ac6936
(dark color)
Image > Add
Borders > 1 px > Symmetric > Color #f4d889
(light color)
Image > Add Borders > 1 px > Symmetric >
Color #ac6936 (dark color)
18- Selections > Select
All.
Image > Add
Borders > 50 px > Symmetric >
with any color.
Selections >
Invert.
Paint with the use
gradient.
Adjust > Blur >
Gaussian Blur > Radius: 30
Effects
> Plugin > Carolaine and Sensibility > CS_LDots:
Effects
> Plugin > FM Tile Tools > Blend Emboss.
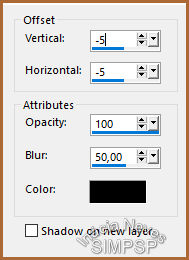
19- Effects > 3D > Drop Shadow:
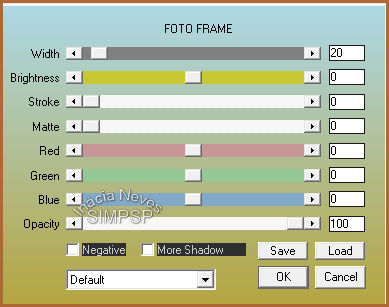
20- Effects > Plugin > AAA Frames > Foto
Frame:
 Selections > Select None.
Selections > Select All.
Selections > Modify > Contract > Number of
pixel: 20.
Effects
> 3D > Drop Shadow:
Selections > Select None.
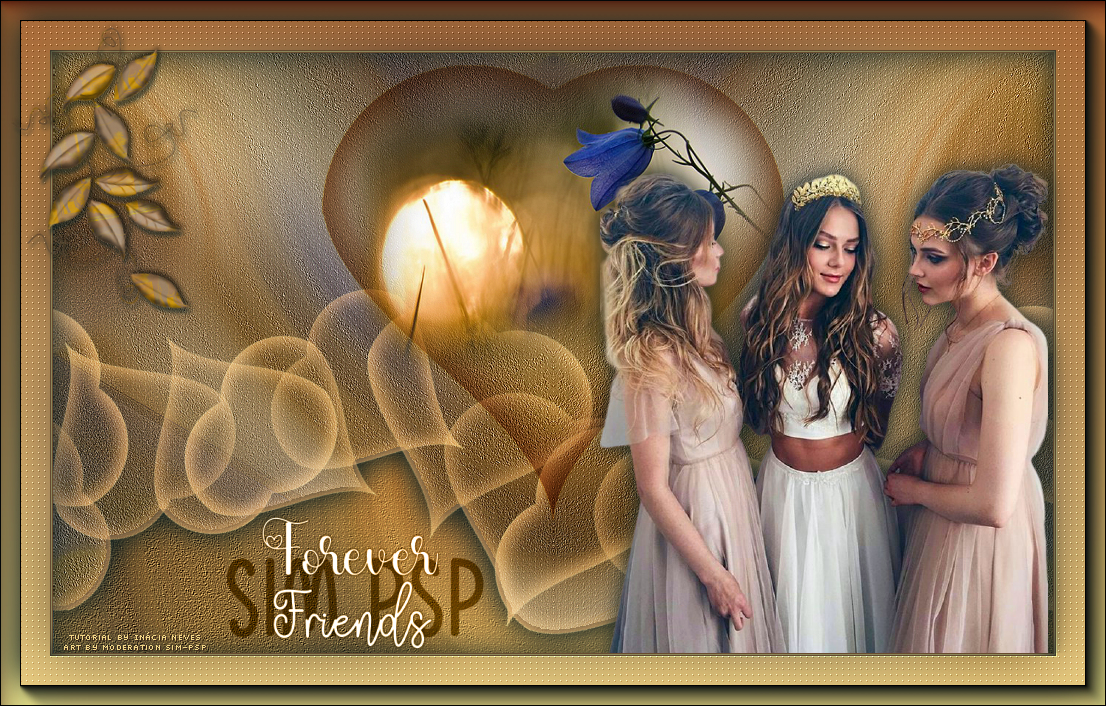
21- Activate wordart tituloSIMPSP_ForeverFriends_Inacia.pspimage
Edit
> Copy
Activate the work.
Edit
> Paste As New Layer
Image > Resize if necessary.
Position of your choice.
Layers >
Properties > General > Blend Mode: Luminance(L), or another Blend Mode of your choice.
22-
Use a Decorative Tube. (optional)
Position and use
Effects > 3D > Drop Shadow as you like.
Layers > Merge
All.
23- If you prefer to resize your work.
Apply your watermark or signature.
CREDITS: Tutorial by InáciaNeves English Translation by Moderation SIM-PSP Main Tube: Tubed by Márcinha Misted Landscape: Tubed by LB Tubes & Mists WordArt: SIMPSP_ForeverFriends_Inácia
Feel free to send your versions. I will be happy to publish them on our website.   
|
