|
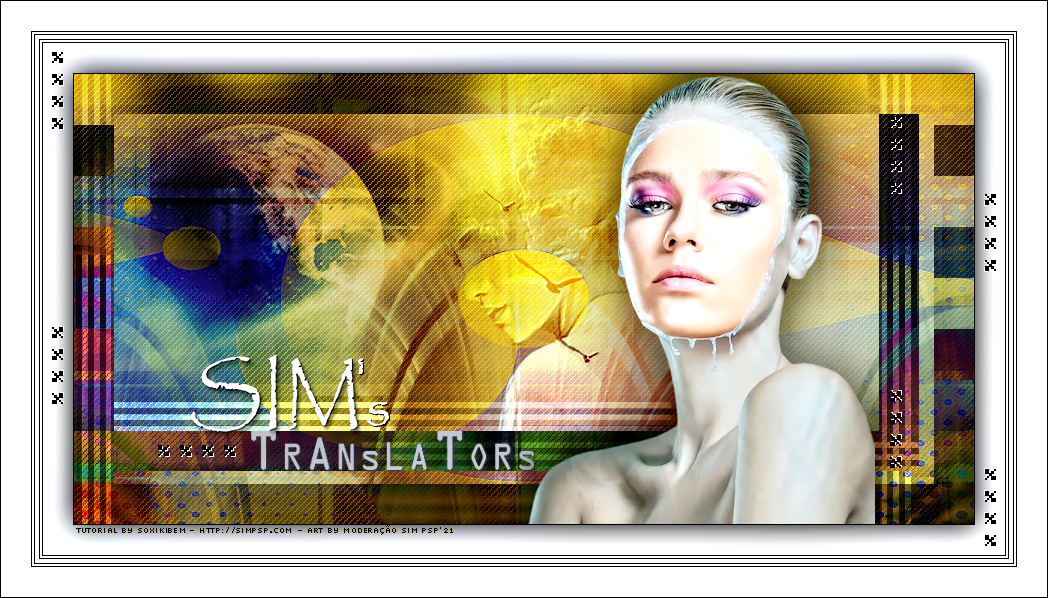
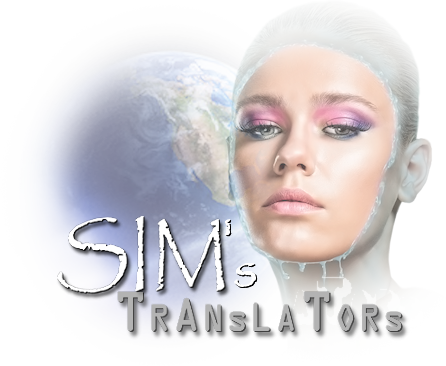
Tutorial dedicated to Translators of SimPsp Tutorials
Tutorial by Soxikibem English Translation by Moderation SIM-PSP Original Tutorial
MATERIAL 1 Main Tube of your choice planetaByMoiMeme VERLAINE B 25 Decor1BySoxikibem Decor2BySoxikibem Decor3BySoxikibem tituloBySoxikibem NarahsMasks_1592
PLUGINS Carolaine and Sensibility Graphics Plus Mehdi Unlimited 2.0
* Change the Blends according to the shades and Tube you are using.
TUTORIAL
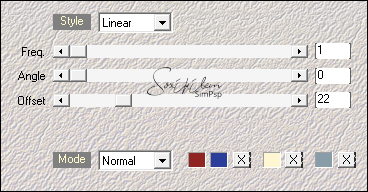
01- Open the material on the PSP, duplicate and close the original. Choose four colors to work with. Foreground: #8e2520 Background: #2b3e99 Color 3: #fff7d2 Color 4: #899da8
02 - Open a new transparent image of 900x450px.
03 - Effects > Plugins Mehdi > Wavy Lab 1.1. Color sequence: 1,2,3,4
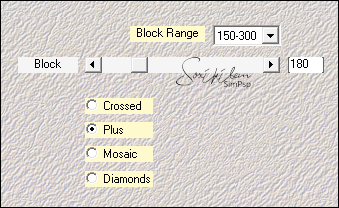
04 - Effects > Plugins Mehdi > Sorting Tiles.
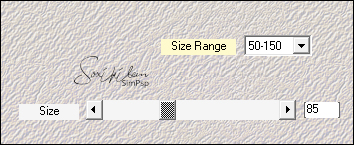
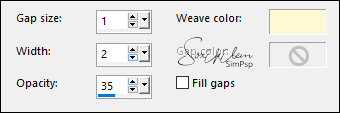
05 - Effects > Plugins Mehdi Weaver.
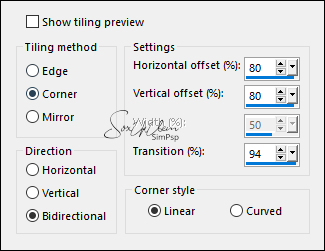
06 - Effects > Image Effects > Seamless Tiling.
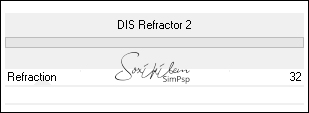
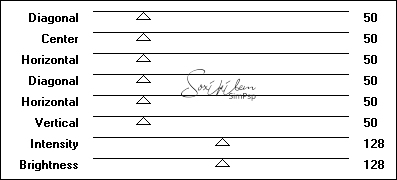
07 - Effects > Plugins Filters Unlimited 2.0 > Bkg Designer sf10 II > DIS Refractor 2.
08 - Layers > Duplicate. Image > Mirror > Mirror Vertical. Effects > Distortion Effects > Polar Coordinates: Polar to rectangular. Layers > Properties > General > Blend Mode: Hard Light.
09 - Activate Layer Raster 1. Effects > Texture Effects > Weave. Weave color: color 3
10 - Activate Layer Copy of Raster 1. Edit > Copy no Misted planetaByMoiMeme. Edit > Paste as New Layer. Position in the upper left corner. Layers > Properties > General > Blend Mode Burn.
11 - Layers > New Raster Layer. Selections > Select All. Selections > Modify > Contract: 40. Selections > Invert. Paint this selection with a Linear gradient formed by colors 3 and 4.
12 - Effects > Plugins Graphics Plus > Cross Shadow: Default.
Selections > Select None.
13 - Effects > Plugins Carolaine and Sensibility > CS-HLines.
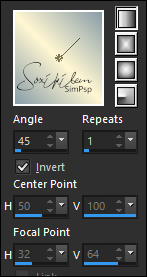
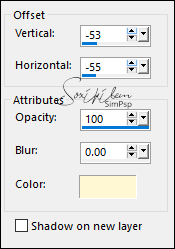
14 - Effects > 3D Effects > Drop Shadow: color 3.
Layers > Properties > General > Blend Mode: Difference, Opacity 50%.
15 - Layers > New Raster Layer. Paint with color 3. Layers > New Mask Layer > From Image: NarahsMasks_1592. Effects > Edge Effects: Enhance. Layers > Merge > Merge Group. Layers > Duplicate. Layers > Merge > Merge Down. Layers > Properties > General > Blend Mode: Color.
16 - Edit > Copy the VERLAINE B 25. Edit > Paste as New Layer. Image > Resize: 50%, all layers unchecked. With the Pick Tool tool, position: Position X 361, Position Y -63. Layers > Properties > General > Blend Mode: Overlay.
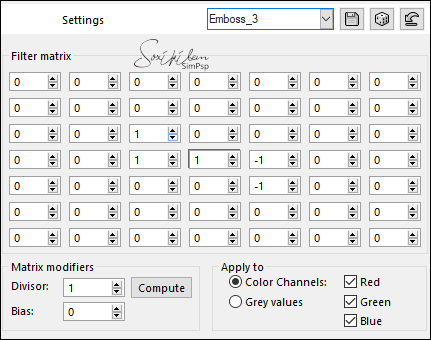
17 - Effects > User Defined Filter: Emboss 3.
18 - Edit > Copy the Decor1BySoxikibem. Edit > Paste as New Layer. With the Pick Tool tool, position: Position X 2, Position Y 0. Layers > Properties > General > Blend Mode: Overlay.
19 - Edit > Copy the Decor2BySoxikibem. Edit > Paste as New Layer. With the Pick Tool tool, position: Position X 84, Position Y 42.
20 - Edit > Copy the tituloBySoxikibem. Edit > Paste as New Layer. With the Pick Tool tool, position: Position X 115, Position Y 280.
21 - Edit > Copy the Main Tube. Edit > Paste as New Layer. Position to the right. Effects > 3D Effects > Drop Shadow as you prefer.
22 - Image > Add Borders > Symmetric: 1px - color: #000000 Selections > Select All. Image > Add Borders > Symmetric: 30px - color: #FFFFFF Effects > 3D Effects > Drop Shadow: 0, 0, 100, 40, color: #000000 Selections > Select None. Image > Add Borders > Symmetric: 1px - color: #000000 2px - color: #FFFFFF 1px - color: #000000 4px - color: #FFFFFF 1px - color: #000000 2px - color: #FFFFFF 1px - color: #000000 30px - color: #FFFFFF 1px - color: #000000
23 - Edit > Copy the Decor3BySoxikibem. Edit > Paste as New Layer. With the Pick Tool tool, position: Position X 52, Position Y 52. Layers > Duplicate. Image > Mirror > Mirror Horizontal. Image > Mirror > Mirror Vertical.
24 - If you wish, resize your work
Apply your watermark or signature.
CREDITS: Tutorial by Soxikibem English Translation by Moderation SIM-PSP Main Tubes: Tubed by Lily and by Verlaine Misted Landscape: Tubed b y Moi-MemeDecor & WordArt: by Soxikibem Mask by Narah
Feel free to send your versions. I will be happy to publish them on our website.
|