  Tutorial By CidaBen English Translation by SIM-PSP moderation Original Tutorial
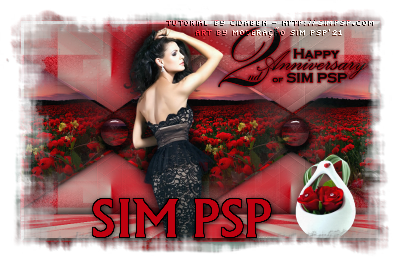
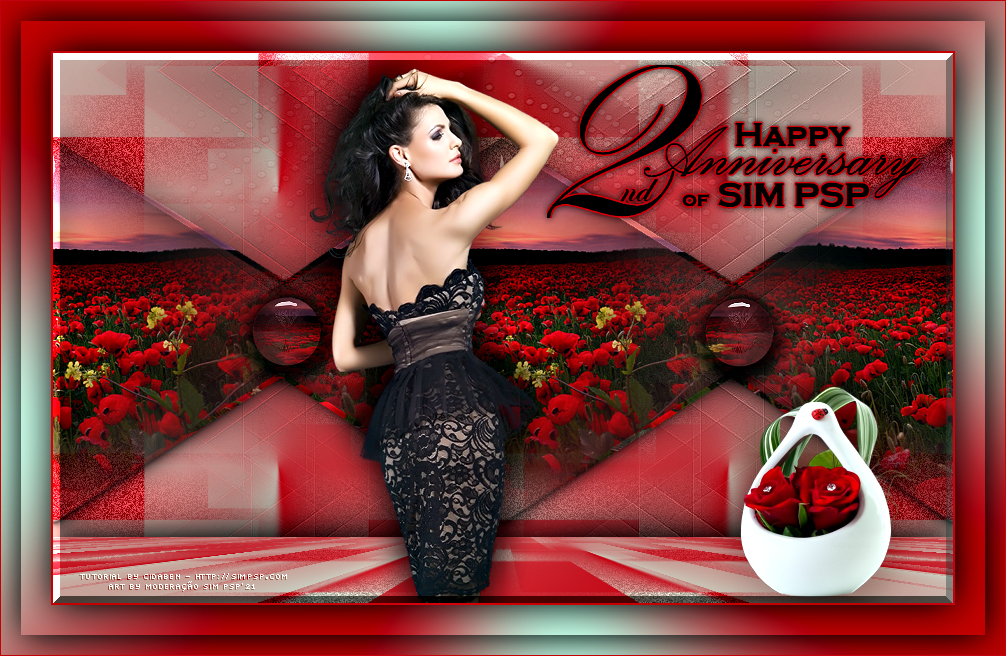
Tutorial created for SimPsp 06 Challenge. This challenge was proposed by Marcinha with the theme: Happy Anniversary 2nd of SIM PSP. MATERIAL Main Tube of your choice Misted Landscape of your choice Decorative tube of your choice. Mask: Masksuiza098-3 e 098-39 Mask: Narah_mask_1351 Decor_ NiverSim_bycidaben21 WordArt_SIMPSP21
PLUGINS VM Tollbox Alien Skin Eye Candy 5 Impact Mura's > Meister Filters Unlimited AFH Mehdi PSP Effects and Tools
TUTORIAL
1 -
Open the
material on the PSP, duplicate and close the original.
Choose 2 colors to work with. Foreground #c00110 Background #c1b509
Extra colors: #000000 and #FFFFFF
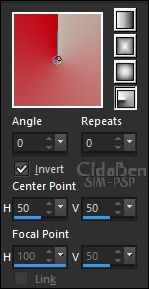
2 - Open a transparent 900x550 px image. Paint with the Radial gradient:
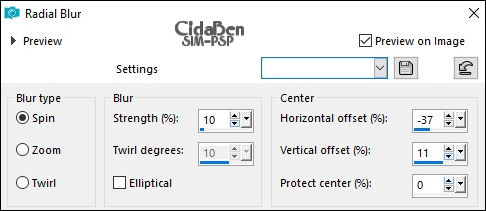
3 - Adjust > Blur > Radia Blur:
4 - Layers > Duplicate Image > Mirror Horizontal
5 - Layers > New Mask Layer > From Image: Masksuiza098-3 Layers > Merge > Merge Group
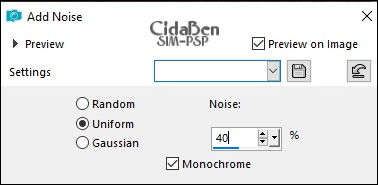
6 - Adjust > Add/Remove Noise > Add Noise
7 - Layers > Merge > Merge Down
8 - Effects > Plugins > VM ToolBox > Instant Tile
9 - Layers New Raster Layer Paint with the gradient in use.
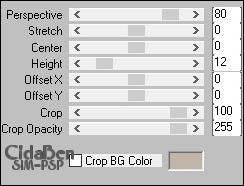
10 - Adjust > Blur > Radial Blur:
11 - Layers > Properties > General > Opacity: 70%
12 - Image > Mirror Horizontal.
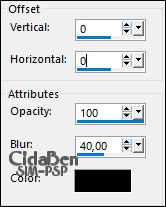
13 - Layers > New Mask Layer > From Image: Masksuiza098-39 Layers > Merge > Merge Group. 14 - Effects > 3D Effects Drop Shadow:
15 - Effects > Edge Effects > Enhance. Adjust > Shapness > Sharpen.
16 - Layers > Merge > Merge Down.
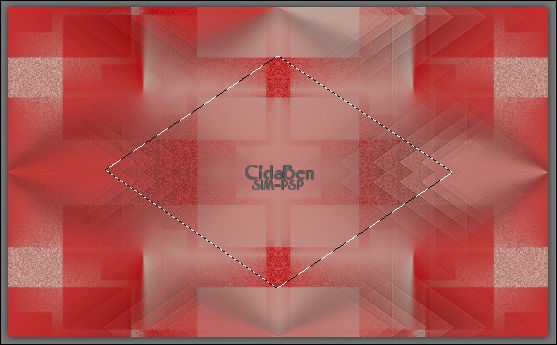
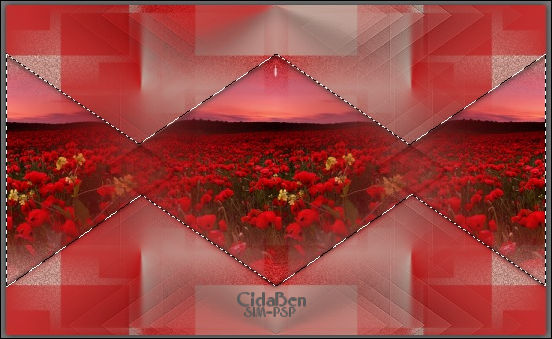
17 - Layers > New Raster Layer. Click on the Tool > Freehand Selection and select as indicated:
18 - Edit > Copy the Misted Paisagem. Edit > Past Into Selection. Adjust > Sharpness > Sharpen.
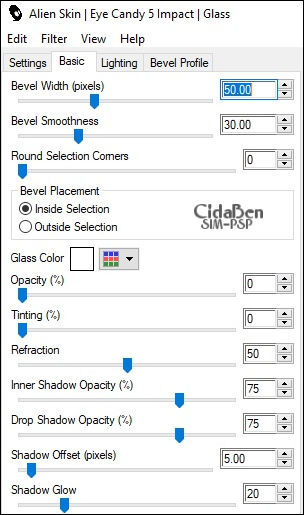
19 - Effects > Plugins > Alien Skin Eye Candy 5 Impact > Glass > Settings: Clear Basic: Glass Color > #FFFFFF
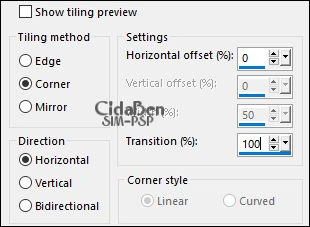
20 - Selections > Select None. Effects > Imge Effects > Seamless Tiling:
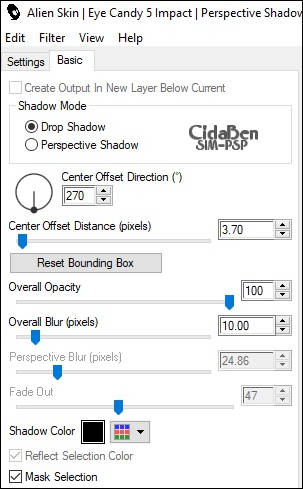
21 - Effects > Plugins > Alien Skin Eye Candy 5 Impact > Perspective Shadow > Shadow Color > #000000
22 - Click on the Tool > Freehand Selection and select as indicated:
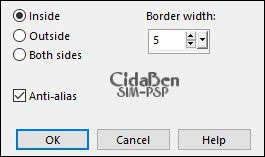
23 - Selections > Modify > Select Selection Borders:
24 - Layers > New Raster Layer. Edity > Copy the Misted Paisagem. Edit > Paste Into Selection. Adjust > Sharpness > Sharpen. Layers > Merge > Merge Down.
25 - Effects > 3D Effects > Drop Shadow:
26 - Selections > Select > None . Activate Raster Layer 1. Layers > New Raster Layer. Paint with color: #FFFFFF.
27 - Layers > New Mask Layer > From image: Narah_mask_1351 Layers > Merge > Merge Group.
28 - Layers > Properties > General > Blend Mode > Soft Light. Effects > Edge Effects > Enhance. Effects > 3D Effects > Drop Shadow: 1 > 1 > 60 > 2 > Color #000000
29 - Activate Raster Layer 1. Layers > Duplicate. Layers > Arrange > Bring To Top.
30 - Effects > Plugins > Mura's Meister > Perspective Tiling:
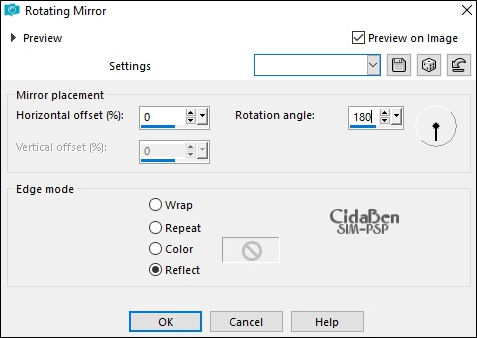
31 - Effects > Reflection Effects > Rotating Mirror: Effects > 3D Effects > Drop Shadow: -2 > 0 > 100 > 50 > Color #000000
32 - Edit > Copy the Decor_ NiverSim_bycidaben21 Edit > Paste as new layer. With the Pick Tool tool, position: Position: X 170 > Position: Y 225. Adjust > Sharpness > Sharpen. Effects > 3D Effects > Drop Shadow: as you prefer.
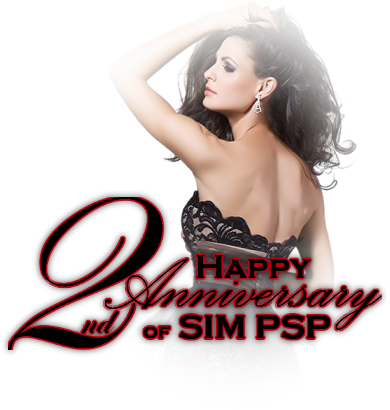
33 - Edit > Copy > the WordArt_SIMPSP21. Edit > Paste as new layer. Colorize your choice according to the color of your work. Position as you wish.
34 - Edit > Copy the main Tube. Edit > Paste As New Layer Position as you wish. Adjust > Sharpness > Sharpen. Effects > 3D Effects > Drop Shadow: as you prefer.
35 - Edit > Copy the Decorative tube. Edit > Paste as new layer. Position as you wish. Adjust > Sharpness > Sharpen. Effects > 3D Effects > Drop Shadow: as you prefer.
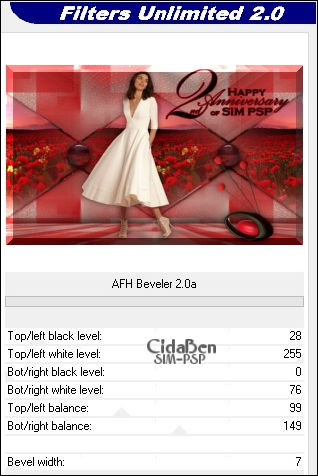
36 - Layers > Merge > Merge Visible. Effects > Plugins > Filters Unlimited AFH > AFH Beveler 2.0a
37- Image > Add Borders > Symmetric: 2 px - color: Foreground #c00e10 Selections > Select All. Image > Add Borders > Symmetric: 50 px - color: Background #c1b5a9 Selections > Invert.
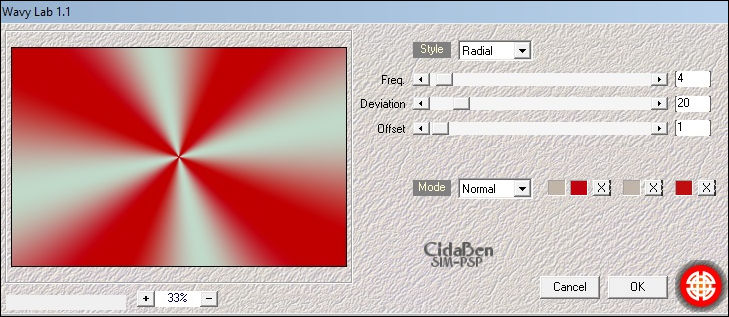
38 - Effects > Plugins > Mehdi > Wavy1.1 Configure with the two chosen Background and Foreground colors:
39 - Selections > Invert. Effects > 3D Effects > Drop Shadow: 1 > 1 > 100 > 60 > Color #000000 Selections > Select All. Selections > Modify > Contract > 20 px Repeat the Drop Shadow: 1 > 1 > 100 > 60 > Color #000000 Selections > Select None
40 - Image > Add Borders > Symmetric: 1 px - Color: Foreground #c00e10.
41-
Apply your watermark or signature.
File > Export > JPEG Optimizer
Credits:
Tutorial by CidaBen
English Translation by Moderation SIM-PSP
Main Tube: Tubed by Grisi
Decorative tube: Tubed by Animabelle Misted Landscape: Tubed by Guismo
WordArt: by SIM PSP
Feel free to send your versions. I will be happy to publish them on our website.
|