|
TRADUÇÕES:
Obrigada aos nossos tradutores!
MATERIAL 1 tube a sua escolha alphachannel_4maos05 Narah_Mask_1497 NarahsMasks_1530 titulo_05future decor_05future decor2_05future 4maos05.f1s * Dar dois cliques no arquivo 4maos05.f1s para importá-lo automaticamente para o plugin Alien Skin Eye Candy 5 Impact.
PLUGINS AP Lines Filters Unlimited 2.0 Mehdi Mura's Meister Alien Skin Eye Candy 5 Impact
Roteiro:
01- Abrir o material no PSP, duplique e feche o original. Escolher duas cores para trabalhar. 1- Foreground #038fb3 2- Background #84dbf9 cores extras: 3- #013644 4- #c7e4f9
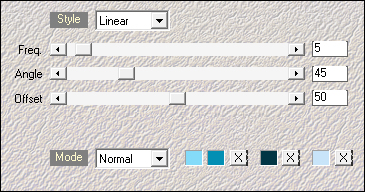
02- Abrir o alphachannel_4maos05. Effects > Plugin Medhi > Wavy Lab 1.1:
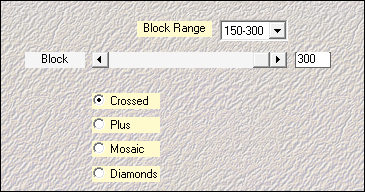
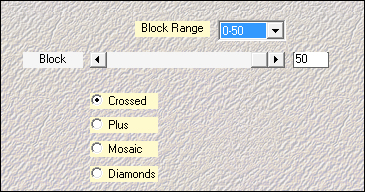
03- Effects > Plugin Medhi > SortingTiles:
Effects > Plugin Medhi > SortingTiles:
Adjust > Sharpness > Sharpen.
04- Filters Unlimited 2.0 > Background Designers IV > sf10 Diamond Flip
05- Layers Duplicate. Feche a visibilidade da layer Copy of Raster 1. Ative a layer Raster 1.
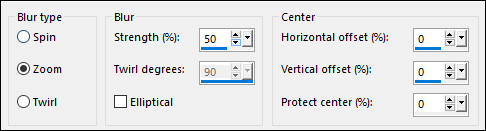
06- Adjust > Blur > Radial Blur.
Effects > Edge Effects > Enhance.
07- Ative a abra a visibilidade da layer Copy of Raster1. Image > Resize em 80%, all layers desmarcado. Effects > 3D Effects > Drop Shadow: 0, 0, 100, 50, com a cor preta.
08- Effects > Distortion Effects > Pinch: 100. Layers > Merge > Merge Down. Layers > Duplicate. Fechar a visibilidade da layer Copy of Raster 1. Ativar a layer Raster 1.
09- Plugim Mura's Meister > Pole Transform.
10- Filters Unlimited 2.0 > Bkg Designer sf10 I > Blur 'em!: 0, 10.
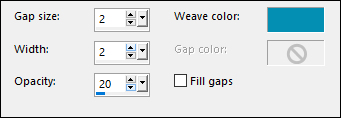
11- Effects > Texture Effects > Weave. Com a cor do Foreground.
12- Layers > Duplicate. Image > Mirror > Mirror Vertical. Layers > Properties: Blend Mode Multiply.
13- Layers > New Raster Layer. Selections > Load/Save Selections > Load Selection From Alpha Channel: Selection #1. Pintar esta seleção com a cor do background.
14- Layers > New Mask Layer > From Image: Narah_Mask_1497. Layers > Merge > Merge Group. Selections > Select None.
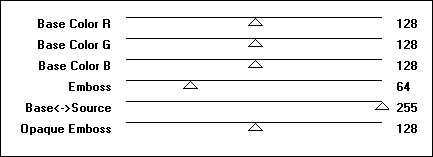
15- Plugin Mura's Seamless > Emboss at Alpha.
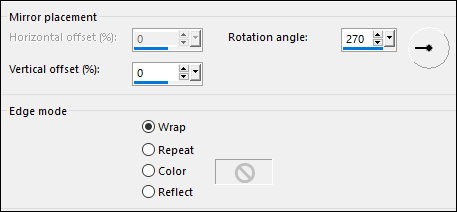
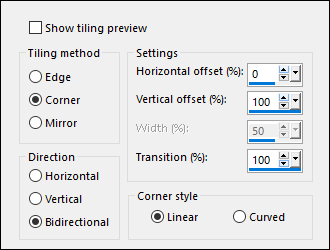
16- Effects > Image Effects > Seamless Tiling: Default. Effects > Reflection Effects Rotating Mirror.
17- Layers > New Raster Layer. Pintar esta layer com uma das cores mais claras escolhidas, aqui usamos a cor numero 4. Layers > New Mask Layer > From Image: NarahsMasks_1530. Layers > Merge > Merge Group. Effects > Image Effects > Seamless Tiling: Default.
18- Ativar e abrir a visibilidade da layer Copy of Raster1. Image > Resize: 30%, all layers desmarcado. Layers > Duplicate. Fehar a visibilidade da layer Copy (2) of Raster 1. Ativar a layer Copy of Raster 1. Effects > Image Effects > Seamless Tiling.
19- Plugin Italian Editors Effect > Effetto Fantasma: 255, 0. Layers > Properties > General: Blend Mode Mutliply, Opacity 50.
20- Layers > New Raster Layer. Selections > Load/Save Selections > Load Selection From Alpha Channel: Selection #2. Pintar esta selecao com a cor mais escura escolhida, aqui usamos a cor 03. Selections > Select None.
21- Layers > Duplicate. Image > Mirror > Mirror Vertical. Layers > Merge > Merge Down. Layers > New Mask Layer > From Image: Narah_Mask_1497. Layers > Merge > Merge Group.
22- Filters Unlimited 2.0 > Bkg Designer sf10 II > Line Panel Stripes: 30, 169, 69. Layers > Properties > General: Opacity 50.
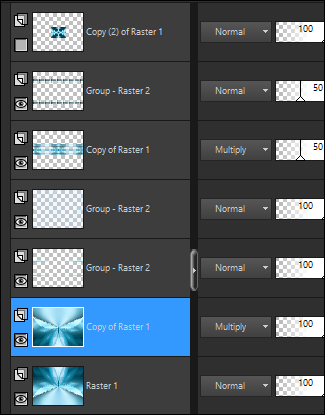
23- Ative a layer Copy of Raster 1 como mosta o print abaixo.
Layers > Arrange > Bring to Top. Layers > Arrange > Move Down. Ative e abra a visibilidade da layer Copy (2) of Raster 1 (Layer do topo de todas).
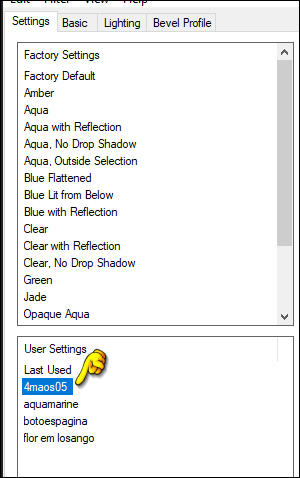
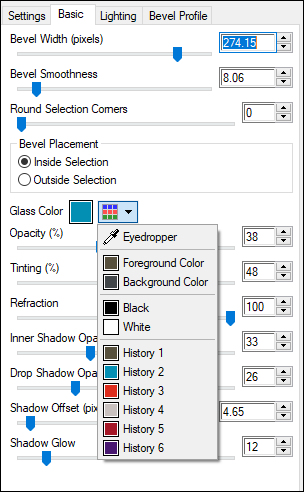
24- Alien Skin Eye Candy 5 Impact > Glass: 4maos05.f1s. *Para combinar com a cor que esta usando mude a cor na aba
25- Layers > New Raster Layer. Selections > Load/Save Selections > Load Selection From Alpha Channel: Selection #3 Pintar esta seleção com a cor branca. Selections > Select None.
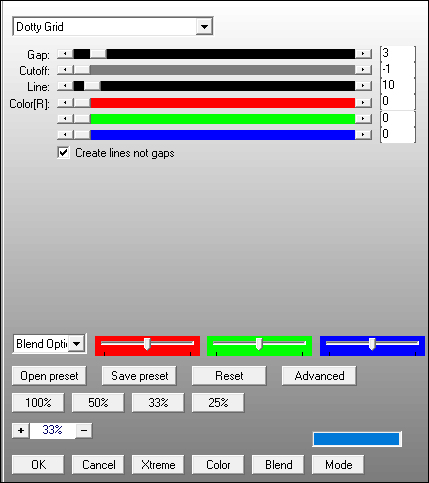
26- Plugin AP Lines > Silver Lining.
27- Layers > Arrange > Move Down. Ative a layer Copy (2) of Raster 1 Layers > Merge > Merge Down. Layers > Duplicate. Fechar a visibilidade da layer duplicada. Ativar a layer Raster 2.
28- Image > Free Rotate: Right,20, all layers desmarcado. Com a ferramenta Pick Tool posicione assim: Position X 387, Position Y 69. Effects > 3D Effects > Drop Shadow: 0, 0, 100, 50.
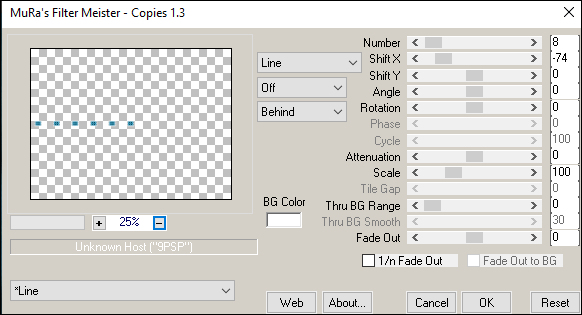
29- Ative a abra a visibilidade da layer Copy of raster 2. Image > Resize: 10%, all layers desmarcado. Adjust > Sharpness > Sharpen. Plugin Mura's Meister > Copies.
Effects > 3D Effects > Drop Shadow: 14, 14, 100, 20.
30- Edit > Copy no Tube principal. Edit > paste a New Layer. Posicione a esquerda. Aplique Drop Shadow como preferir.
31- Edit > Copy no titulo_05future. Edit > Paste a New Layer. Com a ferramenta Pick Tool posicione: Position X 358, Position Y 403. Se desejar aplicar Drop Shadow como preferir.
32- Edit > Copy no decor_05future. Edit > Paste a New Layer. Com a ferramenta Pick Tool posicione: Position X 460, Position Y 30.
33- Image > Add Borders: 1px cor preta. Selections > Select All. Image > Add Borders: 40px com a cor branca. Selections > Invert. Plugin AP Lines > Silver Lining.
34- Selections > Invert. Effects > 3D Effects > Drop Shadow: 0, 0, 100, 60. Selections > Select None.
35- Image > Add Borders: 1px cor preta. 10px cor branca. 1px cor preta. 25px cor branca. 1px cor preta.
36- Edit > Copy no decor2_05future. Edit > Paste a New Layer. Com a ferramenta Pick Tool posicione: Position X 33, Position Y 10. Layers > Duplicate. Image > Mirror > Mirror Horizontal. Image > Mirror > Mirror Vertical.
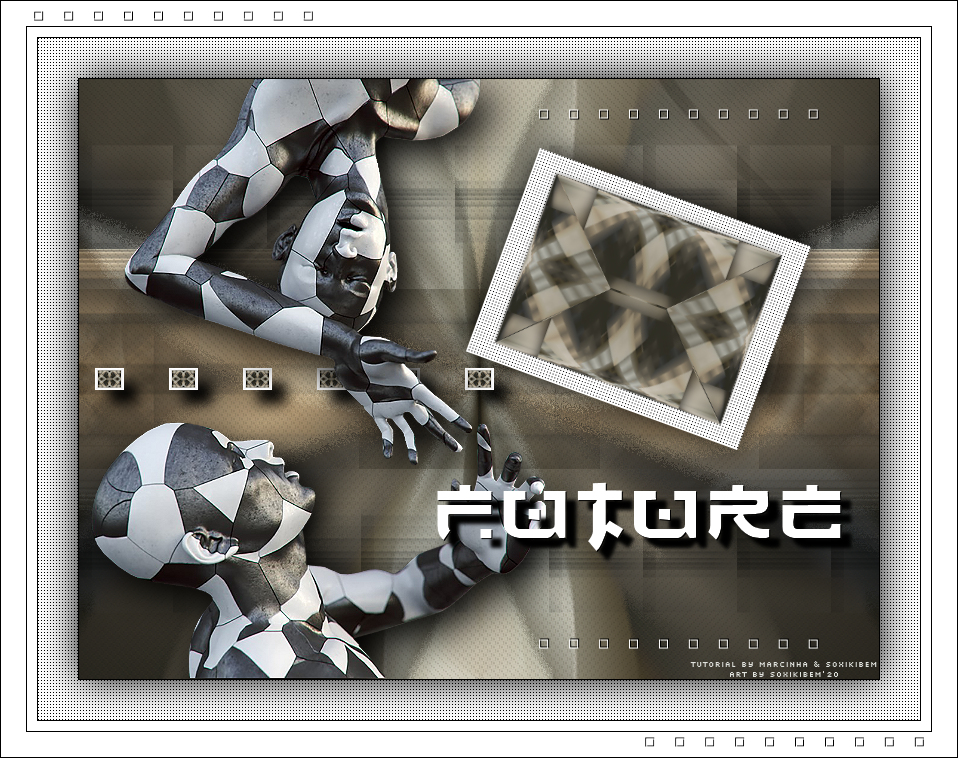
37- Se você desejar, redimensione seu trabalho. Aplicar sua marca d'água ou assinatura. File > Export > JPEG Optimizer.
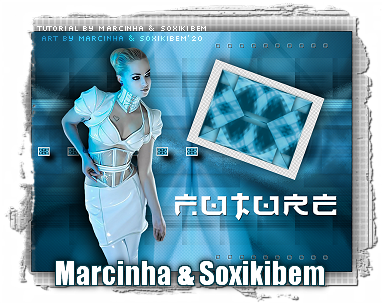
CRÉDITOS Tutorial by Marcinha & Soxikibem'20 Créditos: Tube: Tubedy by GraphicsBeatrice - Masks by Narah
VERSÃO BY SOXIKIBEM Tube: Tubedy by Cady
Sinta-se à vontade para enviar suas versões. Teremos todo o prazer em publicá-las em nosso site.
|