Tutorial By
AnaMariaC
English Translation by SIM-PSP
moderation
Original Tutorial
MATERIAL
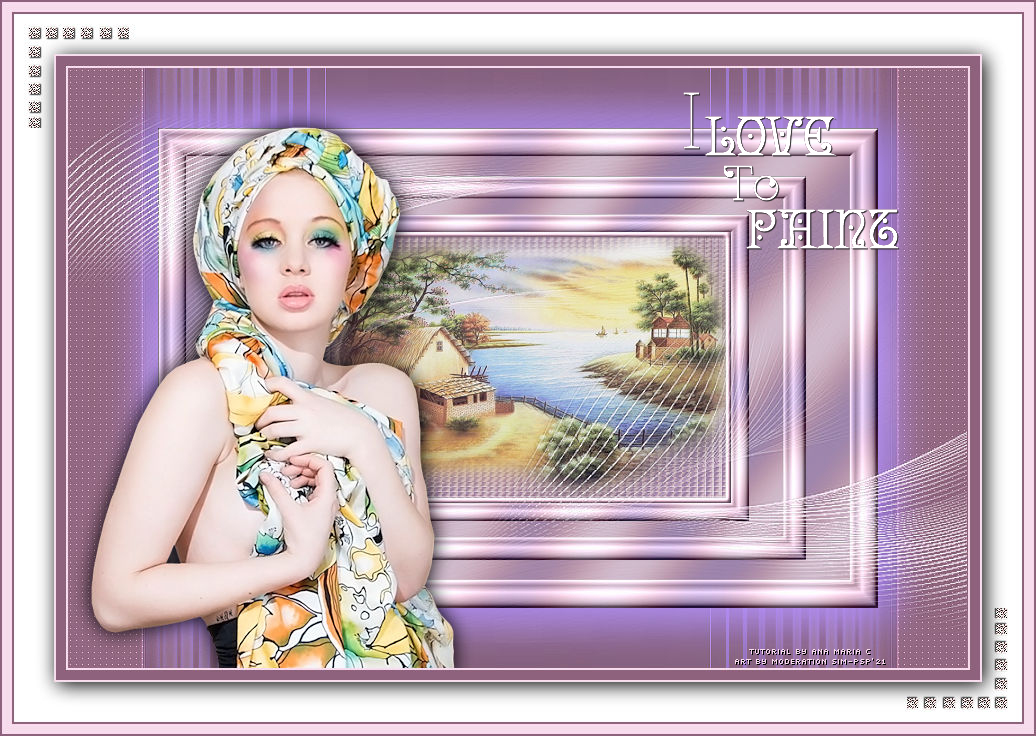
1 Main Tube of your choice
1 Misted Landscape of your choice
WordArt
by AnaMariaC
Narah
_masck_1234
decor_split
Landscape nights.PspGradient (Save to Gradient folder on your PSP)
PLUGINS
Unlimited > Buttons & Frames > 3D Glass Frame 1.
Carolaine and Sensible > CS-LDots.
PSP Effects
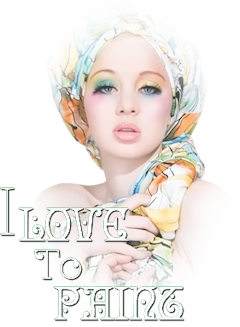
TUTORIAL
1-
Open the material on the
PSP, duplicate and close the original.
Choose two
colors to work with.
Foreground > #8e627c
Background > #f6dced
Extra colors: #b18cff
#FFFFFF #000000

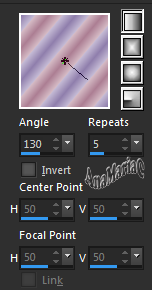
2- Set up the Foreground with Gradient Landscape nights.
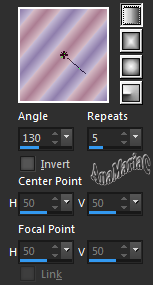
3-
Open a 900x600 transparent image.
Paint
the transparency with the Gradient that was created.
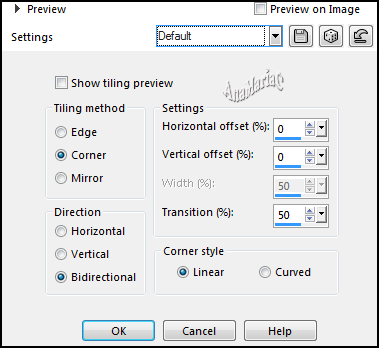
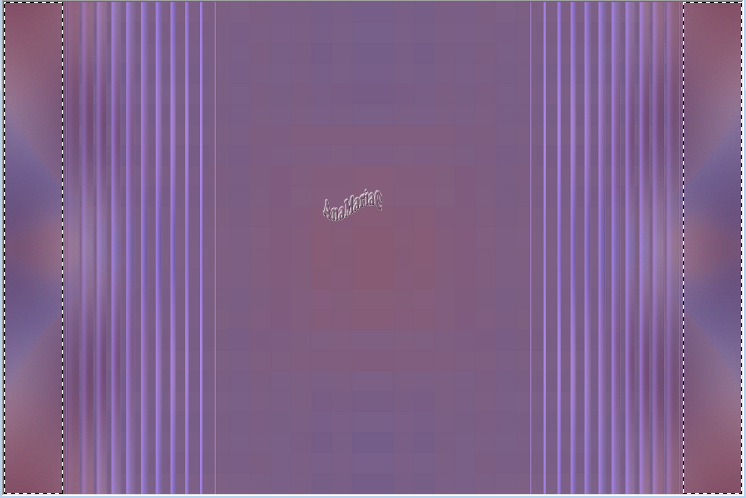
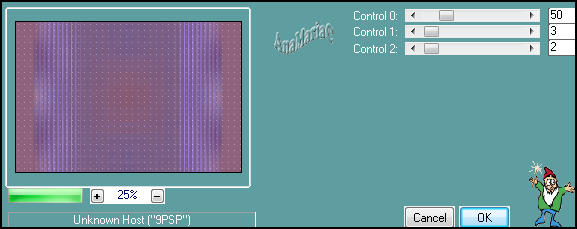
4- Effects > Image Effect > Seamless Tiling > Default:
5- Adjust > Blur > Radial Blur:

6- Layers > Duplicate.
Image > Mirror > Mirror Vertical.
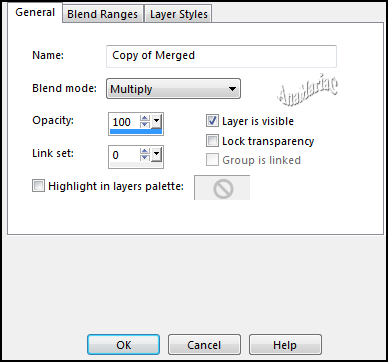
7- Layers > Properties > General > Blend Mode: Multiply.
8- Layers > Merge > Merge down.
9- Effects > Edge Effect > Enhance More.
10- Layers > Duplicate.
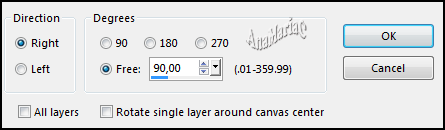
11- Image > Free Rotate:
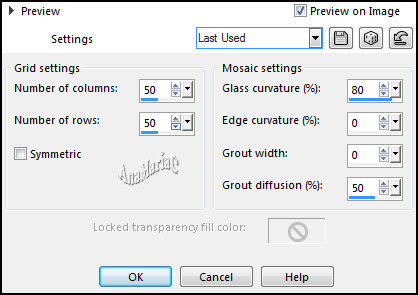
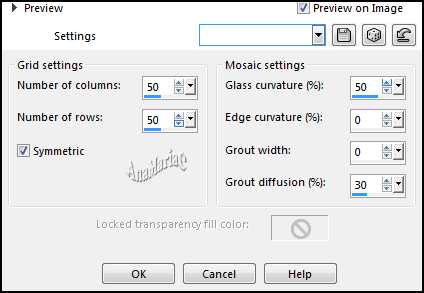
12- Effects > Texture Effects > Mosaic Glass:
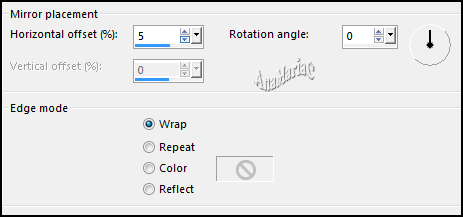
13- Effects > Reflection Effect > Rotating mirror.
14- Objetcs > Align > Center In Canvas.
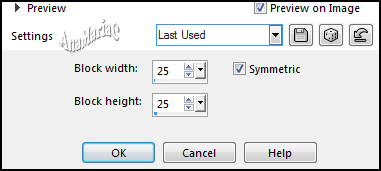
15- Effects > Distortions Effect > Pixelate:
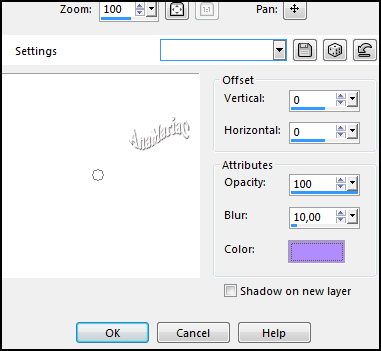
16- Effects > 3 D Effects > Drop Shadow: Color 3
17- Adjust > Sharpness > Sharpen.
Layers > Merge > Merge Visible.
18- Layers > New Raster Layer.
19- Paint with Linear Gradient.
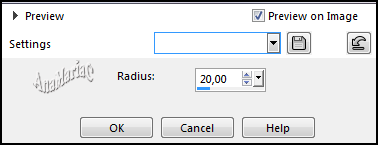
20- Adjust > Blur > Gaussian Blur:
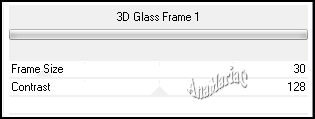
21- Effects > Plugin > Unlimited > Buttons & Frames > 3D Glass Frame
1.
22- Layers > Duplicate.
23- Image > Resize: 80% - Resize all layer unchecked.
24- Layers > Duplicate.
Image > Resiz: 80% > Resize all layer unchecked.
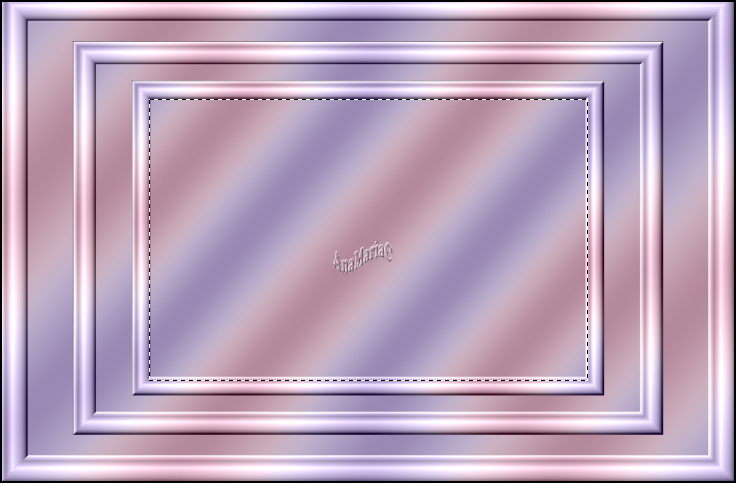
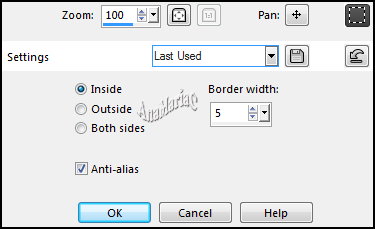
25- Activate the Selection Tool tool: Feather and Tolerance
at 0, select as in the example:
26- Effects > Texture Effects > Mosaic - Glass:
27- Edit >
Copy the Misted Landscape.
Edit > Paste Into Selection.
Adjust > Shapness > Sharpen.
28- Selections > Modify > Select Selections Borders.
Fill with color: #8e627c (Foregraund).
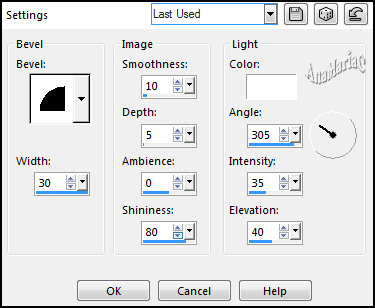
29- Effects > 3 D Effects > Inner Bevel.
Selections > Select None.
30- Layers > Merge Down.
Edit > Repeat layer Merge Down.
31- Close Layer Raster 1 Visibility.
32- Activate Layer Merged.
33- Activate the Selection Tool tool > Mode: Add (Shift) -
Feather and Tolerance at 0, select as in the example:
34- Layers > New Raster Layer.
Fill with color #8e627c (foreground)
35- Effects > Plugins > Carolaine and Sensible > CS-LDots.
36- Adjust > Sharpness > Sharpen More.
Selections > Select None.
Layers > Merge > Merge Down.
37- Activate and open the visibility of Layer Raster 1.
Image > Resiz: 80% > Resize all layer unchecked.
38- Effects > 3D Effects > Drop Shadow > color 3: #b18cff.
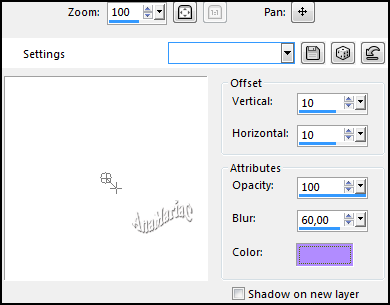
Repeat
> Drop Shadow: (V -10) > (H -10).
39- Layers New Raster Layer.
Fill with color: #f6dced (background)
40- Layers > New Mask Layer > From Image: Narah_Mask_1234.
Layers > Merge > Merge Group.
Adjust > Shapness > Sharpen.
Layers > Merge > Merge Down.
41- Edit > Copy the Main Tubes.
Edit > Paste as New Layer.
Image > Resize if necessary.
Adjust > Shapness > Sharpen.
Effects
> 3D Effects > Drop Shadow:
your choice.
Layers > Merge > Merge All (Flatten).
42- Image > Add Bordes > Simmetric:
2 px > color: #f6dced background
10 px > color: #8e627c foreground
2 px > color: #f6dced background
Selections > Select All.
Image > Add Bordes > Simmetric:
50 px - color: #ffffff
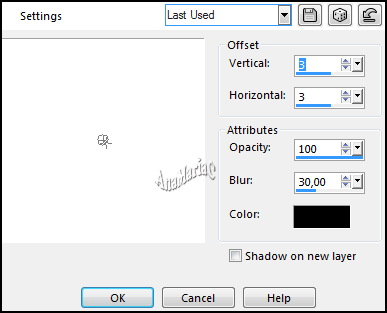
43- Effects > 3 D Effects > Drop Shadow > color: #000000.
Selections > Select None.
44- Image > Add Bordes > Simmetric:
2 px > color: #8e627c foreground
10 px > color: #f6dced background
2 px > color: #8e627c foreground
45- Edit > Copy no decor_split.
Edit > Paste as New Layer.
46 - Edit > Copy no WordArt
by AnaMariaC.
Edit > Paste a New
Layer.
Position to your choice.
Layers > Merge > Merge Visible.
47 -
If you wish, resize your work.
Apply your watermark or signature.
File > Export > JPEG Optimizer.
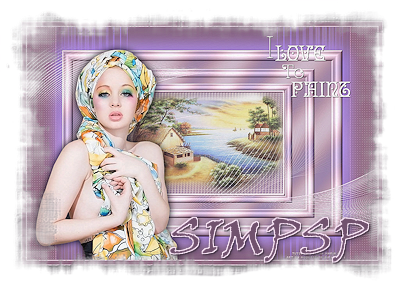
Tutorial by AnaMariaC
English Translation by Moderation SIM-PSP
Misted Paisagem: Tubed By
NenaSilva
Tube Principal by
CibiBijoux
Decor: I don't know the author
WordArt By AnaMariaC
Feel free to send your versions.
I will be happy to publish them on our website.


|
Tutorial created by AnaMariaC, in July
/ 2021. Translated into English in August / 21, by the Moderation of SIM-PSP. It cannot be
copied,
removed from its place, translated
or used in learning lists or groups without
the author's
prior consent. |
|