
TRADUÇÕES


Obrigada ao nossos tradutores
MATERIAL
1- Tube principal
1- Decor_byAnaMariaC
1- WorArt_byAnaMariaC
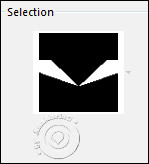
Selecões_byAnaMariaC
Alien Skin Filter Setting
Antes de iniciar:
*Salve as seleções na pasta Selection do PSP*
*Dois cliques no Alien Skin Filter para exportar, o efeito Glass,
para o plugin*
PLUGINS
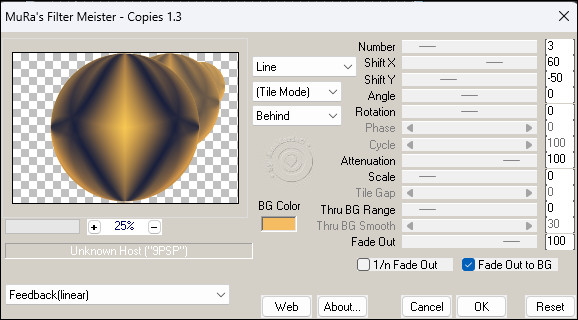
MuRa’s Meister > Copies
MuRa’s Meister > Perspective Tiling
Pixelate > Sector Moisaic
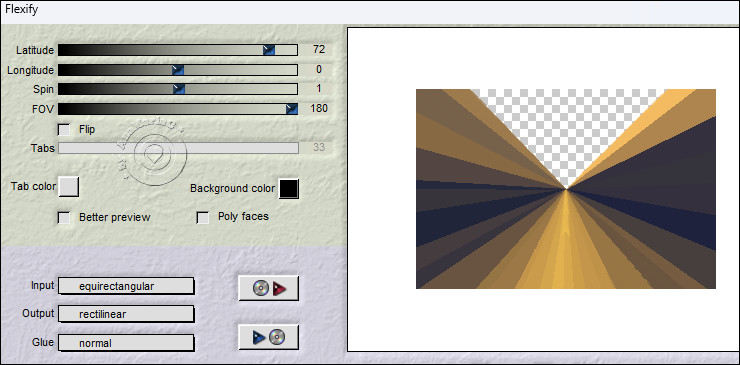
Flaming Pear > Flexify
Flaming Pear > Flexify 2
Alien Skin Eye Candy 5: Impact > Glass
Efeitos do PSP.
EXECUÇÃO
1- Abrir os materiais no PSP, duplique e feche os originais.
2- Escolher as cores para trabalhar.
Foreground: #323850 / Background: #f5bc61
3- Abrir uma imagem transparente de 900x600px.
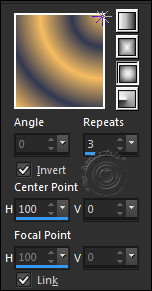
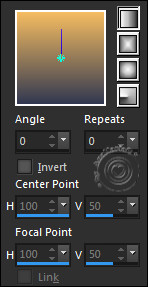
4- Pintar com o gradiente > Sunburst.
5- Layers > Duplicate.
6- Image > Mirror > Mirror Horizontal.
7- Layers > Properties > Blend Mode > Darken.
8- Layers > Merge > Merge Down.
9- Layers > Duplicate.
10- Image > Mirror > Mirror Vertical.
11- Layers > Properties > Blend Mode > Soft Light.
12- Layers > Merge > Merge > Down.
13- Layers > Duplicate.
14- Effects > Geometric Effects > Circle > Transparent.
15- Effects > MuRa’s Meister > Copies: Feedback (Linear).
16- Layers > Duplicate.
Image > Mirror > Mirror Horizontal.
Layers > Merge > Merge Down.
17- Image > Resize > 90% > Resize all layers > desmarcado.
18- Effects > Plugin > Pixelate > Sector Moisaic.

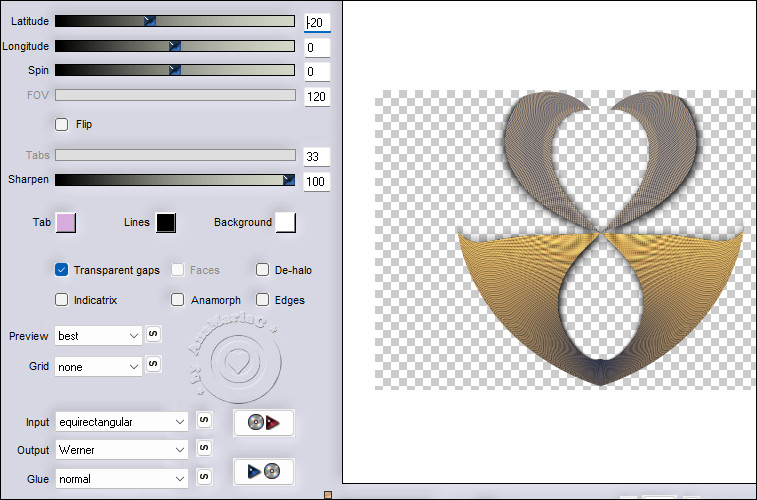
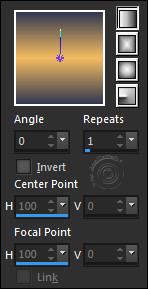
19- Effects > Plugin > Flaming Pear > Flexify:
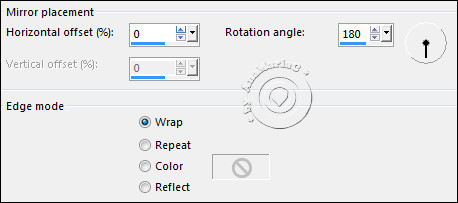
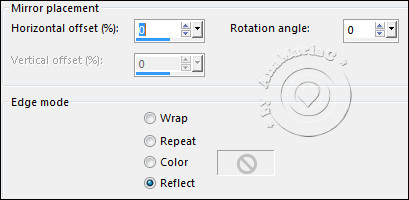
20- Effects > Reflections Effects > Rotating Mirror.
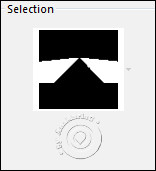
21- Selections > Load/Save Selections > Load Selection From Disk:1_Japão_byAnaMariaC
22- Selections > Promote Selection to Layer.
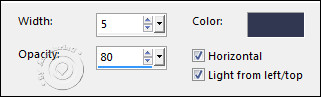
23- Effects > Texture Effects > Blinds > cor: (1) #323850
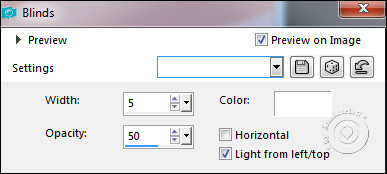
24- Effects > Texture Effects > Blinds.
Selections > Select None.
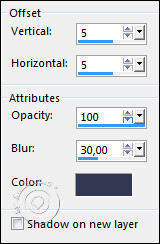
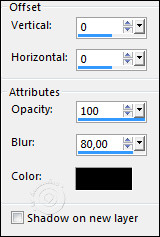
25- Effects > 3D Effects > Drop Shadow > cor: (1) #323850

26- Layers > New Raster Layer.
27- Selections > Load/Save Selections > Load Selection From Disk:2_Japão_byAnaMariaC
28- Preencher a seleção > gradiente > Linear.
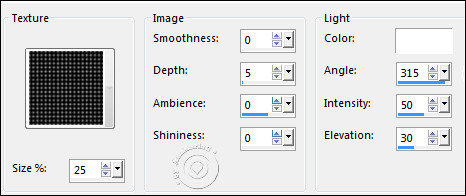
29- Effects > Texture Effects > Texture:

Selections > Select None.
30- Effects > 3D Effects > Drop Shadow > cor: (1) #323850 (Foreground).
31- Layers > Merge > Merge Down.
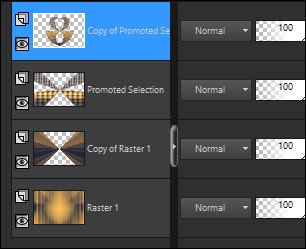
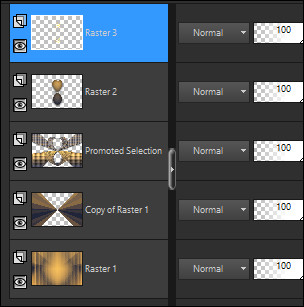
Conferir a posição das layers:

32- Ativar a layer > Copy of Raster 1.
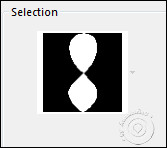
33- Selections > Load/Save Selections > Load Selection From Disk:3_Japão_byAnaMariaC
Aperte a tecla Delete no seu teclado.
Selections > Select None.
34- Ativar a layer Raster 1
Layers > New Raster Layer.
Preencher > cor 2: #f5bc61(Background).
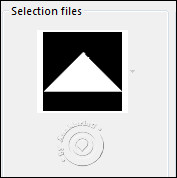
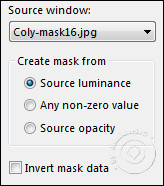
35- Layers > New Mask Layer > From image.
Layers > Merge > Merge Group.
36- Layers > Merge > Merge Down.
37- Ativar a Layer > Pomoted Selection.
Layers > Duplicate.
38- Effects > Plugin > Flaming Pear > Flexify 2:
39- Image > Resize: 90% - all layers unchecked.
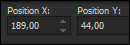
40- Ativar > Pick – Posicion:
Conferir a posição das layers:
41- Adjust > Sharpness > Sharpen.
Layers > Merge > Merge Down.
Layers > New Raster Layer.
42- Selections > Load/Save Selections > Load Selection From Disk:
4_Japão_byAnaMariaC
43- Preencher a seleção com o gradiente > Linear:
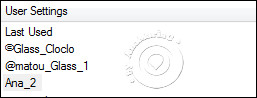
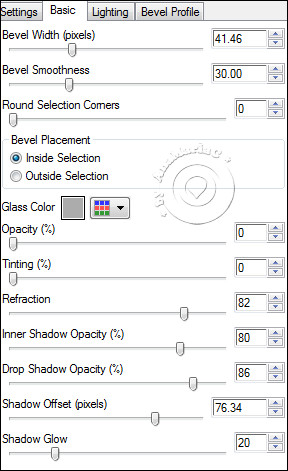
44- Effects > Plugin > Alien Skin Eye Candy 5: Impact > Glass >
Ana_2
Seletions > Select None.
45- Edit > Copy no Decor_byAnaMariaC.
Edit > Paste as New Layer.
Conferir a posição das layers:
46- Fechar a visibilidade da layer > Raster 1.
Layers > Merge > Visible.
47- Ativar e abrir a visibilidade da layer > Raster 1.
Layers > Duplicate.
48- Effects > Plugins > MuRa’s Meister > Perpective Tiling.

49- Effects > Reflection Effects > Rotating Mirror.
50- Layers > Arrange > Bring to Top.
51- Effects > 3D Effects > Drop Shadow > cor: (1) #323850 (Foreground).

52- Ativar a layer > Merged.
Effects > 3D Effects > Drop Shadow > cor: (1) #323850 (Foreground).
Conferir a posição das layers:
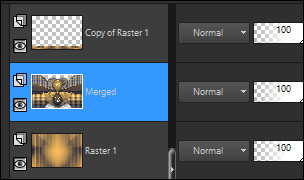
53- Image > Add Borders > Symmetric
3 px > cor 2: #f5bc61 (Background).
2 px > cor 1: #323850 (Foreground).
3 px > cor 2: #f5bc61 (Background).
54- Selections > Select All.
Image > Add Borders > Symmetric: 50 px > qualquer cor.
Selections > Invert.
55- Pintar com o gradiente > Linear.
56- Effects > Texture Effects > Texture:
57- Selections > Invert.
58- Effects > 3D Effects > Drop Shadow:
Selections > Select None.
59- Edit > Copy no tube principal.
Edit > Paste as New Layer.
Rezise: 78% ou a seu gosto.
Adjust > Sharpness > Sharpen.
Effects > Drop Shadow a seu gosto.
60- Edit > Copy noWordArt_by AnaMariaC.
Edit > Paste as New Layer.
Posicionar a seu gosto.
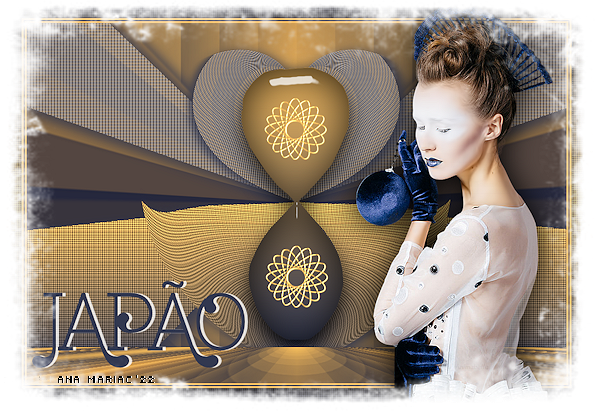
61- Finalizar
Image > Add Borders > Symmetric:1 px > cor 1: #323850 (Foreground).
62- Se você desejar, redimensione seu trabalho.
Aplicar sua marca d'água ou assinatura.
File > Export > JPEG Optimizer.
Versão:

Créditos:
Tutorial Art Final & Formatação by
AnaMariaC
Tube Principal: by
Animabelle
Mask: by
Colibrix
Wordart: by
AnaMariaC
Versão:
Tube Principal: by
Nikita
Brasil, 07/01/2023
Sinta-se à vontade para enviar suas versões.
Terei todo o prazer em publicá-las em nosso site.

Tutorial criado por
Ana Maria C em Janeiro/2023 para
SIM-PSP. Não poderá ser copiado, retirado de seu
lugar, traduzido ou utilizado
em listas de aprendizados ou grupos sem o consentimento
prévio da autora. |
|