Tutorial by
Tati Designs
MATERIAL 1 Main Tube All other materials were created by Tati.
PLUGINS MuRa's Meister > Copies Flaming Pear > Melancholytron &<Bkg Kaleidoscope> > @BlueBerry Pie ** Italian Editors Effect > Effeto Fantasma L and K landksiteofwonders > L en K's Paris AP [Lines] > Lines - Silverlining Carolaine and Sensibility > CS_HLines
IMPORTANT
Colors
If using other colors, you should change the Blend Mode and the Opacity of the layers.
TUTORIAL
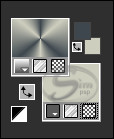
01 - Open the material on the PSP, duplicate and close the original. In your Materials palette: Foreground color (4) #3e464e Background color (1) #cecebe
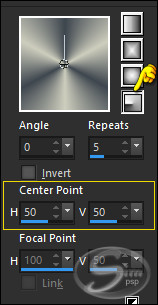
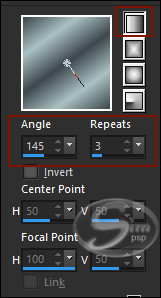
02 - Click on the foreground color and prepare a "Foreground-background" gradient: Radial
03 - Open the file "TD_Canal_Alfa_Dandelion"
(This will be the basis for our work, which contains
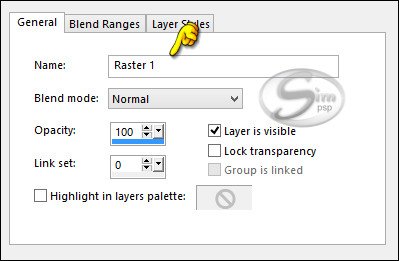
selections recorded on the alpha channel.) Layers > Properties > General > Name: Raster 1
04 - Fill your transparent image with the foreground gradient.
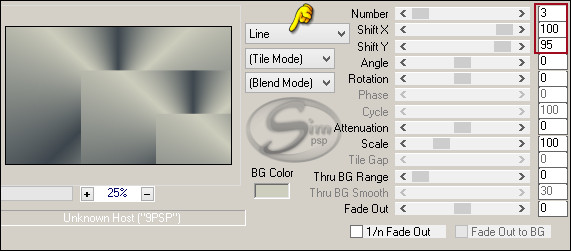
05 - Effects > Plugins > MuRa's Meister > Copies:
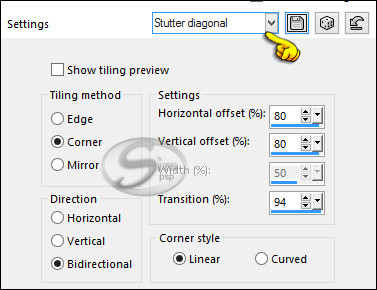
06 - Effects > Image Effects > Seamless Tiling: Stutter diagonal
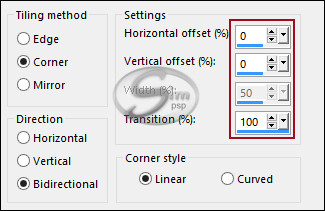
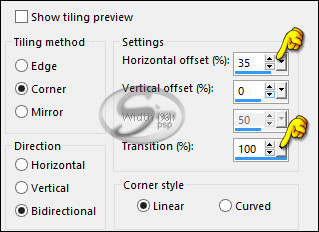
07 - Effects > Image Effects > Seamless Tiling:
08 - Layers > Duplicate.
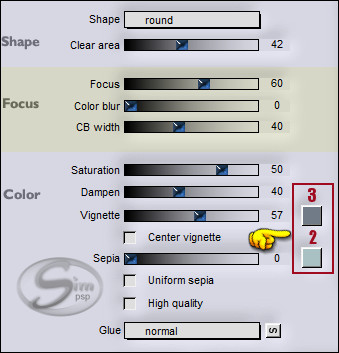
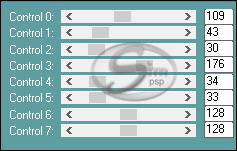
09 - Effects > Plugins > Flaming Pear > Melancholytron:
10 - Image > Mirror > Mirror Horizontal.
11 - Layers > Properties > General > Blend Mode: Hard Light
12 - Layers > Merge > Merge Visibile.
13 - Layers > Duplicate.
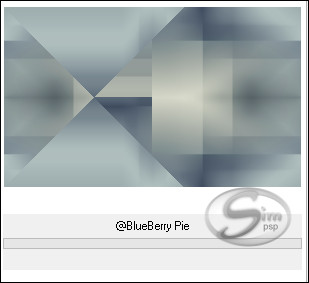
14 - Effects > Plugins > I.C.NET Software > Filters Unlimited 2.0 > &<Bkg Kaleidoscope> / @BlueBerry Pie:
15 - Effects > Image Effects > Seamless Tiling:
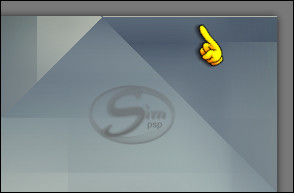
16 - Image> Resize: 101% - all layers unchecked. We do this to hide the line that has remained in the upper right:
17 - Layers > Properties > General > Blend Mode: Hard Light
18 - Activate the Background layer (Merged)
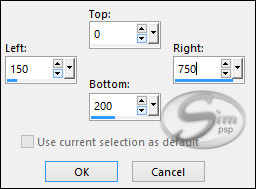
19 - Activate the "Selection Tool (S)" Tool Rectangle > Custom Selection:
20 - Selections > Promote Selection to layer.
21 - Selections > Select None.
22 - Effects > Plugins > Italian Editors Effect > Effeto Fantasma (Default):
23 - Effects > Plugins > L and K landksiteofwonders > L en K's Paris (Default):
24 - Activate the Top layer (Copy of Merged)
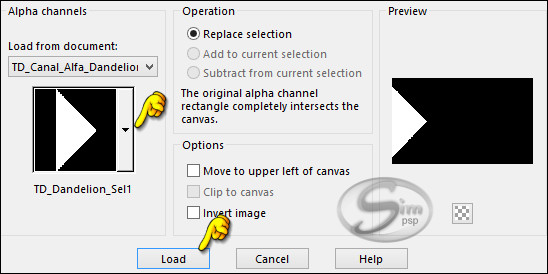
25 - Selections > Load/Save Selections > Load Selection from Alpha Channel: "TD_Dandelion_Sel1"
26 - Selections > Modify > Feather: 45px
27 - Adjust > Blur > Gaussian Blur: 35
28 - Selections > Select None.
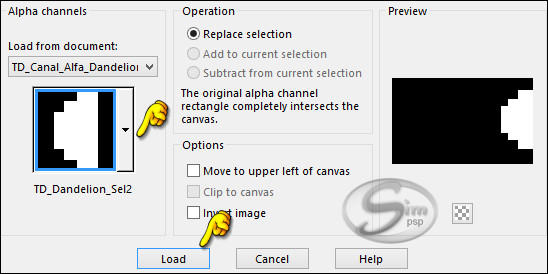
29 - Selections > Load/Save Selections > Load Selection from Alpha Channel: "TD_Dandelion_Sel2"
30 - Selections > Modify > Feather: 45px
31 - Adjust > Blur > Gaussian Blur: 55
32 - Selections > Select None.
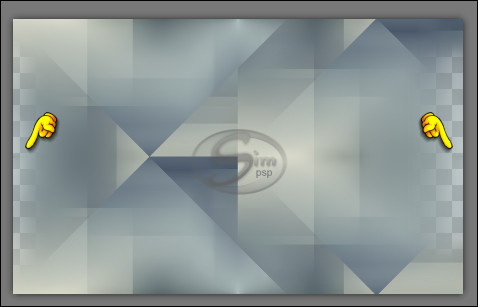
33 - Our image has the right and left edges as in the image, let's solve this:
34 - Activate the "Merged" layer.
35 - Selections > Select All.
36 - Activate the "Copy of Merged" layer.
37 - Image > Crop to Selection.
38 - Effects > Plugins > AP [Lines] > Lines - Silverlining:
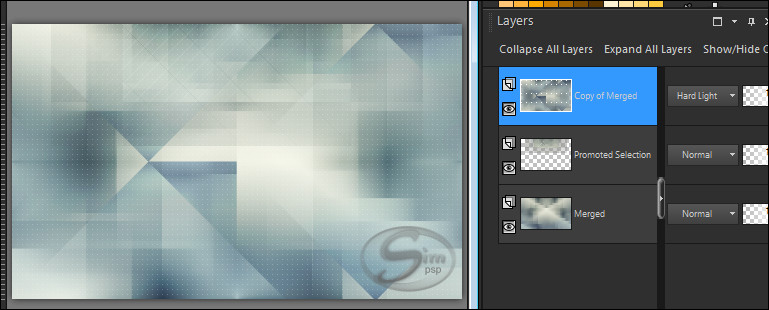
This is what our work so far and our layer palette looks like:
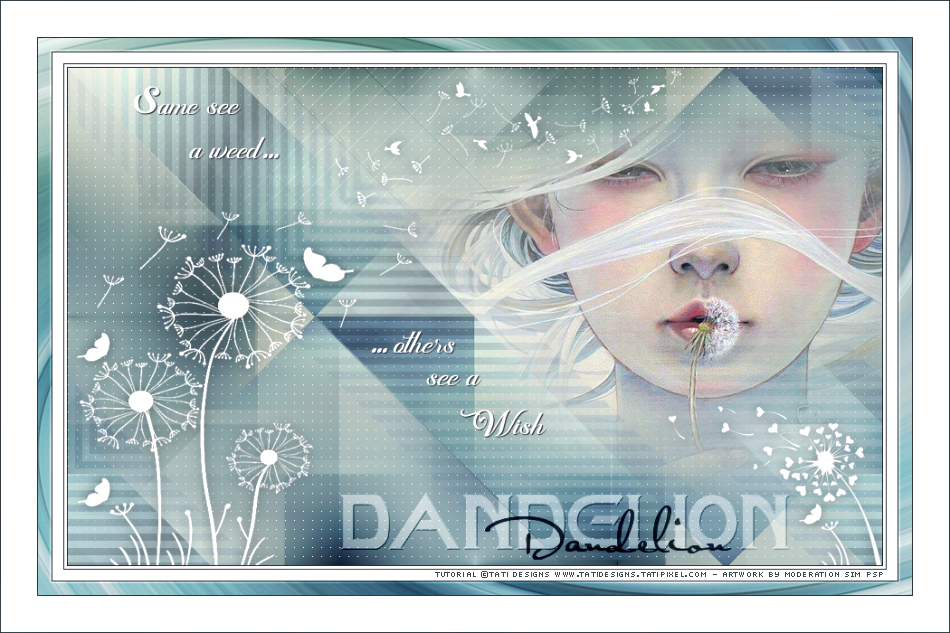
39 - Edit > Copy the "TD_Tube_Mujer_Miho_Hirano". Edit > Paste as new layer.
40 - Activate the "Pick" Tool (K) and modify the positions of X (346.00) and Y (35.00)
If you choose another Tube, place it at the top right.
41 - Adjust > Sharpness > Sharpen.
42 - In your Materials palette: Foreground color (4) #3e464e Background color (2) #aac1c4
43 - Click on the foreground color and prepare a "Foreground-background" gradient: Linear
44 - Layers > New Raster Layer.
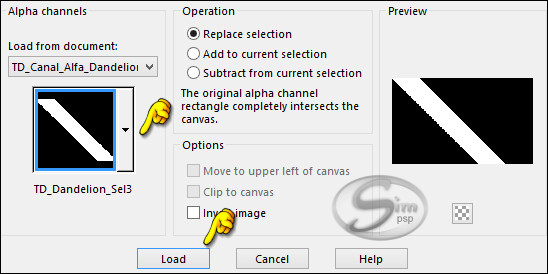
45 - Selections > Load/Save Selections > Load Selection from Alpha Channel: "TD_Dandelion_Sel3"
46 - Activate the "Flood Fill" Tool (F). Lower the Opacity to 50.
47 - Fill the selection with the gradient. *Return the "Flood Fill" tool Opacity to 100%.
48 - Selections > Select None.
49 - Effects > 3D Effects > Drop Shadow: 0 / 50 / 50 / 0 / Cor: (3) #717b87 Effects > 3D Effects > Drop Shadow: 0 / -50 / 50 / 0 / Cor: (3) #717b87
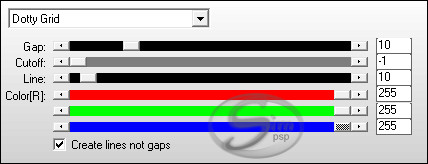
50 - Effects > Plugins > Carolaine and Sensibility > CS_HLines:
51 - Effects > Image Effects > Seamless Tiling:
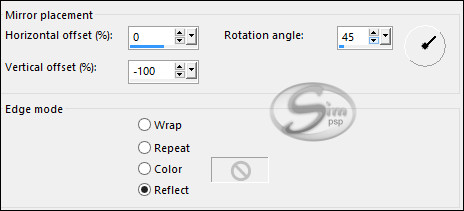
52 - Effects > Reflection Effects > Rotating Mirror:
53 - Layers > Properties > General > Blend Mode: Hard Light
54 - Edit > Copy the "TD_Texto_Dandelion"
55 - Activate the "Pick" Tool (K) and modify the positions of X (73.00) and Y (20.00)
Press "M" KEY to disable Pick Tool.
56 - Effects > 3D Effects > Drop Shadow: 1 / 1 / 100 / 1 / Cor: (4) #3e464e
57 - Edit > Copy the "TD_Titulo1_Dandelion"
58 - Activate the "Pick" Tool (K) and modify the positions of X (301.00) and Y (469.00)
Press "M" KEY to disable Pick Tool.
59 - Layers > Properties > General > Blend Mode: Soft Light
60 - Edit > Copy the "TD_Titulo2_Dandelion"
61 - Activate the "Pick" Tool (K) and modify the positions of X (461.00) and Y (484.00)
Press "M" KEY to disable Pick Tool.
62 - Layers > Properties > General > Blend Mode: Multiply
63 - Layers > New Raster Layer. Fill in the white color #FFFFFF
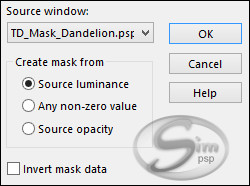
64 - Layers > New Mask Layer > From image: TD_Mask_Dandelion
Layers > Merge > Merge Group.
65 - Effects > 3D Effects > Drop Shadow: 0 / 0 / 60 / 20 / Color: (4) #3e464e
66 - Image > Add Bordes > 1px - simmetric - color: (4) #3e464e
67 - Edit > Copy
68 - Image > Add Bordes > 3 px - simmetric - color: #FFFFFF Image > Add Bordes > 1 px - simmetric - color: (4) #3e464e Image > Add Bordes > 12 px - simmetric - color: #FFFFFF Image > Add Bordes > 1 px - simmetric - color: (4) #3e464e
69 - Selections > Select All.
70 - Image > Add Bordes > 15 px - simmetric - color: #FFFFFF
71 - Selections > Invert.
72 - Edit > paste into selection.
73 - Adjust > Blur > Radial Blur:
74 - Adjust > Sharpness > Sharpen More.
75 - Selections > Promote Selection to layer.
76 - Selections > Select None.
77 - Layers > Properties > General > Blend Mode: Multiply
78 - Layers > Duplicate.
79 - Layers > Properties > General > Blend Mode: Overlay
80 - Image > Add Bordes > 1 px - simmetric - color: (4) #3e464e
81 - Image > Add Bordes > 40 px - simmetric - color: #FFFFFF
82 - Image > Add Bordes > 1 px - simmetric - color: (4) #3e464e
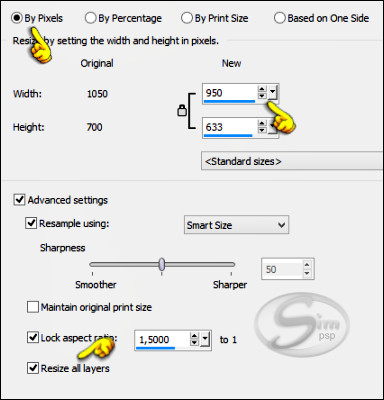
83 - Image > Resize: 950 Width - all layers checked
84 - Adjust > Sharpness > Unsharp Mask.
85 -
Edit > Copy the "©Tutorial_TatiDesigns" *If you need to change the color, you can use the "Color Changer" tool Position of your choice.
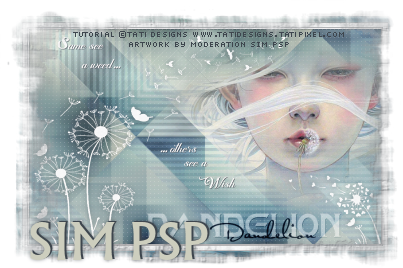
86 - Apply your watermark or signature. File > Export > JPEG Optimizer.
CREDITS:
Versão by Márcinha - Owner SIM PSP
CREDITS: Art by Márcinha - Tutorial Dandelion by Tati Designs - Main Tube: Tubed by Beatrice
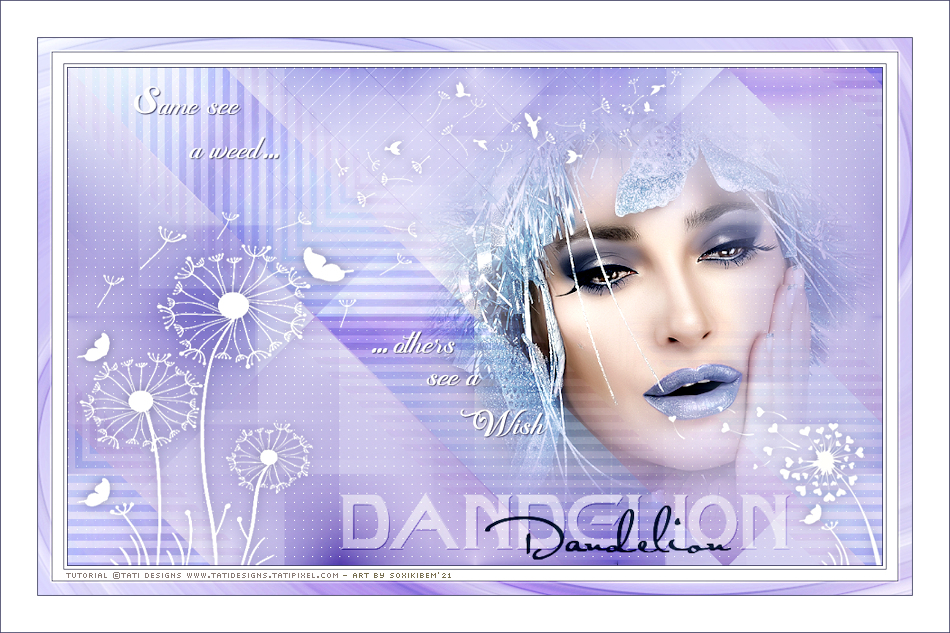
Versão by Soxikibem - Owner SIM PSP
CREDITS: Art by Soxikibem - Tutorial Dandelion by Tati Designs - Main Tube: Tubed by Lili
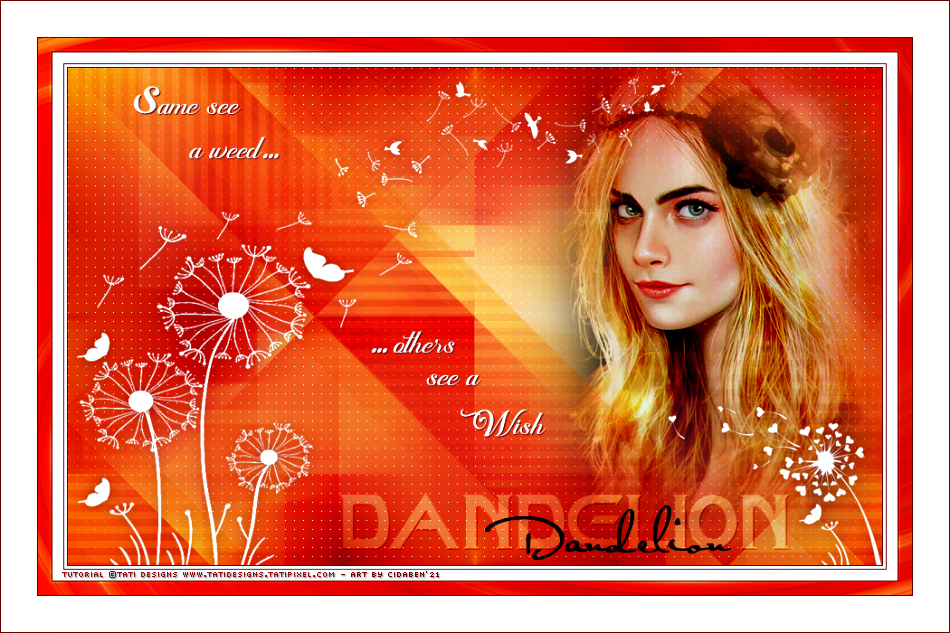
Versão by CidaBen - Moderação SIM PSP
Art by CidaBen - Tutorial Dandelion by Tati Designs - Main Tube: Tubed by LuzCristina
Versão by RobertaMaver - Moderação SIM PSP
CREDITS: Art by RobertaMaver - Tutorial Dandelion by Tati Designs - Main Tube: ZyanArt
Feel free to send your versions.
|
