|
TRADUÇÕES:
O Sim
PSP valoriza e reconhece o trabalho das tradutoras que tornam os
tutoriais acessíveis a diferentes idiomas.
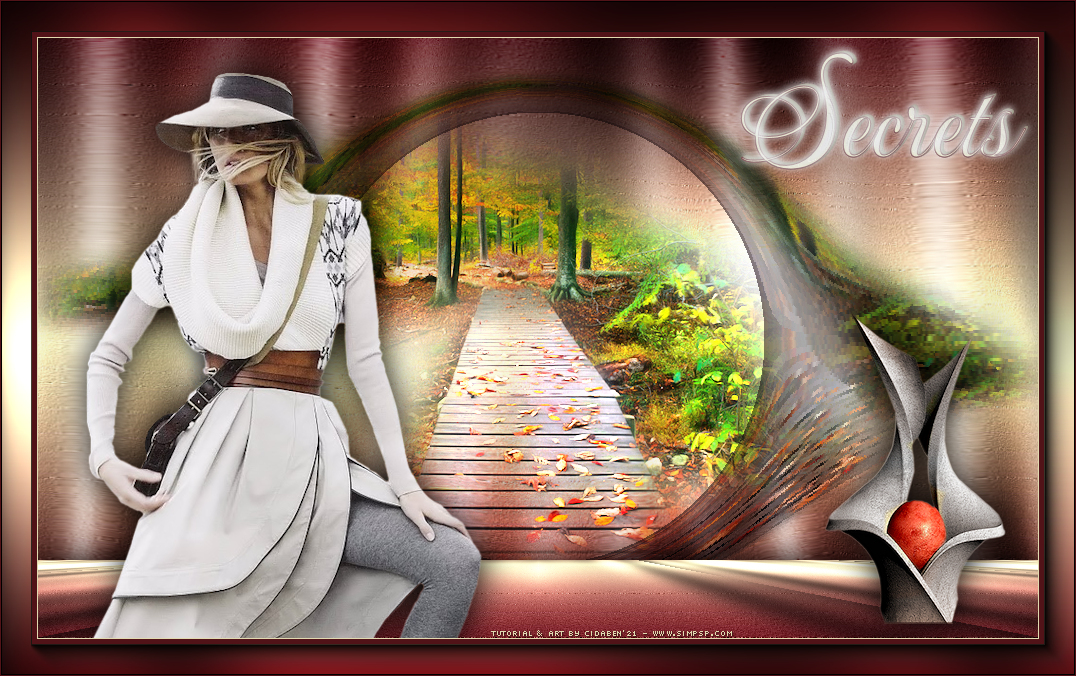
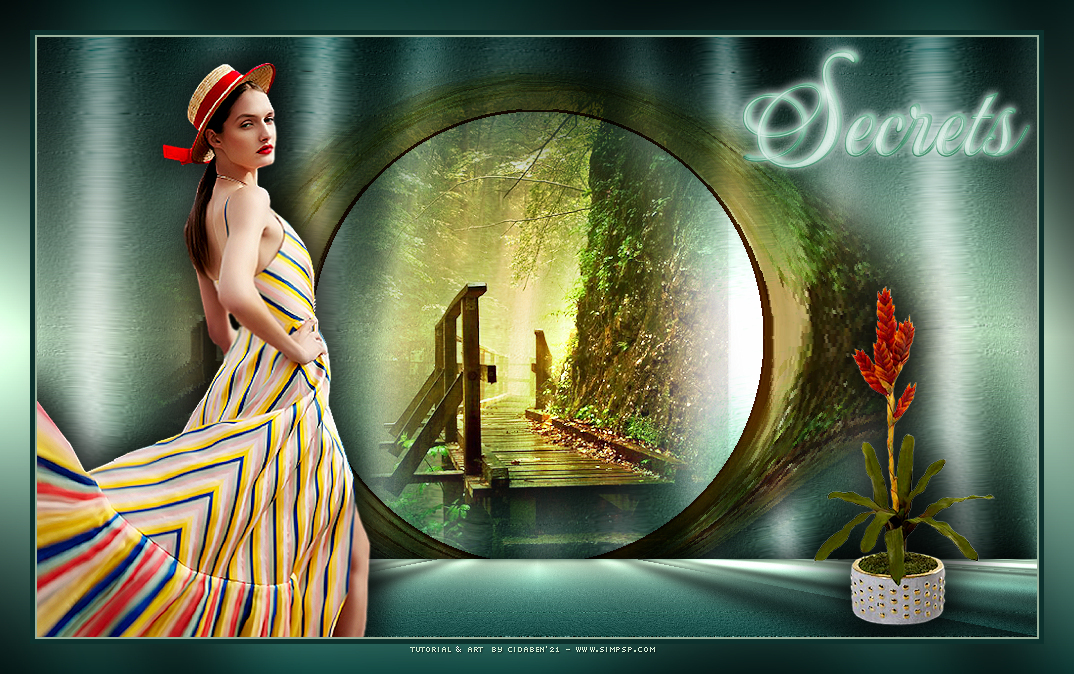
MATERIAL 1 Tube Principal à sua escolha. 1 Misted Paisagem à sua escolha. 1 Tube Decorativo à sua escolha. titulo_secrets_cidaben.
PLUGINS FM Tile Tools Graphics Plus Filter Unlimited 2.0 MuR'as Meister Redfield AAA Frames
Tutorial elaborado no PSP 2020 Ultimate Testado e revisado por Márcinha no PSP 2020.
******************
Agradeço às Tubeiras pelos Tubes e Masks, pois sem eles não seria
possível criar este trabalho. ******************
EXECUÇÃO
1 - Abrir o material no PSP, duplique e feche o original. Escolher duas cores para trabalhar. Foreground #511318 Background #e1dab1
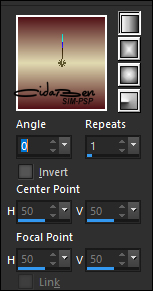
2 - Abra uma imagem transparente 1000 X 600. Formar um gradiente com as cores escolhidas: Linear > Angle 0 > Repeats 1.
3 - Adjust > Add/Remove Noise > JPEG Artifact Removal.
4 - Effects > Plugins > FM Tile Tools > Blend Emboss > Default.
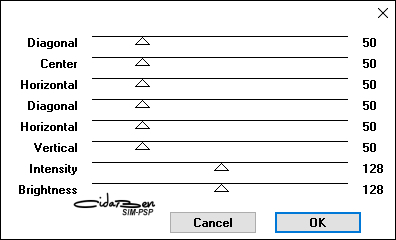
5 - Effects > Graphics Plus > Cross Shadow: Default
6 - Edit Copy no Misted Paisagem Edit > Paste As New Layer. Layer > Duplicate.
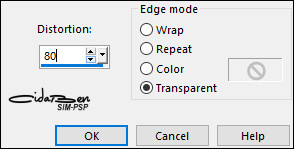
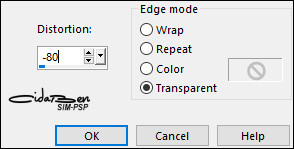
7 - Effects > Geometric Effects > Perspective Horizontal: Distortion 80: > Transparent.
Distortion: -80 > Transparent.
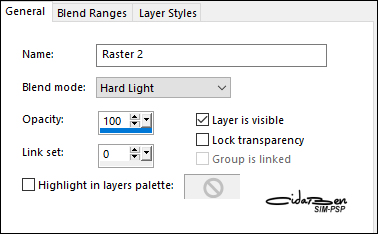
8 - Ativar a layer Raster 2. Layers > Properties > General > Blend Mode > Hard Light.
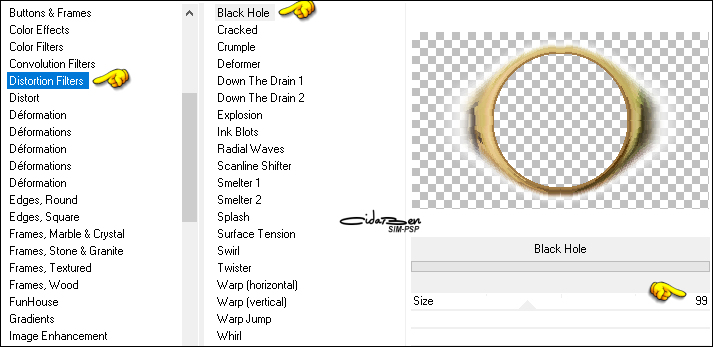
Ativar a Layer > Copy of Raster 2. 9- Effects > Plugins > Filters Unlimited 2.0 > Distortion Filters > Black Hole.
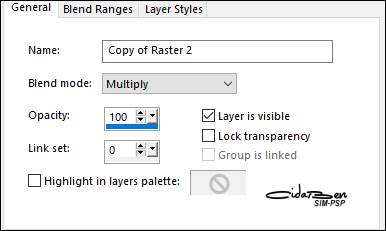
Layers > Properties > General > Blend Mode > Multiply.
Ativar a layer Raster 2. Image > Rezize > 85% > Resize all layers. Adjust > Sharpness > Sharpen.
10 - Ativar a layer Raster 1. Layers > Duplicate. Effects > Plugins > MuR'as Meister > Perspective Tiling.
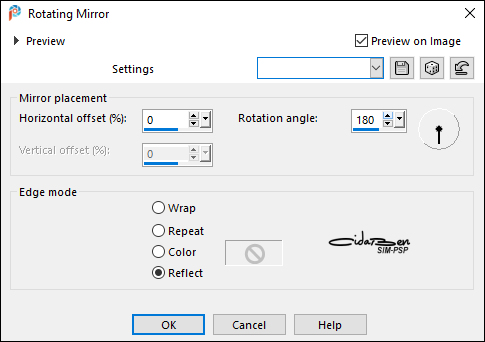
Layers > Arrange > Bring To Top. Effects > Reflection Effects > Rotating Mirror.
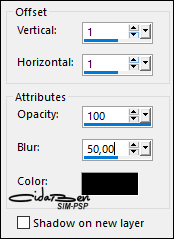
11 - Effects > 3D Effects > Drop Shadow: 1, 1, 100, 50 > Color #000000.
12 - Ativar a layer Raster 1.
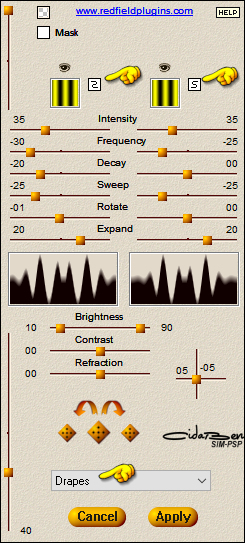
13 - Effects > Plugins > Redfield > Ripples Magic:
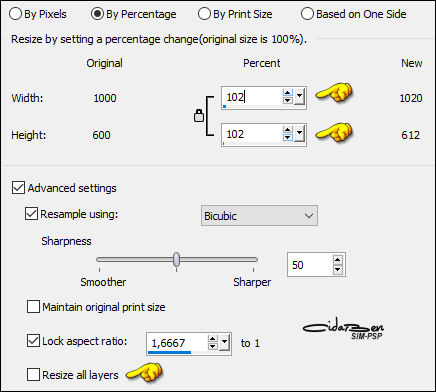
Image > Resize > 102 % > Resize all Layers > desmarcado
14 - Layer > Merge > Merge All.
15 - Edit > Copy no tube principal. Posicionar como desejar. Adjust > Sharpness > Sharpen. Effects > 3D Effects > Drop Shadow > como preferir.
16 - Edit > Copy no tube Decoração. Edit > Paste As New Layer Posicione como desejar. Adjust > Sharpness > Sharpen. Effects > 3D Effects > Drop Shadow > como preferir.
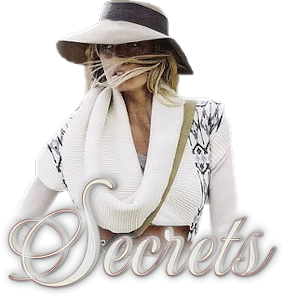
17 - Edit > Copy > titulo_secrets_cidaben. Edit > Paste As New Layer. Com a ferramenta Pick Tool, posicionar: Position X 694 > Position Y 2.
18 - Image > Add Borders. 1 px > Symmetric marcado > Cor do Background #e1dab1. 5 px > Symmetric marcado > Cor do Foreground #511318. 1 px > Symmetric marcado > Cor do Bacground #e1dab1. Selections > Select All. Image > Add Borders > 30 px > Symmetric marcado > com qualquer cor. Selections > Invert. Pintar com o gradiente em uso.
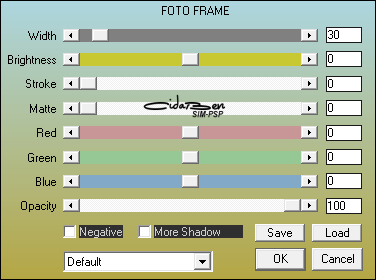
19 - Effects > Plugins > AAA Frames > Foto Frame... Width 30.
20 - Effects > Plugins > Graphics Plus > Cross Shadow > Default
Selections > Select None.
21 - Image > Add Borders > 1px > symmetric marcado > Cor Foreground #511318.
22- Aplicar a sua marca d'agua ou assinatura.
File > Export > JPEG Optimizer.
Créditos
Versão 1: Tube:
by Verlaine _ Misted: by Nikita - Decor: by
Angel Star
Créditos
Versão 2: Tube &
Decor:
by Luz Cristina - Misted: by Grisi
Sinta-se à vontade para enviar suas versões. Terei todo o prazer em publicá-las em nosso site.
Envie sua versão para o e-mail:
CidaBen Redes Sociais
SimPSP Redes Sociais
|