|
TRADUÇÕES
Obrigada aos nossos tradutores!
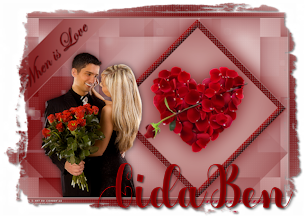
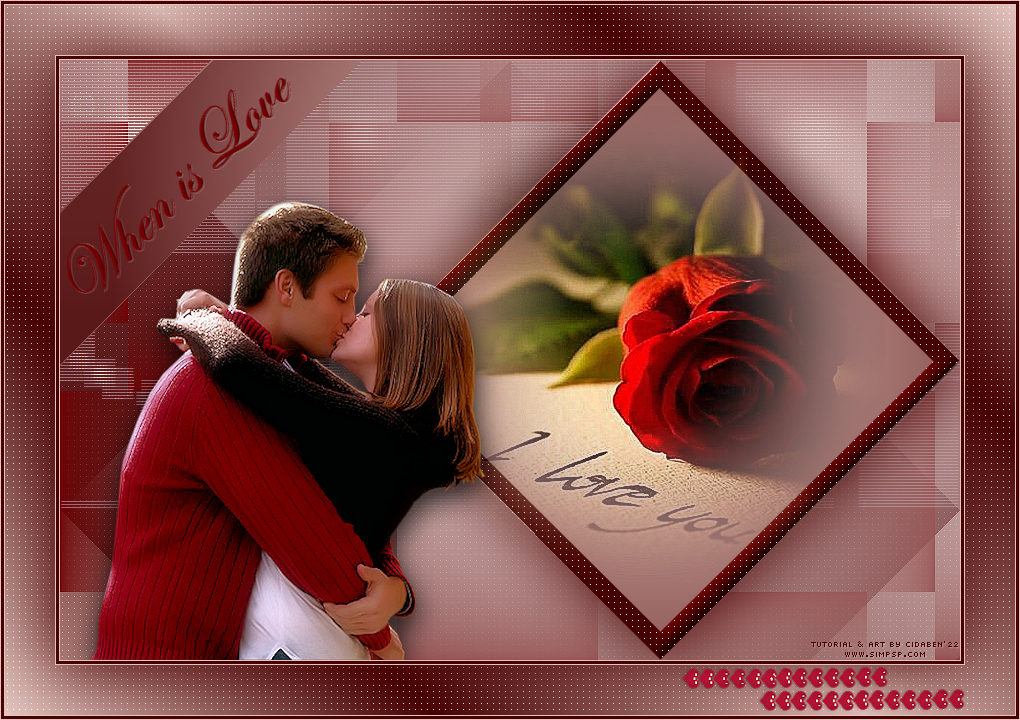
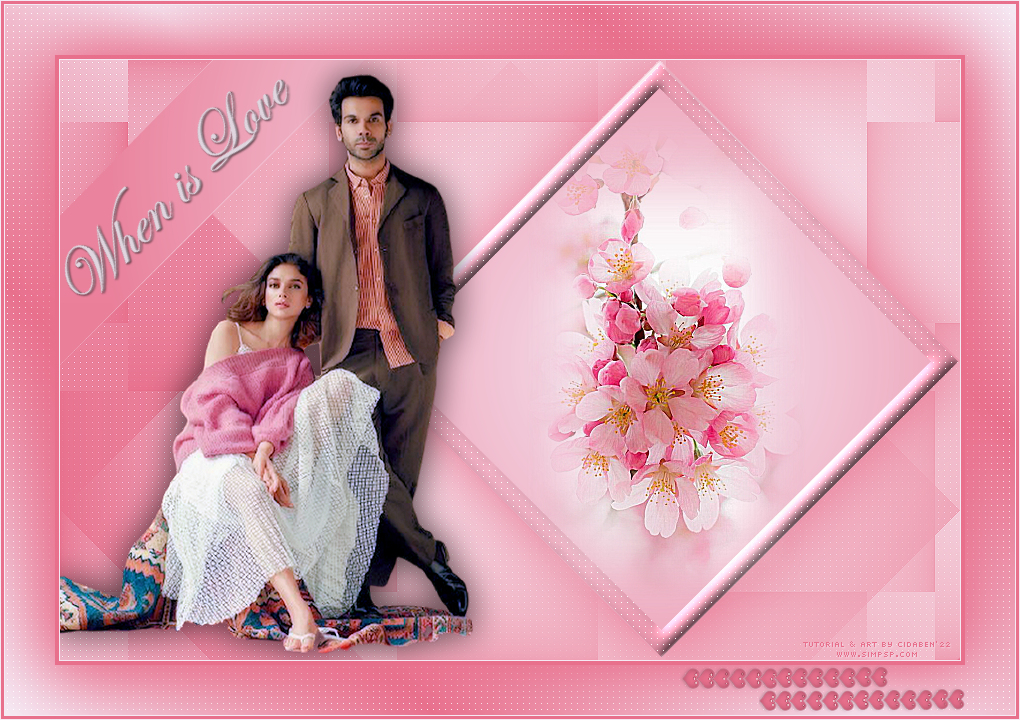
MATERIAL 1 Tube decorativo ou Misted à sua escolha
decor_coracao_ByCidaBen
PLUGINS Simple > Blintz
Nota: Fique à vontade para alterar os Blends de acordo com o material e cores escolhidas para o seu trabalho.
1 - Abrir o material no PSP, duplique e feche os originais. Cor 1 - Foreground: #700103 Cor 2 - Background: #efdcd8
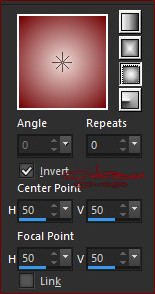
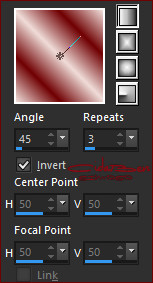
2 - Abra uma transparência de 900x600px. Pintar a transparência com a um gradiente formado com as cores escolhidas: Style > Sunburst > Angle > 0 - Repeats > 0 - Invert marcado.
3 - Effects > Plugins > Simple > Blintz > por 2 vezes.
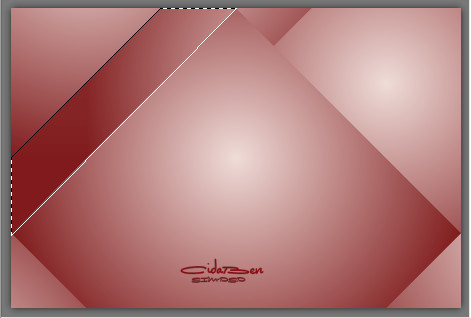
4 - Com a Ferramenta Freehand Selection Tool: Feather em 0 Selecionar a faixa como no exemplo abaixo:
Selections > Promote Selection Layer. Selections > Select None. Ativar a Raster 1
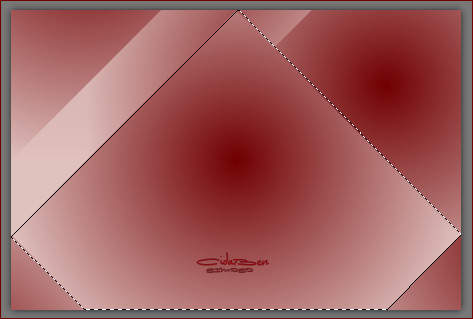
5 - Com a Ferramenta Freehand Selection Tool: Feather em 0, selecionar o triangulo como no exemplo abaixo:
Selections > Promote Selection Layer. Selections > Select None. Ativar a Raster 1
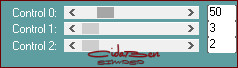
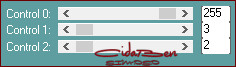
6 - Effects > Plugins > Carolaine Sensibility > CS-LDots:
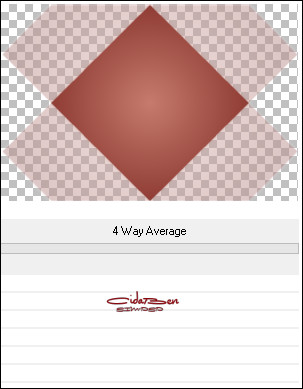
7 - Ativar a Layer > Promoted Selection 1 Effects > Plugins > Filters Unlimited 2.0 > Bkg Designer sf10 l > 4 Way Average:
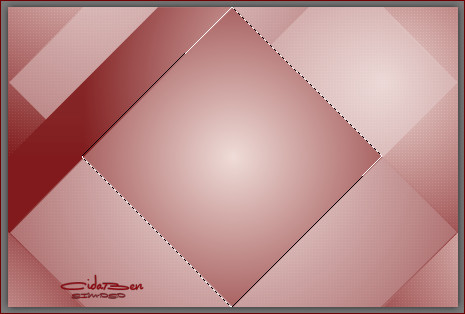
8 - Com a Layer Promoted Selection 1 ativada: Selecionar com a Ferramenta Freehand Selection Tool: Feather em 0, como no exemplo :
9 - Effects > 3D Effects > Drop Shadow: Color: Foreground
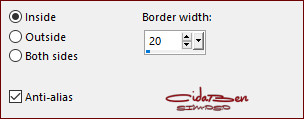
10 - Selections > Modify > Select Selections Borders:
Pintar a seleção com a Cor 1 - Foreground #700103
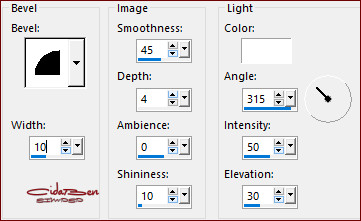
11 - Effects > 3D Effects > Inner Bevel:
12 - Effects > Plugins > Carolaine Sensibility > CS-LDots
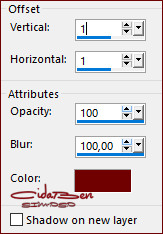
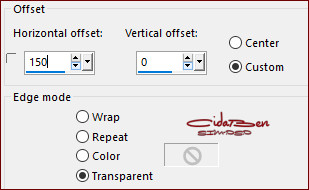
13 - Selections > Select None. Effects > Image Effects > Offest:
14 - Edity > Copy no 2018-3-Nadege. Edity > Paste As New Layer. Image > Resize > 65% > All Layers Desmarcado Posicionar dentro do
triangulo. Adjust > Sharpness > Sharpen More. Layers > Merge > Merge Down. Ativar a Raster 1
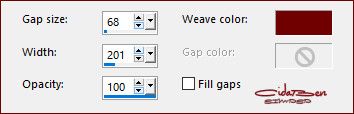
15 - Effects > Texture Effects > Weave:
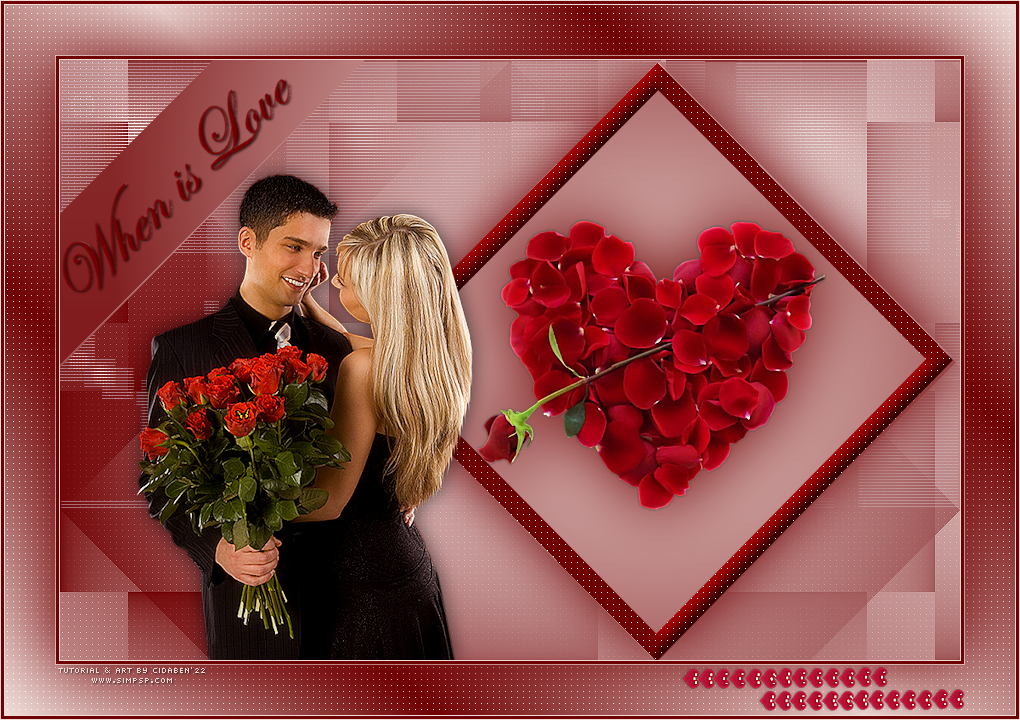
Adjust > Sharpness > Sharpen.
16 - Ativar a Layer Promoted Selection (topo) Com a Ferramenta Pick Tool posicionar: Position X: -98 > Position Y: -49.
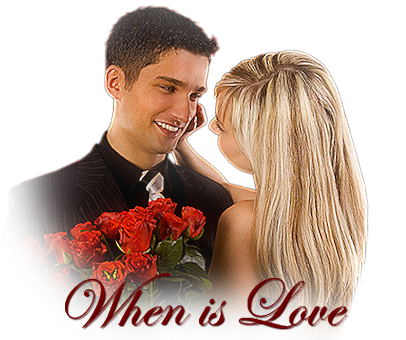
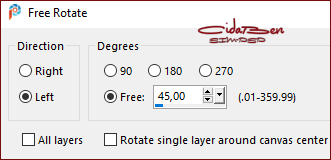
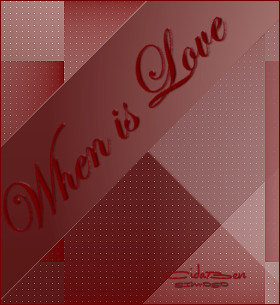
17 - Edit > Copy > título_when_is_love_ByCidaBen. Edit > Paste As New Layer. Image > Free Rotate:
Com a Ferramenta Pick Tool posicionar: Position X: 8 - Position Y: 6.
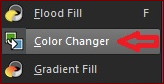
Colorize como desejar ou use a Ferramenta > Color Changer tool.
Usar o Efeito que desejar. Adjust > Sharpness > Sharpen. Layers > Merge > Merge Dow.
18 - Edit > Copy no Tube principal. Edit > Paste as New Layer. Reduzir e aplicar Drop Shadow ao seu gosto. Adjust > Sharpness > Sharpen.
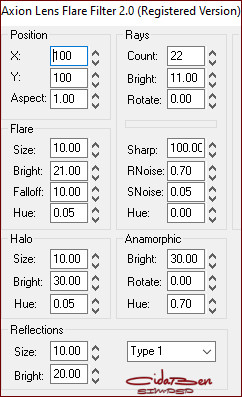
19 - Ativar a Layer Raster 1 Effects > Plugins > Axion > Lens Flare > Default
20 - Image > Add Borders > Symmetric: 1px - Color 2: Background #efdcd8 3 px - Color 1: Foreground #700103 1 px - Color 2: Background #efdcd8
21 - Selections >
Select All.
22 - Effects > Plugins > Carolaine Sensibility > CS-LDots:
23 - Selections > Invert. Effects > 3D Effects > Drop Shadow: 0 / 0/ 100 /100, Color 1: Foreground #700103 Edit >
Repeat Drop Shadow
24 - Edit > Copy > no decor_coracao_ByCidaBen Edit > Paste as New Layer. Pick Tool > Position X 675 - Position Y 659. Adjust > Sharpness > Sharpen More.
25 - Image > Add Borders > Symmetric: 1px Cor 2 - Background #efdcd8 3 px - Cor 1: Foreground #700103 1 px - Cor 2: Background #efdcd8
26 - Aplicar sua marca d'água ou assinatura. File > Export > JPEG Optimizer.
Créditos: Versao 1 Tube Principal: by Sylvie Erwan - Tube Decorativo: by Nadege
Créditos: Versão 2 - Tube: by Sylvie Erwan - Misted: by Mary
Créditos versão 3 - Tube & Misted: by Callitubes
Sinta-se à vontade para enviar suas versões. Terei todo o prazer em publicá-las em nosso site.
|