  Tutorial by
CidaBen
English
Translation by Soxikibem
Original Tutorial
MATERIAL
1 Main Tube of your
choice
1 Misted Landscape or
Flower of your choice
Mask_Narah_mask_0613
Decor_PDS_Aiden
Titulo
>Brand_new_me_bycidaben
 PLUGINS
DC Layer
Graphics
Plus
AAA
Frames
Efeitos e
Ferramentas do PSP TUTORIAL
1 - Open the
material on the PSP, duplicate and close de original.
Choose two colors
to work with
Foreground
#4f371e
Background
#dfd7bb
2 - Open a
transparent 900 X 550px image.
3 - Paint with a gradient formed with the chosen colors: Linear, Angle 45, Repeats 1, Invert unchecked. 
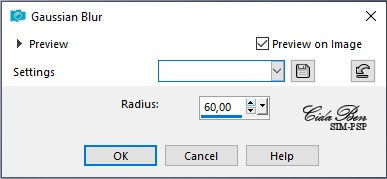
4 - Adjust > Blur > Gaussian Blur:
60
 5 -
Layers > New Raster Layer
6 - Selections > Select All
7 - Edit > Copy
in the Main Tube
8 - Edit >
Paste
Into Selection
9 - Selection >
Select None
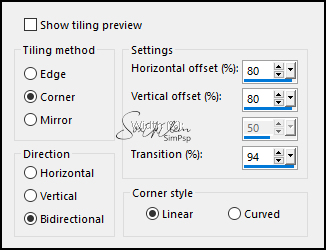
10 - Effects
> Image Effects > Seamless Tiling > Default.
11
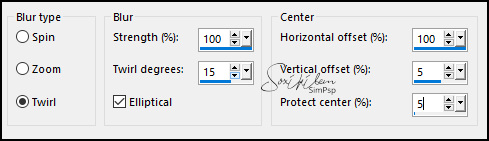
- Adjust > Blur > Radial Blur
 12 - Plugins > DC Layer > Mergency II:
180.
13 - Edit > Copy in Misted
Landscape or flower
Edit> Paste As New Layer
14 - Adjust
the landscape or resize if necessary to
that the misted fits in the indicated location, as in the print. 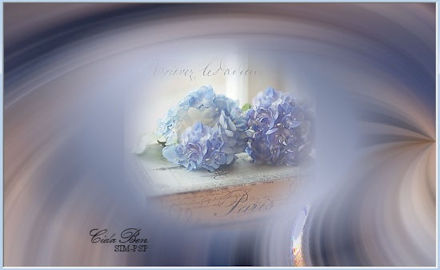 15 - Adjust > Sharpness
> Sharpen
16 -
Enable Layer Raster 2
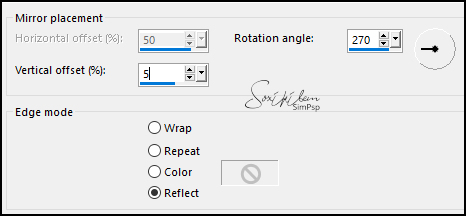
17 - Effects > Reflection Effects >
Rotating Mirror
 18 - Layers > New Raster Layer: paint with white
color
(#FFFFFF)
Layers > New Mask Layer > From Image: Narah_mask_0613
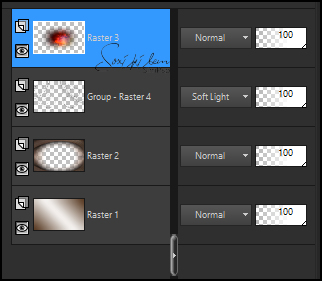
Image > Merge > Merge Group
19 - Layers > Properties > Blend Mode: Soft
Light
20 - Layers Duplicate
Image > Mirror > Mirror
Horizontal
21 - Layers > Merge > Merge Down
22 - Effects > Drop Shadow: 1, 1,
80, 3, color: #000000 (black)
23 - Effects > Image Effects > Seamless Tiling
> Stutter Diagonal
 24 - Adjust > Sharpness > Sharpen
Enable top Layer (Raster 3 )
 25 - Edit > Copy in the main Tube
Edit Paste New Layer
Position right
Effects > Effects 3D > Drop Shadow, as you
wish.
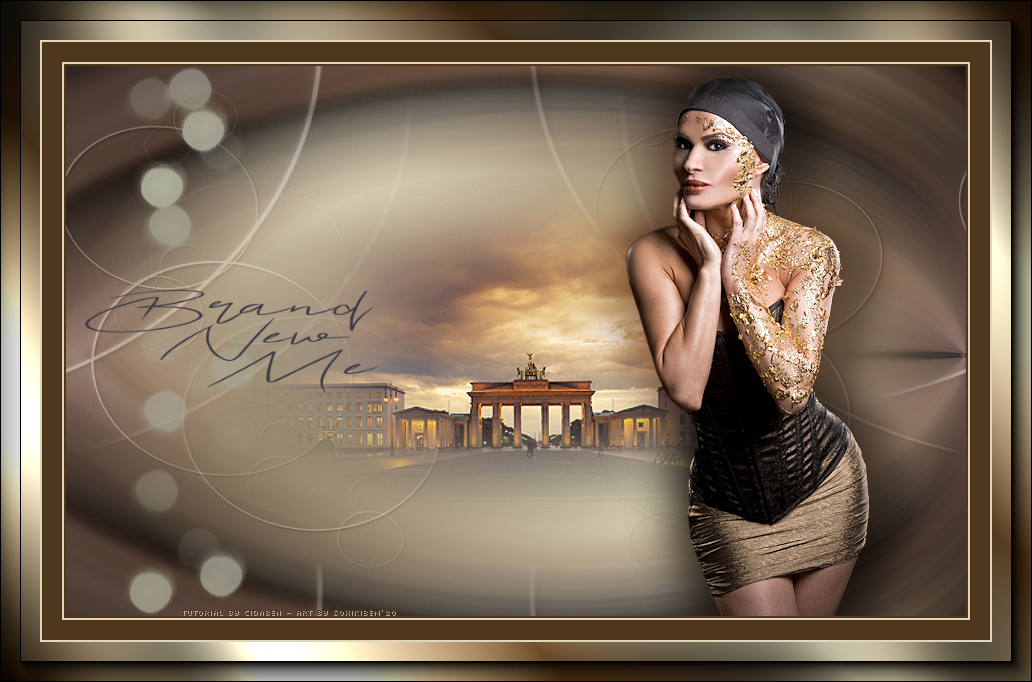
26 - Image > Add Borders:
2 px Foreground color
2 px Background color
20 px Foreground color
2 px Background color
27 - Selections > Select All
28 - Image Add Borders > 40 px with any color.
Selections > Invert
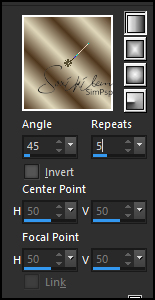
Paint with a gradient: Linear, Angle 45, Repeats 5, Invert
unchecked
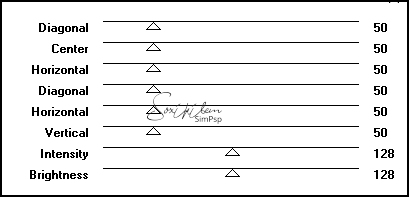
 29 - Effects > Graphics Plus > Cross Shadow:
Default
 30 - Effects > Plugins > AAA Frames > Foto
Frame
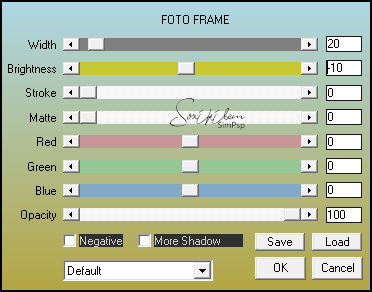 Selections > Select None
31 - Edit > Copy in decor_PDS_Aiden
Pick Tool: Position X 120, Position Y 64
Colorize to your liking.
32 - Edit > Copy in título_brand_new_me_bycidaben
Edit > Paste As New Layer
Pick Tool: Position X 85 >
Position Y 289
33 - Layers > Merge > Merge All
34 - If you
wish, resize your work.
Apply your watermark or signature. File> Export> JPEG Optimizer. 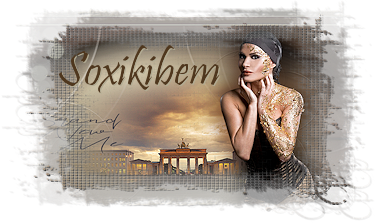 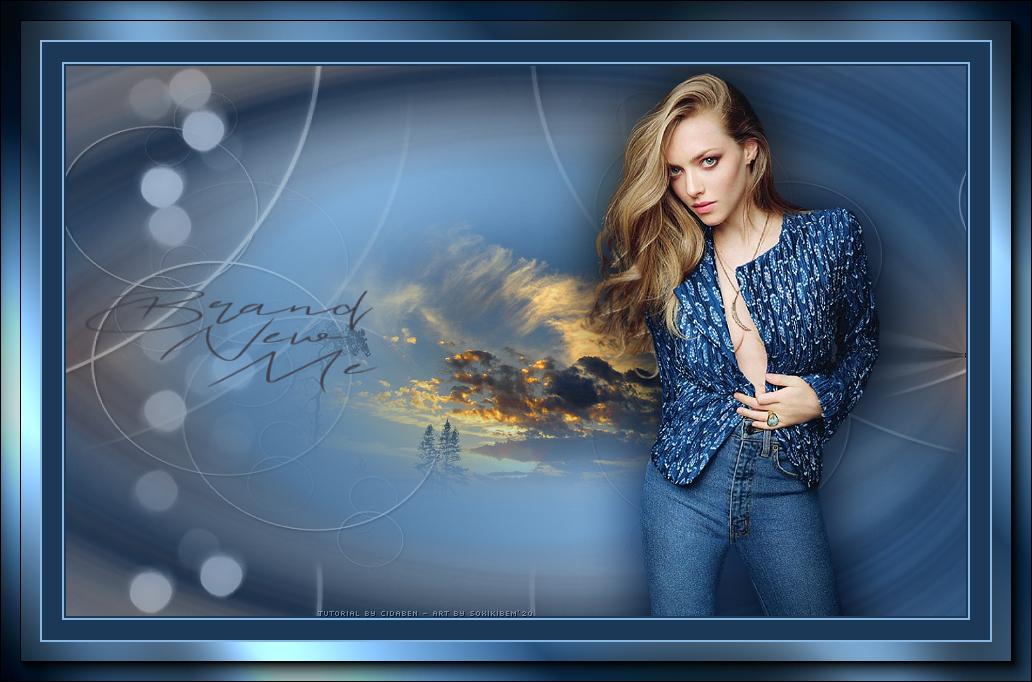 Credits
Version 1&2: Tube & Misted by
Ana Ridzi
Decor: PDS_Ainden - Mask: by Narah > Titulo: by CidaBen Tutorial by
CidaBen'20
Feel free to send your versions.
|