|
Tutorial by Roberta Maver English Translation by Moderation SIM-PSP Original Tutorial
MATERIAL 1 Main Tube of your choice 1 Misted Landscape of your choice
1 Decorative Tube of your choice
Choose the colors to work with:Foreground #e3e1d5 Color 4: #FFFFFF Color 5: #000000
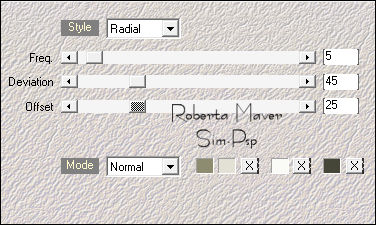
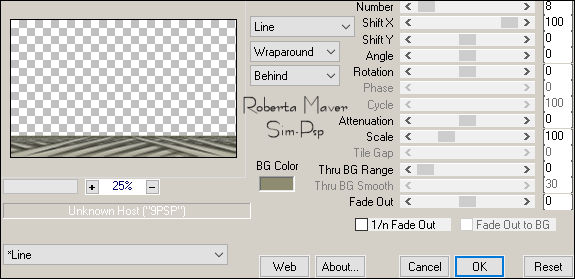
Effects > Plugins > Mehdi > Wavy Lab 1.1.
Colors in sequence: 2, 1, 3:
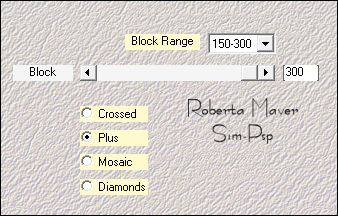
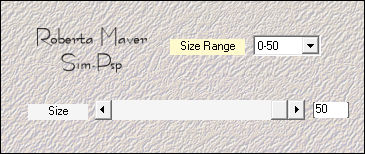
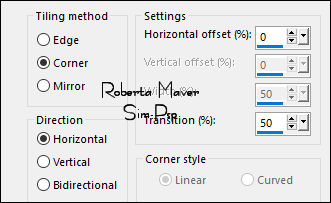
Effects > Plugins > Mehdi > Sorting Tiles:
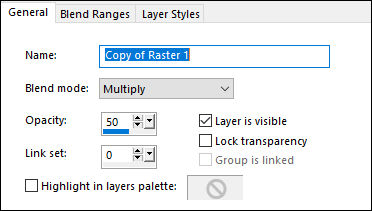
6 - Layers > Duplicate. Image > Mirror > Mirror Horizontal. Layers > Properties > General > Blend Mode: Multiply - Opacity: 50
*Feel free to change the Blends Mode according to the materialand colors chosen for your work.
Layers > Merge > Merge Down.
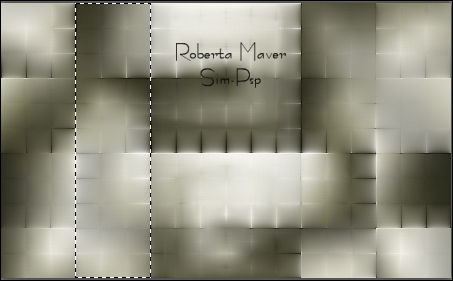
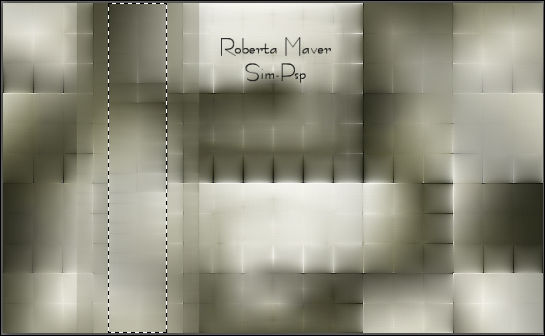
With the Selection Tool tool: Feather: 0, select as in the example:
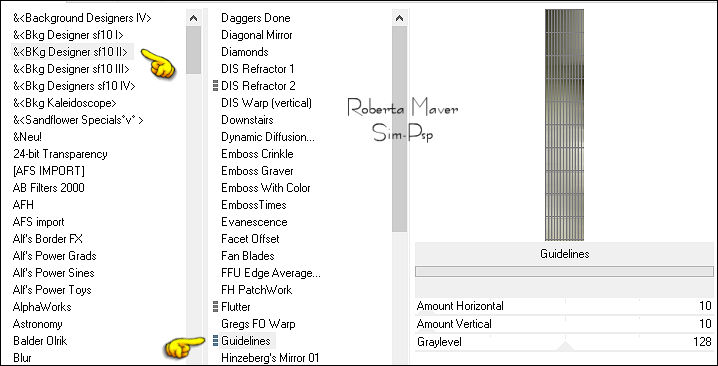
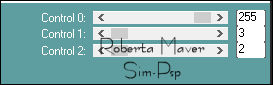
Selections > Promote Selection to Layer. 9 - Effects > Plugins > Filters Unlimited 2.0 > Bkg Designer sf10 II > Guidelines:
10 - Selections > Select None. Effects > 3D Effects > Drop Shadow: 0, 0, 100, 50, Color: #000000 (Black) Activate the layer Promoted Selection. Effects > 3D Effects > Drop Shadow: 0, 0, 100, 50, Color: #000000 (Black) Activate Top Layer. Layers > Merge > Merge Down.
Layers > Duplicate. Image > Mirror > Mirror Horizontal. Layers > Merge > Merge Down.
13 -Effects > Plugins > MuRa's Filters Meister > Copies:
Effects > 3D Effects > Drop Shadow: 0, 0, 100, 50, Color: #000000 (Black) Activate the layer Raster 1
14 - Effects > Plugins > Carolaine & Sensibility > CS-LDots:
15 -
Edit > Copy no Deco1_byRoberta Layers >
Duplicate.
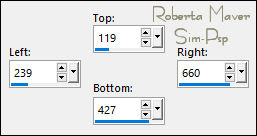
16 - Layers > New Raster Layer. Activate the Selection Tool: Retangle > Custon Selection:
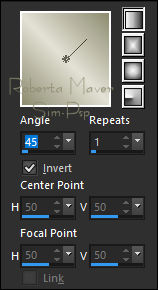
Paint with a Linear gradient by the chosen colors: Foreground #e3e1d5 - Background #8d8c70
17 -
Edit >
Copy in Misted Landscape.
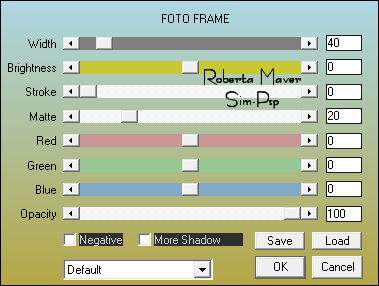
18 - Effects > Plugins > AAA Frames > Foto Frame:
Selections > Modify > Contract: 40 Selections > Promote Selection to Layer. Selections > Select None Activate the Layer Raster 3 (Foto Frame Effect)
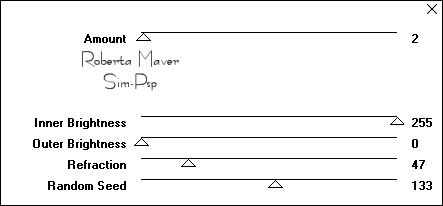
19 - Effects > Plugins > VM Natural > Acid Rain:
Activate the layer Promoted Selection 1
20 - Layers > Merge > Merge Down. Effects > Image Effects > Seamless Tiling:
Layers >
Duplicate. Layers > Merge > Merge Down. Effects > 3D Effects > Drop Shadow: 0, 0, 100, 50, Color: #000000 (Black)
21 - Edit > Copy no Deco2_byRoberta. 22 - Image > Add Borders > Symmetric:
1 px - Color: #000000 (Black) Selections > Select All.
Paint with a Linear gradient by the chosen colors: Foreground: #e3e1d5 - Background: #8d8c70
24 - Effects > Plugins > VM Natural > Acid Rain:
Selections > invert. Selections > Select None
Layers > Properties > General > Blend Mode: Luminance (L)
27
- Edit > Copy on Main Tube. Adjust > Sharpness > Sharpen. Position to the right.
Effects > 3D Effects > Drop Shadow: your choice
Adjust > Sharpness > Sharpen. Effects > 3D Effects > Drop Shadow: your choice
29 - Edit > Copy no Titulo_HappyNew_byRoberta. Effects > 3D Effects > Drop Shadow: 1 / 5 / 100 / 1, Color: #8d8c70 (Background)
I will be happy to publish them on our website.
Tutorial by RobertaMaver English Translation by Moderation SIM-PSP Main Tube: Tubed by Grisi Misted Landscape and Decorative Tube: Tubed by Animabelle Mask: by NarahMask Feel free to send your versions. I will be happy to publish them on our website.
|