|
TRADUÇÕES:
Obrigada aos nossos tradutores!
MATERIAL Seleções: 01_TimeForLove - 02_TimeForLove - 03_TimeForLove* *
Salvar as seleções na pasta Selections do PSP Alien Skin Eye Candy 5: Impact > Glass Italian Editor Effect > Effetto Fantasma Filters Factory Gallery A > Weave Toadies > Sucking Toad Bevel II.2 Toadies > What Are You? Mehdi > Wavy Lab
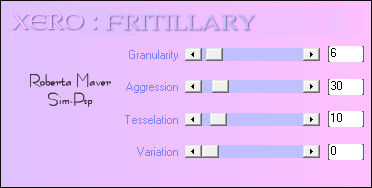
1.1 Xero > Fritillary
5 - Effects > Plugins > Simple > Quick Tiles. Effects > Edge effects > Enhance.
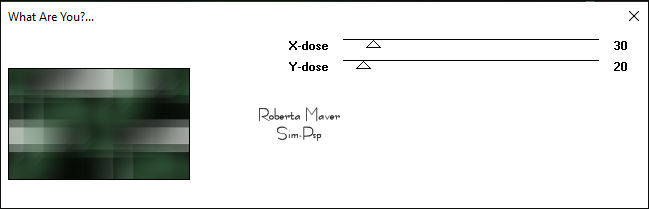
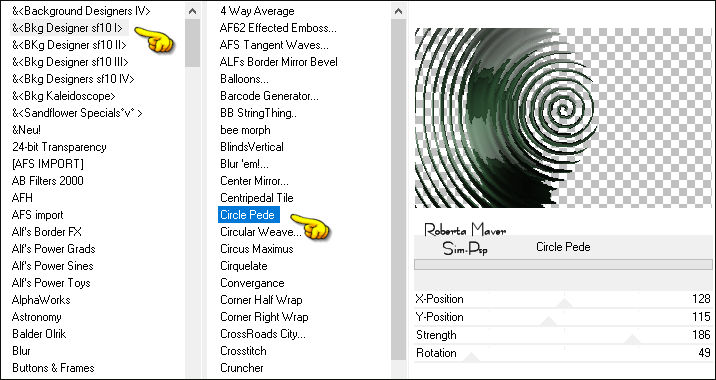
6 - Layers > Duplicate. Ativar a Layer Raster 1 Effects > Plugins >Toadies > What Are You?
Ativar a Layer Copy of Raster 1 (Topo)
8 - Selections > Load/Save Selections > Load Selection From Disk: 01_TimeForLove Selections > Promote
Selection to Layer. Selections > Select None. Fechar a visibilidade das layer Promoted Selection Fechar a visibilidade das layer Copy of Promoted Selection Fechar a visibilidade das layer Copy (2) of Promoted Selection Ativar a layer Copy Layer Raster 1
Ativar e abrir a visibilidade da layer Promoted Selection.
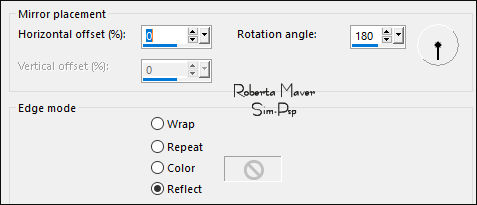
11 - Effects > Reflection Effects > Rotating Mirror:
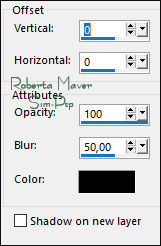
12 - Effects > 3D Effects > Drop Shadow:
Layers > Arrange > Move Down. Ativar e abrir a visibilidade da layer Copy of Promoted Selection
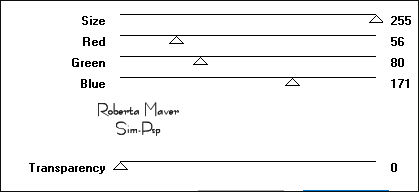
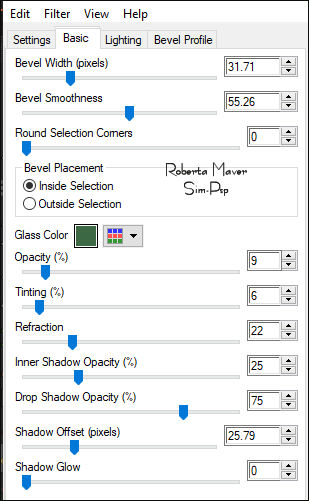
14 - Image> Resize: 30% - all layers desmarcado. Selections > Load/Save Selections > Load Selection From Disk: 02_TimeForLove Layers > New Raster Layer. Pintar com a cor do Foreground (cor clara) Selections > Select None. Effects > Plugins > Alien Skin Eye Candy 5: Impact > Glass escolha em Settings: Clear
Layers > Merge > Merge Down. Com a ferramenta Pick Tool, posicionar: Position X: 730 - Position Y: 99 Layers > Duplicate. Com a ferramenta Pick Tool, posicionar: Position X: 730 - Position Y: 356 Layers > Merge > Merge Down.
15 - Selections > Load/Save Selections > Load Selection From Disk: 03_TimeForLove Layers > New Raster Layer. Pintar com o Gradiente Linear, formado pelas cores em uso:
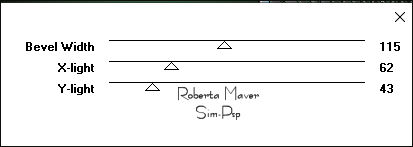
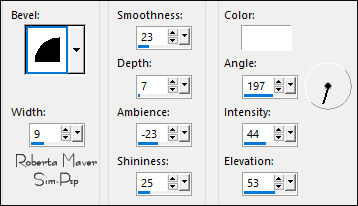
16 - Effects > 3D Effects > Inner Bevel:
Selections > Select None. Com a ferramenta Pick Tool puxe a parte superior e inferior da barra para fora:
Layers > Arrange > Move Down. Ativar a layer Copy of Promoted Selection. Layers > Merge > Merge Down. Effects > 3D Effects > Drop Shadow:
Ativar e abrir a visibilidade da layer Copy (2) of Promoted Selection
19 - Edit > Copy no Misted Paisagem. Image > Resize se necessário.
*No misted do Material dei um resize de 80% Layers > Properties > General > Blend Mode: Luminance (L).
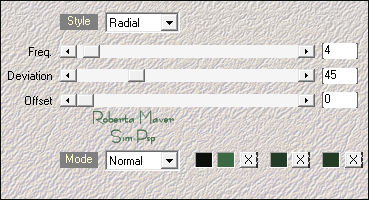
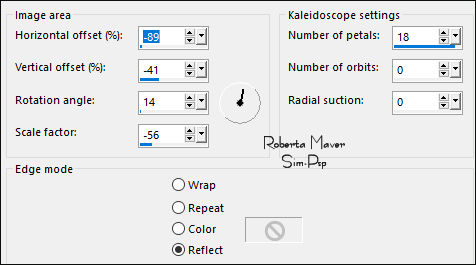
22 - Effects > Plugins > Xero > Fritillary:
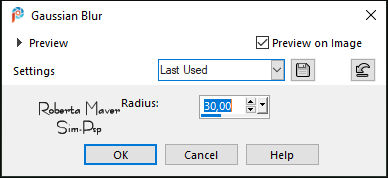
Adjust > Sharpness > Sharpen.
Selections > Select None. Edit > Paste as New Layer. Com a Ferramenta Pick Tool, posicione: Position X: 76 - Position Y: 236 Layers > Duplicate. Image > Mirror > Mirror Vertical. Layers > Merge > Merge Down.
24 - Edit > Copy no Tube Principal.
26 -
Image > Add Borders > Symmetric: 1px cor Background
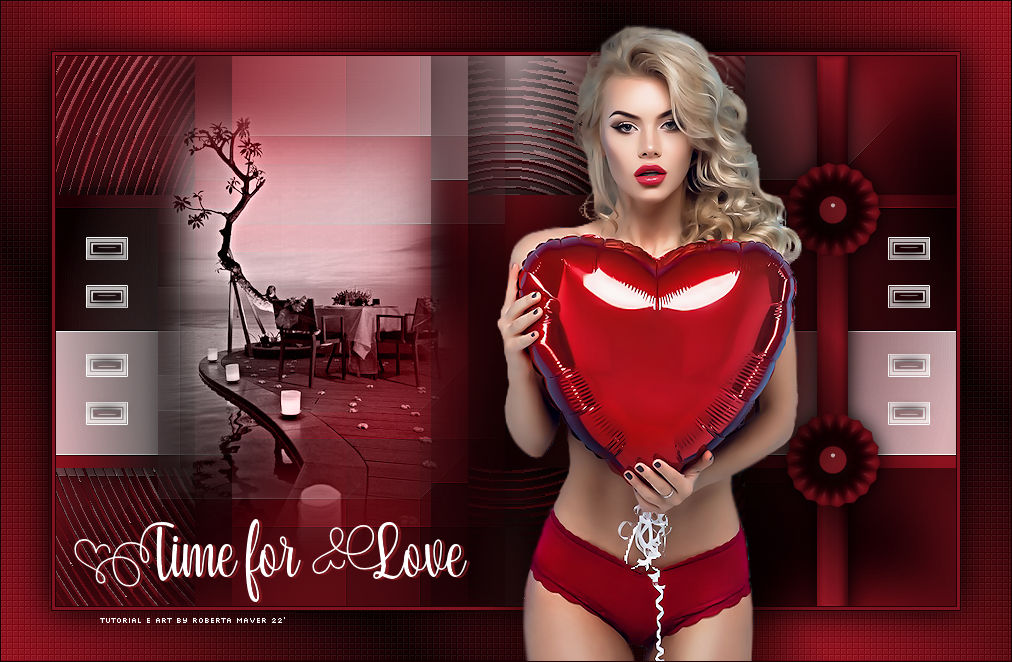
Créditos: Tutorial by Roberta Maver - Tube: SvB (1119) Beauty - Miste Paisagem: Tube_by_RobertaMaver 21/01/2022
Sinta-se à vontade para enviar suas versões. Terei todo o prazer em publicá-las em nosso site.
|