|
TRADUÇÕES:
Obrigada aos nossos tradutores!
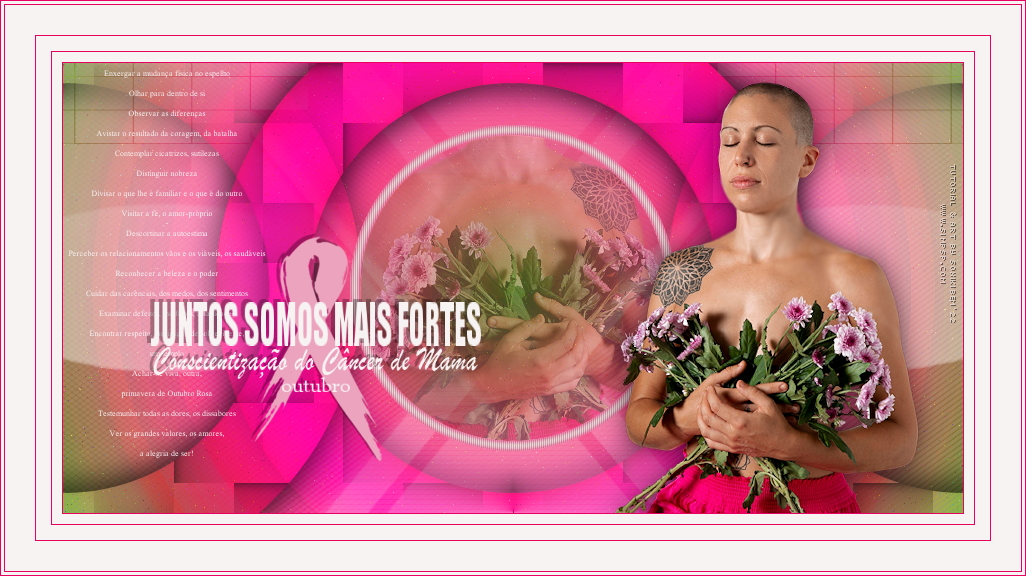
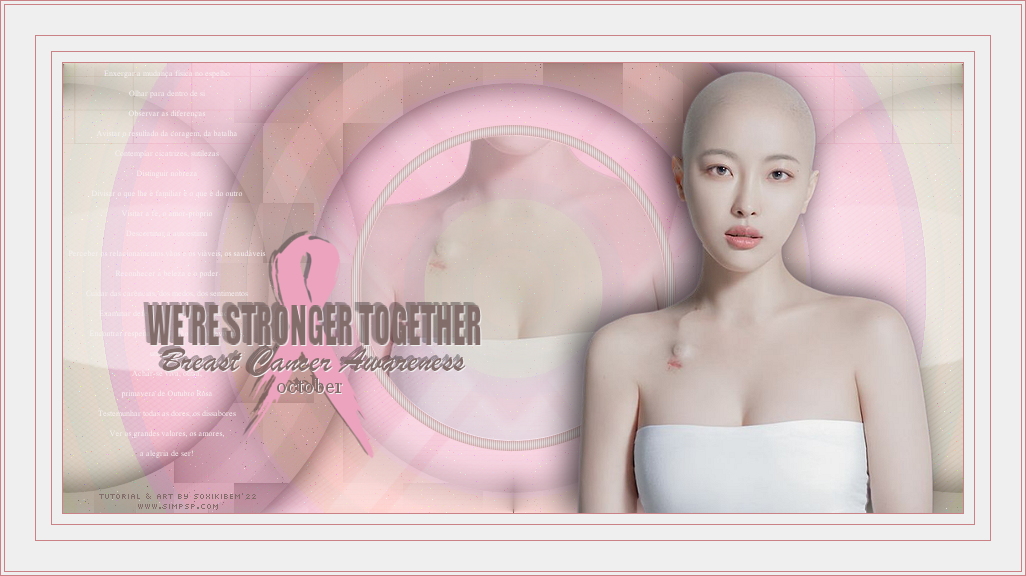
MATERIAL 1 Tube Personagem à sua escolha Títulos: WordArt04_EN_byPqna&Alice ou WordArt04_PT_byPqna&Alice poema_espelho NarahsMasks_1726 *Selections: SelectionFest75_1ByXiki - SelectionFest75_2ByXiki - SelectionFest75_3ByXiki * Salvar as seleções na pasta Selections do PSP
PLUGINS Mehdi 2 > Flat Median Sapphire Filters 01 > SapphirePlugin_0021
NOTA: Fique à vontade para alterar os Blends e
Opacidade de acordo com o material Lembre-se de retirar a Marca d'agua do material usado para colocar em seu trabalho.
Execução
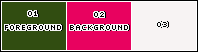
1 - Abrir o material no PSP, duplique e feche o original. Escolher 3 cores para trabalhar. Foreground: #314d11 Background: #e8025f Cor 3: #f7f3f3
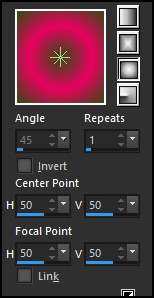
2 - Abra uma imagem transparente de 900x450px. Pintar com um gradiente Sunburst formado pelas cores do foreground e background:
3 - Layers > Duplicate. Effects > Plugins > Sapphire Filters 01 > SapphirePlugin_0021:
Layers > Properties > General > Blend Mode: Dodge - Opacity: 50%. Layers > Merge > Merge Down.
4 - Layers > Duplicate. Effects > Plugins > Mehdi 2 > Flat Median:
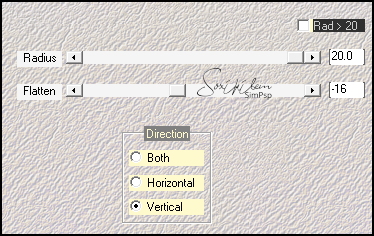
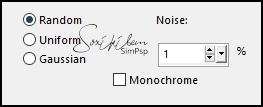
5 - Effects > Edge Effects > Enhance. Adjust > Add/Remove Noise > Add Noise:
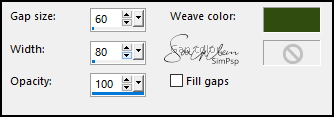
6 - Selections > Load/Save Selections > Load Selection from Disk: SelectionFest75_1ByXiki. Selections > Promote Selection to Layer. Selections > Select None. Effects > Texture Effects > Weave: Weave color: com a cor do Foreground
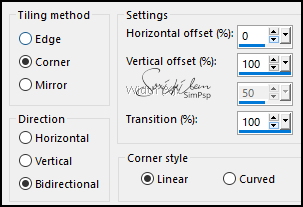
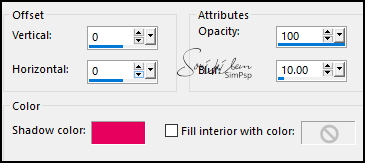
7 - Effects > 3D Effects > Drop Shadow: 0, 0, 100, 50, Color: #000000 (preto). Layers > Properties > General > Blend Mode: Luminance - Opacity: 80%. Effects > Image Effects > Seamless Tiling:
Image > Mirror > Mirror Vertical.
8 - Selections > Load/Save Selections > Load Selection from Disk: SelectionFest75_2ByXiki. Edit > Copy no Tube Personagem. Edit > Paste as New Layer. Com a ferramenta Move, mover da forma como preferir dentro da seleção. Selections > Invert. Pressionar uma vez a tecla Delete do teclado. Selections > Select None. Layers > Properties > General > Opacity: 40%. Adjust > Sharpness > Sharpen.
9 - Selections > Load/Save Selections > Load Selection from Disk: SelectionFest75_3ByXiki. Layers > New Raster Layer. Pintar esta seleção com a cor 3. Effects > Texture Effects > Blinds: Color: com a cor do foreground.
10 - Layers > New Raster Layer. Effects > 3D Effects > Cutout: Shadow color: com a cor do background.
Selections > Select None. Layers > Merge > Merge Down.
11 - Ativar a Layer Copy of Raster 1. Layers > Properties > General > Blend Mode: Screen. Layers > New Raster Layer. Pintar com a cor 3.
12 - Layers > New Mask Layer: From Image: NarahsMasks_1726. Layers > Merge > Merge Group. Layers > Properties > General > Blend Mode: Screen - Opacity: 60%. Image > Mirror > Mirror Vertical.
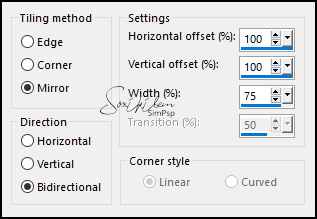
13 - Effects > Image Effects > Seamless Tiling:
14 - Ativar a Layer do topo. Edit > Copy no Tube Personagem. Edit > Paste a New Layer. Image > Resize se for necessário. Posicionar à direita. Aplique Drop Shadow ou efeito como preferir.
15 - Edit > Copy no poema_espelho. Edit > Paste a New Layer. Pick Tool: Position X 5, Position Y 7.
16 - Vamos inserir o titulo. Em material você pode escolher o titulo em português ou inglês: WordArt04_EN_byPqna&Alice ou WordArt04_PT_byPqna&Alice Esta em layers separadas, assim e desejar colorize para combinar com o seu trabalho. Edit > Copy.
17 - Em seu trabalho: Edit > Paste a New Layer. Effects > 3D Effects > Drop Shadow: -3, -4, 30, 0, cor preta. Pick Tool: Position X 84, Position Y 170.
Nota: Neste ponto verifique os Blends das layers e mude se desejar. Na segunda versão eu mudei o Blend da Layer Promoted Selection para Luminance (L).
18 - Image > Add Borders > Symmetric: 1px - Color: cor background 10px - Color: cor 3 1px - Color: cor background 15px - Color: cor 3 1px - Color: cor background 30px - Color: cor 3 1px - Color: cor background 3px - Color: cor 3 1px - Color: cor background
19 - Aplicar sua marca d'água ou assinatura.File > Export > JPEG Optimizer.
CRÉDITOS Versoes 1 & 2: Tutorial & Art by Soxikibem Tube Personagem & WordArt by Pqna&AliceMask by Narah Poema: Aqui
Sinta-se à vontade para enviar suas versões. Terei todo o prazer em publicá-las em nosso site.
|