|

Tutorial by
Inácia Neves
English Translation by Moderation SIM-PSP
Original Tutorial
Material
1 Main Tube of your choice
1
Misted Landscape
of your choice
WordArt_BeThePoem_Inacia
Plugins
FM Tile Tools > Blend Emboss
Plugin Flaming Pear > Flexify 2
VM Instant Art > Lightlines
Transparency > Eliminate Black
AAA Frames > Texture Frame
Fantastic Machine > Paint
Engine*
*Save the fmachine.ini file into the Windows folder for
that the effects appear inside the plugin.
Corel Paint Shop Pro 2020 Ultimate Effects
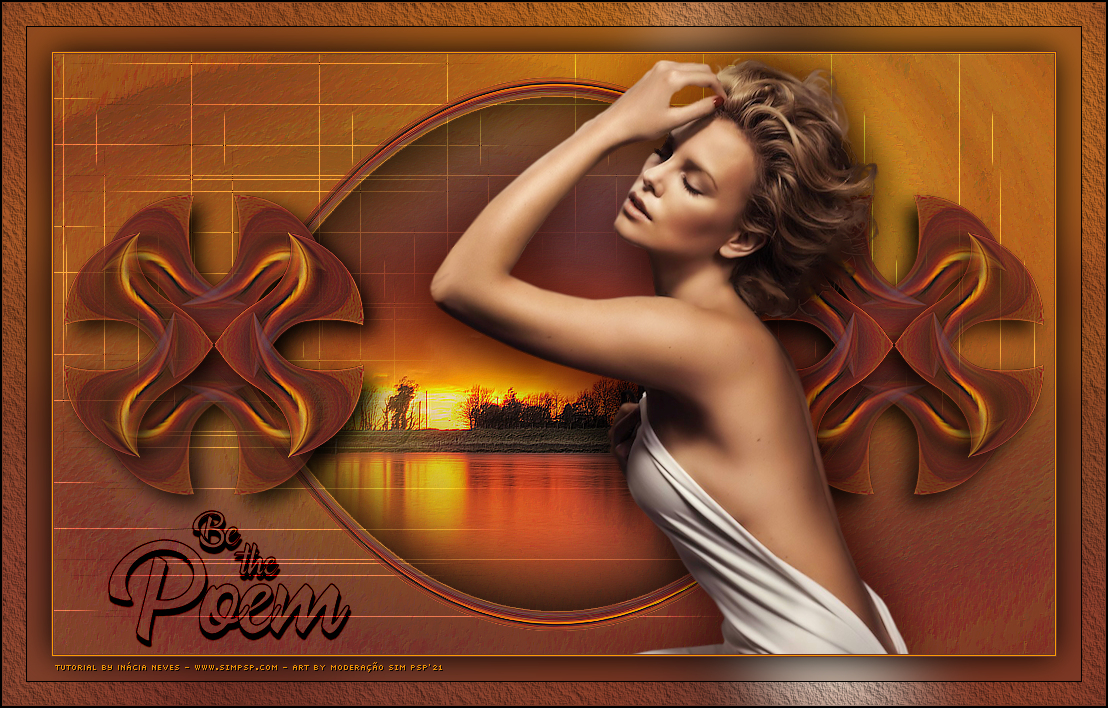
TUTORIAL
1- Open the material on the PSP,
duplicate and close the original.
Choose 2 colors from the
misted landscape.
I chose the colors:
Foreground: #68332a
Background: #fb9c04
Form a gradient with the chosen colors Style: Linear > Angle: 0 >
Repeats: 0 > Invert: unchecked.
2- Open a new transparent image of 1000 x 600 px.
Paint the transparency with the gradient.
Layers > New Raster Layer.
Selections > Select All.
3- Edit > Copy
the
Misted Landscape.
Edit > Paste Into Selection.
Selections > Select None.
Effects > Image Effects > Seamless Tiling > Default
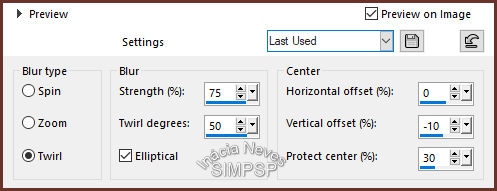
Adjust > Blur > Radial Blur:
4- Effects > Edge Effects > Enhance More.
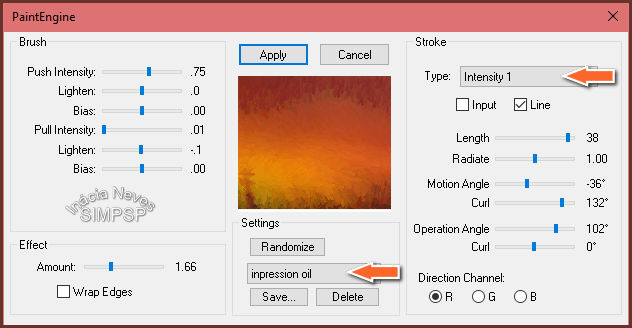
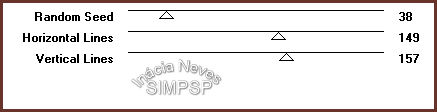
Effects > Plugins >
Fantastic Machine > PaintEngine:
5- Effects > Plugins > FM Tile Tools > Blend Emboss: Default
Layers > Duplicate
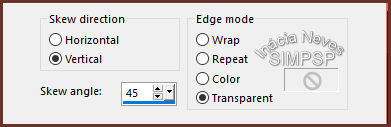
Effects > Geometric Effects > Skew
Effects > Distortion Effects > Pinch

Repeat > Effects > Distortion Effects > Pinch: 75
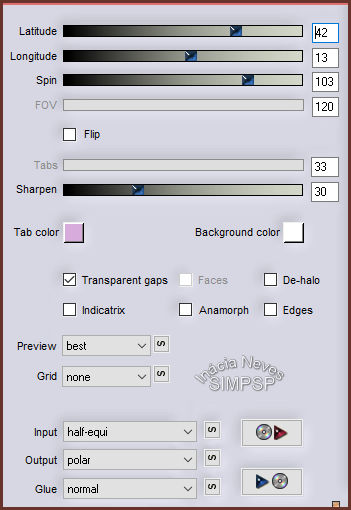
6- Effects > Plugins > Flaming Pear > Flexify 2
7- Layers > Duplicate.
Image > Mirror > Mirror Horizontal.
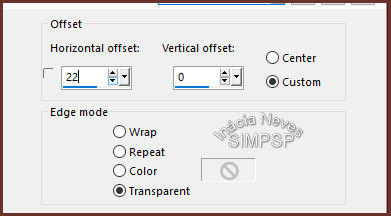
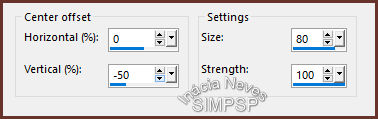
Effects > Image Effects > Offset:
Layers > Merge > Merge Down
Objects > Align > Top.
Layers > Duplicate.
Image > Mirror > Mirror Vertical
Layers > Merge > Merge Down.
Image > Resize > 50% > All layers unchecked.
Adjust > Sharpness > Sharpen More.
8- Layers > Duplicate.
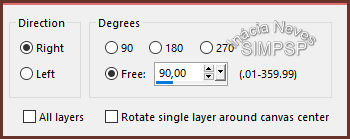
Image > Free Rotate:
Adjust > Sharpness > Sharpen.
9- Activate the
Copy of Raster 2 layer.
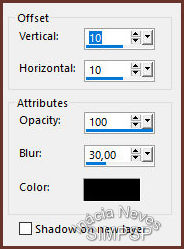
Effects > 3D Effects > Drop Shadow:
Activate the Copy(2) of Raster 2 layer.
Repeat o Effects > 3D Effects > Drop Shadow: 10 / 10 / 100 / 30,
Color: #000000
Layers > Merge > Merge Down.
Objects > Align > Center in Canvas.
Objects > Align > Left.
10- Layers > Duplicate.
Image > Mirror > Mirror Horizontal.
Layers > Merge > Merge Down.
11- Activate the Raster 2 layer.
Layers > Duplicate.
Effects > Geometric Effects > Perspective Horizontal:
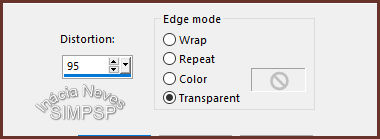
Image > Mirror > Mirror Horizontal
Repeat > Effects > Geometric Effects > Perspective Horizontal: 95 /
Transparent
Adjust > Sharpness > Sharpen More.
12- Effects > Distortion Effects > Warp
Layers > Duplicate.
Image > Mirror > Mirror Vertical.
Layers > Merge > Merge Down.
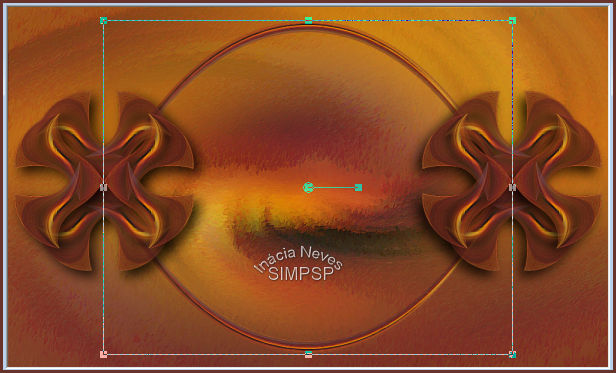
13- Activate the Pick Tool tool:
Decrease on the left and right sides towards the center, as in the
example:
Adjust > Sharpness > Sharpen.
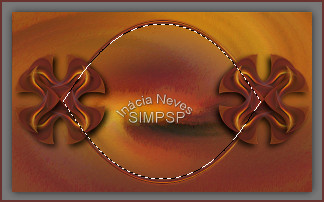
With the Magic Wand Tool, select the center of the effect:

Layers > New Raster Layer.
Edit > Copy
the
Misted Landscape.
Edit > Paste Into Selection.
Adjust > Sharpness > Sharpen.
Effects > Plugin > FM Tile Tools > Blend Embos: Default
Layers > Arrange > Move > Down.
Keep the selection...
14- Activate the
Copy of Raster 2 layer.
Layers > New Raster Layer.
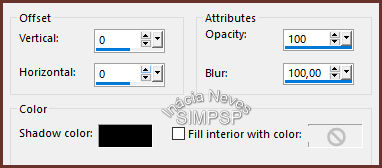
Effects > 3D Effects > Cutout:
Selections > Select None.
15- Activate the Raster 2 layer.
Layers > Duplicate.
Effects > Plugins > VM Instant Art > Lightlines
Effects > Plugins > Transparency > Eliminate Black.
Effects > Edge Effects > Enhance.
Layers > Properties > General > Blend Mode: Overlay (Or
another of your choice)
Optional: if you
want the lines to become stronger, apply the following two steps:
Layers > Duplicate
Layers > Merge > Merge Down
16- Activate the top layer.
Edit > Copy na
WordArt_BeThePoem_Inacia.png
Edit > Paste as New Layer.
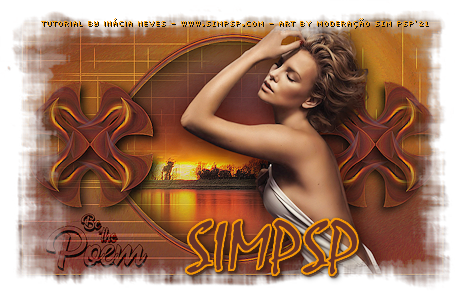
Position and apply effects of your choice.
17- Edit > Copy the Main Tube
Edit > Paste as New Layer
Position and apply effects of your choice.
(The main tube can be
placed at this time or at the end. It's up to you)
18- Check the layers:
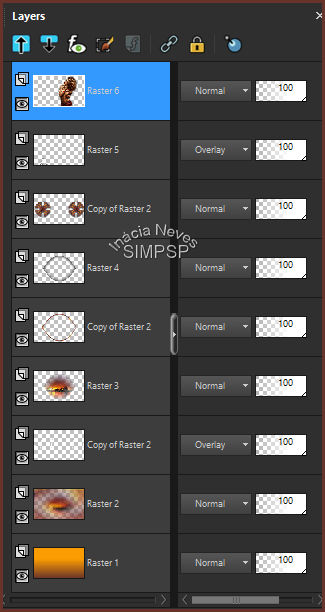
Layers > Merge > Merge All
19-
Create the Borders:
Image > Add Bordes > 1px > symmetric - color: #68332a (dark
color)
Image > Add Bordes > 1px > symmetric - color: #fb9c04
(light color)
Image > Add Bordes > 1px > symmetric - color: #68332a (dark
color)
20- Selections > Select All.
Edit > Copy.
Image > Add Bordes > 50 px > symmetric - any color.
Selections > Invert
Edit > Paste > Into Selection.
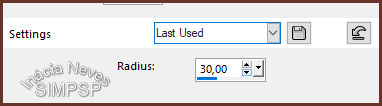
Adjust > Blur > Gaussian Blur
21- Selections > Invert.
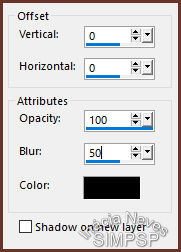
Effects > 3D Effects > Drop Shadow:
Selections > Invert.
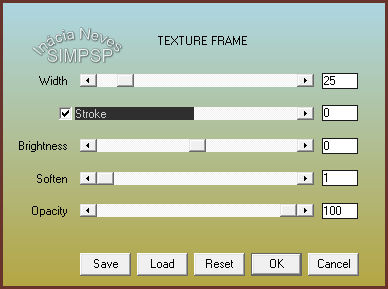
Effects > Plugin AAA Frames > Texture Frame:
Selections > Select None.
Image > Add Bordes > 1px > symmetric - color: #000000 (black)
22-
If you wish, resize your work.
Apply your watermark or signature.
File > Export > JPEG Optimizer...
CREDITS:
Tutorial by
InaciaNeves
English Translation by Moderation
SIM-PSP
Main Tube: Tubed by
Babette
Misted Landscape: by Luna
Feel free to send your versions.
I will be happy to publish them on our website.
|
Tutorial created by InáciaNeves, in August
/ 2021. Translated into English in August / 21, by the Moderation of SIM-PSP. It cannot be
copied, removed from its place, translated
or used in learning lists or groups without
the author's
prior consent.
|
|