 Materiais
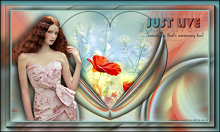
1 Main Tube of your choice 1 Misted Landscape of your choice WordArt
WA_JustLive_Inacia
 Plugins
Mura's
Meister > Pole Transform
Flaming
Pear > Flexify 2
AAA
Frames > Foto Frame
Corel PaintShop Pro 2022 Ultimate Effects Version for the English translation made in Corel PaintShop Pro 2020 Ultimate TUTORIAL
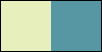
1- Open the material on the PSP, duplicate and close the original. Choose 2 colors from the misted landscape. Foreground: #e7efbd
Background: #5697a3
 2- Open a new transparent image of 1000 x 600 px.
Configure the Foreground with a LINEAR Gradient formed by the chosen
colors:
Angle > 0, Repeats > 0, Invert > Unchecked: 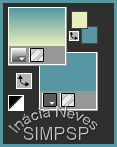
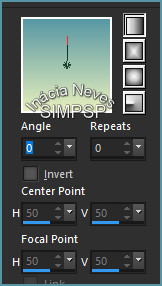 Paint the transparency with the Linear Gradient.
Layers
> New Raster Layer.
Selections > Select All.
3- Edit > Copy
the
Misted Landscape.
Edit
> Paste Into Selection.
Selections > Select None.
Effects
> Image Effects > Seamless Tiling: Default
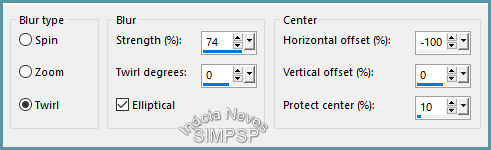
4- Adjust > Blur > Radial
Blur:
 Effects
> Edge Effects > Enhance More.
Layers
> Duplicate.
5- Effects > Geometric Effects
> Perspective Vertical:
 Activate the layer Raster 2.
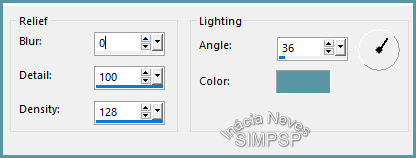
Effects > Artistic Effects > Enamel: Color: Background
 6- Activate the layer Copy of Raster
2.
Layers
Duplicate.
Effects
> Plugin > Mura's Meister > Pole Transform:
Layers
> Duplicate.
Image
> Mirror > Mirror Horizontal.
Layers
> Merge > Merge Down.
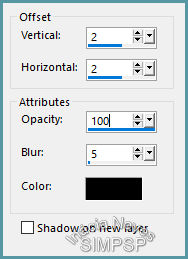
Effects
> 3D Effects > Drop Shadow:
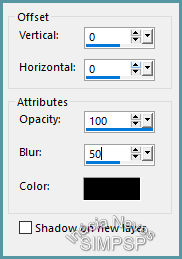 Repeat Drop Shadow on the same settings.
7- Layers >
Duplicate.
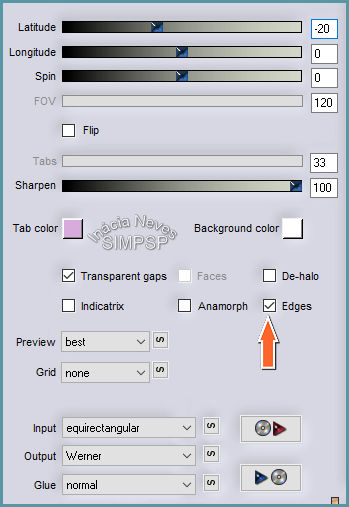
Effects
> Plugin > Flaming Pear > Flexify 2:
 Effects
> 3D Effects > Drop Shadow:
 8- Edit > Copy the Misted Landscape. Edit > Paste as New layer. Image > Resize if necessary. Adjust > Sharpness > Sharpen More. Layers
> Arrange > Move Down.
Position to the center.
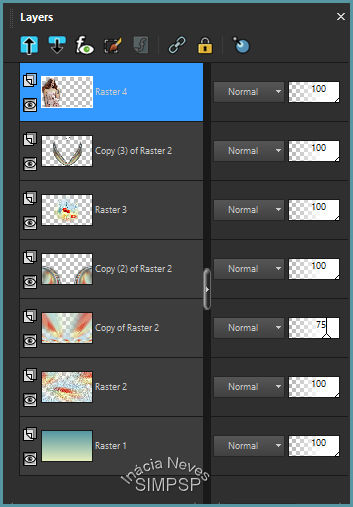
9- Activate the layer Copy of Raster
2
Layers > Properties > General >
Opacity: 75%
10- Edit > Copy the Main Tube.
Edit
> Paste as New Layer.
Reduce, apply effects and Drop Shadow of your choice.
Adjust
> Sharpness > Sharpen.
11-
Check the layers:
 Layers
> Merge > Merge All
12- Create the Borders:
Image
> Add Borders > 2 px > Symmetric > Color: #5697a3 (dark
color)
Image
> Add Borders > 2 px > Symmetric > Color: #e7efbd (light color)
Image
> Add Borders > 2 px > Symmetric > Color: #5697a3 (dark
color)
13- Selections > Select
All.
Edit
> Copy.
Image
> Add Borders > 50 px > Symmetric > any color.
Selections > Invert.
Edit
> Paste Into Selection.
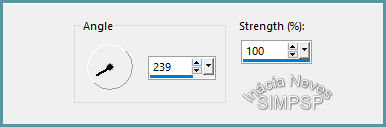
Adjust
> Blur > Motion Blur:
 Effects
> Plugins > AAA Frames > Foto Frame:
 14-
Selections > Select None.
Image
> Add Borders > 1 px > Symmetric > Color: #000000
(black)
15- Edit > Copy the WordArt
JustLive_Inacia or WA_JustLive_Inacia
Edit
> Paste as New Layer.
Position, apply Blend Mode of your choice.
Layers
> Merge > Merge All.
16- If you wish, resize your work.
Apply your watermark or signature. File > Export > JPEG Optimizer...
CREDITS: WordArt: by InáciaNeves  Feel free to send your versions. I will be happy to publish them on our website.   
|