|
TRADUÇÕES:
Obrigada aos nossos tradutores!
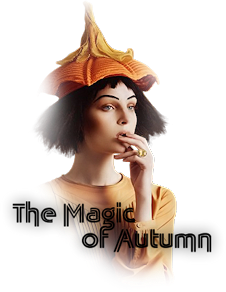
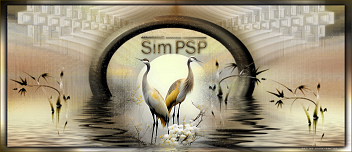
MATERIAL 1 tube principal à sua escolha 1 tube misted paisagem outonal à sua escolha título_the_magic_of_auntumn_leni decor_bolinhas_pretas_leni-2 Decor_leni-1 Narah_mask_0670 mask_GP
PLUGINS:
Filter Unlimetd 2.0 > Bkg Designer sf 10 I AP [Lines] > Lines SilverLining
Cores: #b04200 foreground #e58934 background #dbb685 extra. # 000000 extra 2.
ROTEIRO:
1- Abrir o material no PSP, duplique e fecha o original.
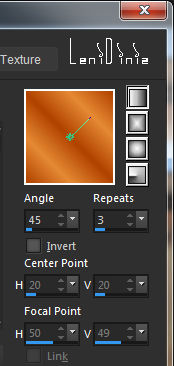
2- Abrir uma imagem transparente 800x500px. Pinte com um gradiente formado pelas cores escolhidas: Linear: Angle 45 Repeats 3, com o invert desmarcado:
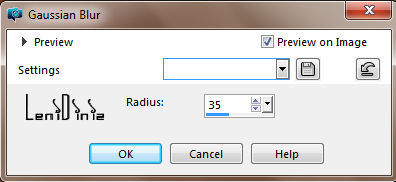
2- Adjust > Blur > Gaussian Blur > 35:
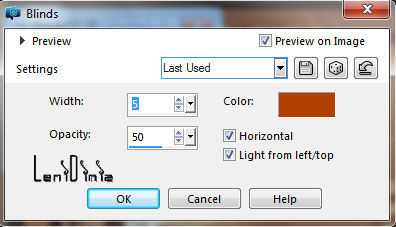
3- Effects > Texture Blinds > 5/50, cor do foreground:
4- Layers > New Raster Layer Selections > Select All. Selections > Modify > Contract 35 Selections > Invert. Pintar com a cor do foreground. Selections > None. Layers > Merge Down.
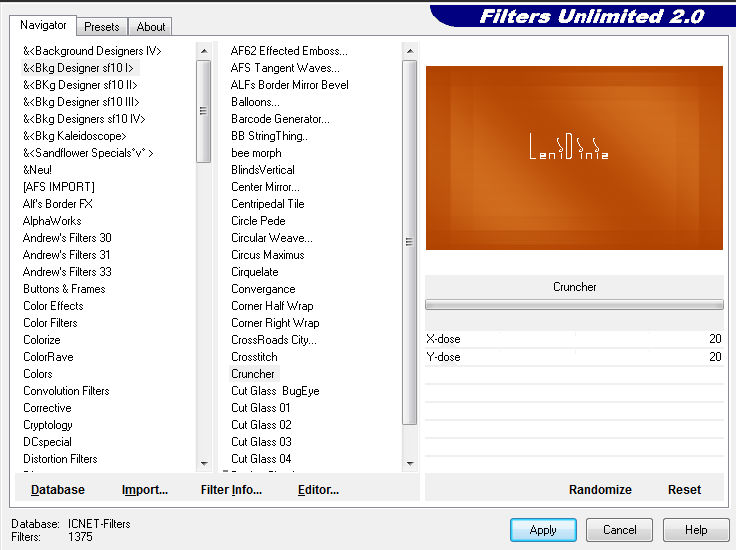
5- Effects > Plugin Filter Unlimetd 2.0 > Bkg Designer sf 10 I > Cruncher 20 > 20
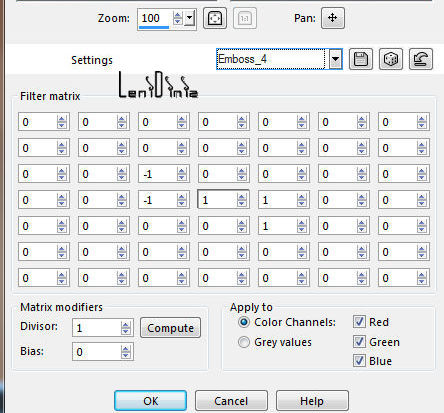
Repetir > Plugin Filter Unlimetd 2.0 > Bkg Designer sf 10 I > Cruncher 20 > 20 6- Effects > User Defined Filter > Emboss 4:
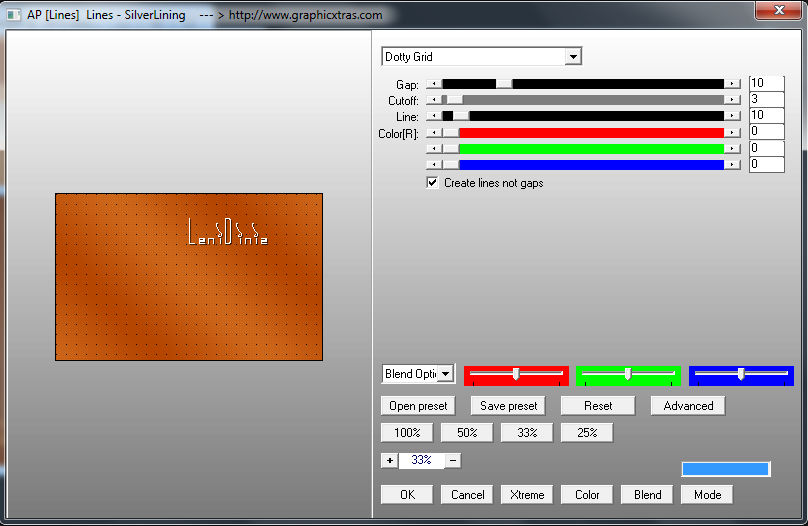
7- Effects > Plugin > AP [Lines] > Lines SilverLining > Dotty Grid:
8- Layers > New Raster Layer, Pintar com a cor extra #dbb685 Image > Resize: 70%, Resize all layers desmarcado:
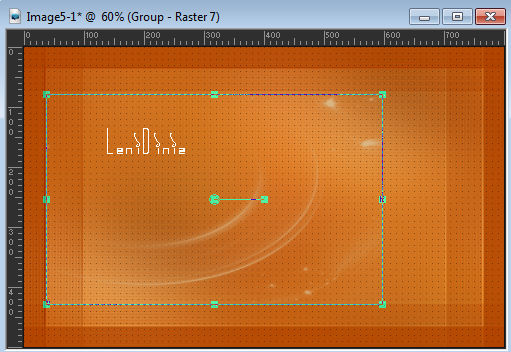
9- Layers > New Mask Layer > From Image > mask_GP Image > Merge > Merge Group. Image > Mirror > Mirror Horizontal. Com a ferramenta Pick posicione conforme print:
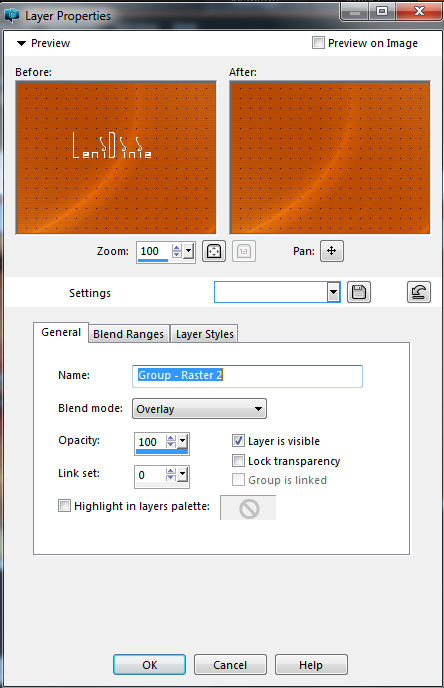
10- Layers > Properties > General > Blend Mode: Overlay:
11- Effects > User Defined Filter > Emboss 4:
12- Layers > New Raster Layer, Pintar com a cor extra #dbb685 Layers > > New Mask Layer > From Image > Narah_mask_0670 Image > Merge > Merge Group.
13- Layers > Properties > General > Blend Mode: Overlay:
14- Effects > User Defined Filter > Emboss 4:
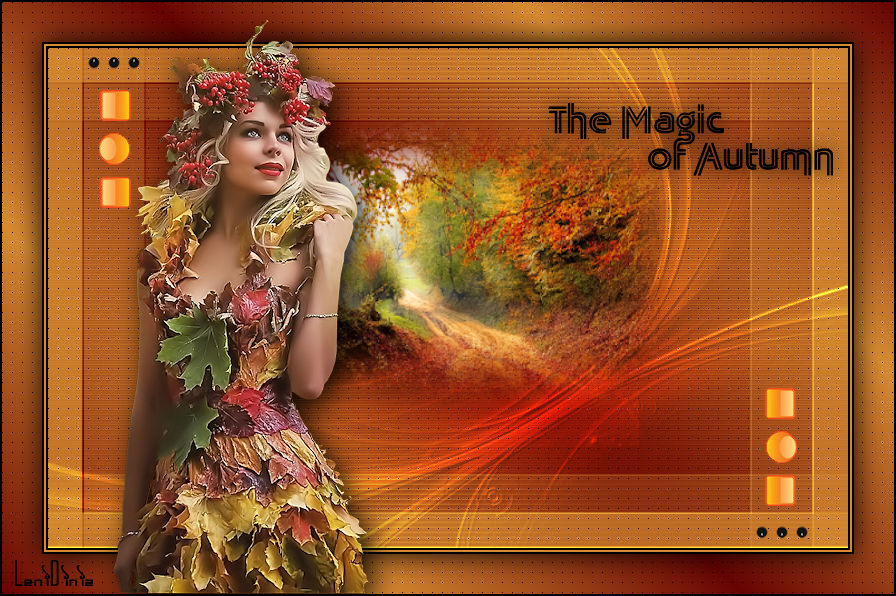
15- Edit > Copy no misted paisagem. Edit > Paste As New Layer, Image > Resize se necessário, Adjust > Sharpness > Sharpen, Posicione na parte central da imagem, indicado no print.
16- Edit > Copy no decor decor_bolinhas_pretas_leni-2 Edit > Paste As New Layer.
17- Edit > Copy no decor Decor_lenidiniz1. Edit > As Paste New Layer. Effects > 3D Effects > Drop Shadow: 1 > 1 > 90 > 1
18- Imagem > Add Border: 2 px cor preto. 2 px cor background 2 px cor preto.
19- Selections > Select All. Imagem > Add Border: 40 px com qualquer cor. Selctions > Invert. Pintar com o gradiente em uso.
20- Effects > Plugin > AP [Lines] > Lines SilverLining > Dotty Grid:
21- Selections > Invert. Effects > 3D effects > Drop Shadow 0 > 0 > 90 > 40. Selections > None.
22- Edit > Copy no tube principal. Edit > Paste As New Layer Image > Resize se necessário Adjust > Sharpness > Sharpen. Posione como preferir. Effects > 3D Effects > Drop Shadow como preferir.
23- Edit > Copy no título_the_magic_of_auntumn_leni Edit > Paste AS New Layer Ativar a ferramenta Ferramenta Pick: Position X 529 Position Y 82 24- Imagem > Add Border: 2 px cor preto.
25- Assine ou coloque a sua marca d'água em nova layer.
26- File > Export > JPG Optimizer.
Leni Diniz
Créditos: Tutorial by Leni Diniz. Tubes by Maryse. Misted paisagem by Lisa T Paysage automne jewel Masks: mask_GP Narah_mask_0670 Decor_leni-1 decor_bolinhas_pretas_leni-2 título_the_magic_of_autumn_leni
Sinta-se à vontade para enviar suas versões. Terei todo o prazer em publicá-las em nosso site.
|