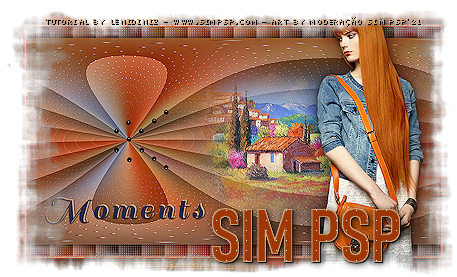
Tutorial By
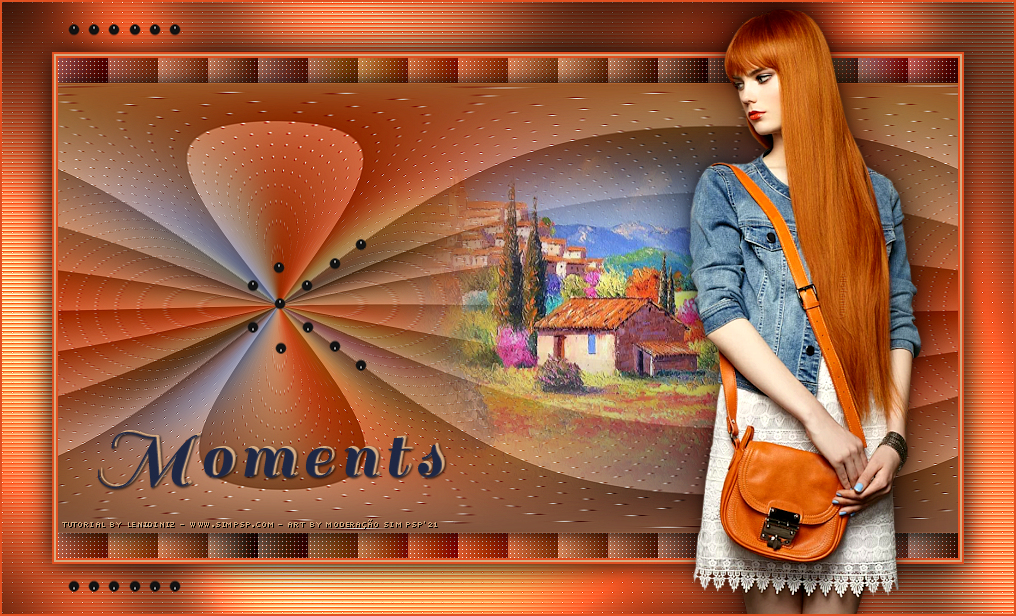
LeniDiniz  MATERIAL: 1 Main Tube of your choice 1 Misted landscape or floral of your choice. decor_moments_leni decor_moments_leni_2
PLUGINS Filters Unlimited 2.0 > Special Effects 1 AP Line Flaming Pear. FM Tiles Tools Graphics Plus CORES: Choose two colors to work with. #e15020 foreground #d6ac83 background
TUTORIAL
1- Open the material in PSP, duplicate and close the original. 2- Form a
Linear Gradient:
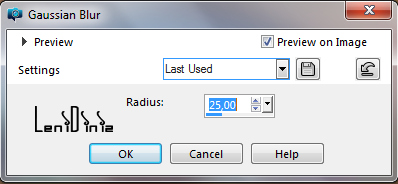
3- Open a new transparent image of 900x500. Paint the transparency with a gradient. Selections > Select All. Edit > Copy on misted landscape or floral. Edit > Paste Into Selection. Selections > Select None. 4- Effects > Image Effects > Seamless Tiling: Default. Adjust > Blur Gaussian Blur:
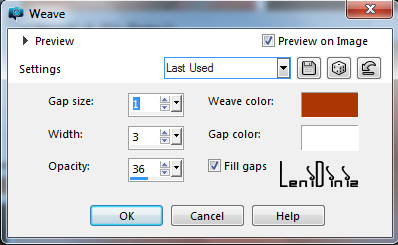
5- Layers > Duplicate. Close the visibility of the Copy of Raster 1 layer. Activate layer Raster 1. 6- Effects > Texture Effects > Weave: Weave color: #e15020 (foreground) - Gap color: #ffffff
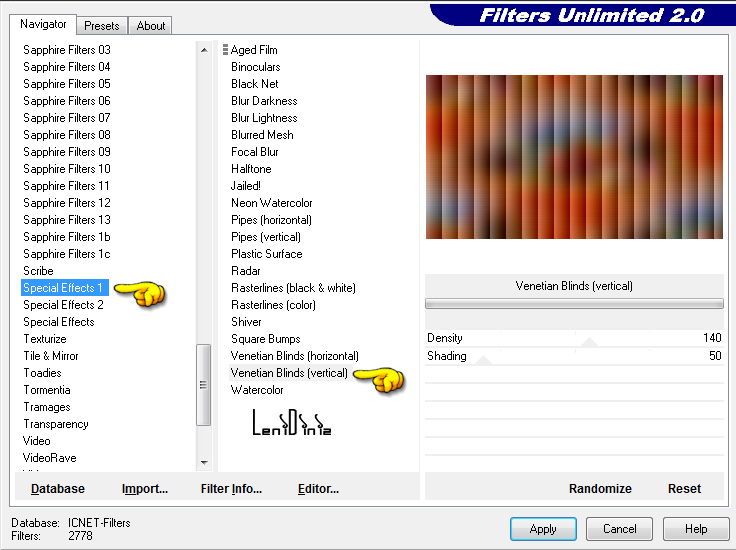
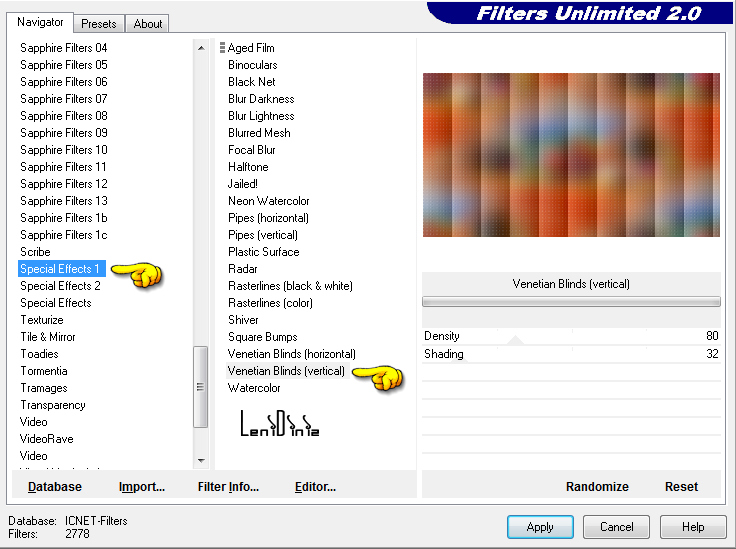
7- Effects > Plugins > Filter Unlimited > Special Effects 1 > Venetian Blinds (vertical).
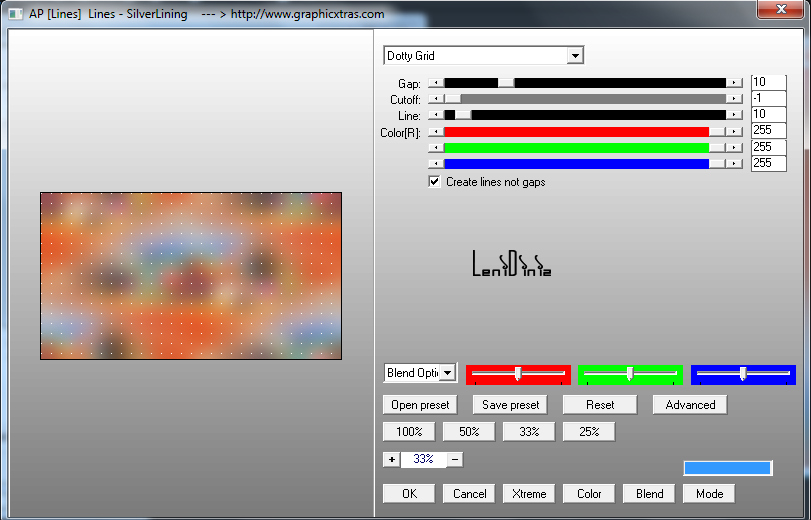
8- Activate and open the layer Copy of Raster 1. Effects > Plugins > AP [Lines] > Lines - SilverLining: Dotty Grid
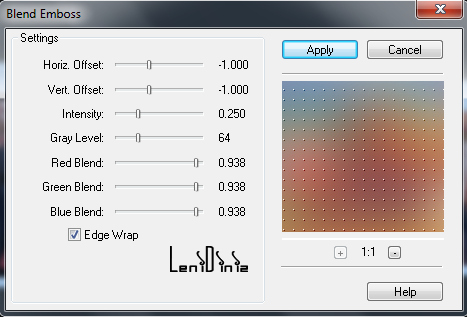
9- Effects > FM Tiles Tools > Blend Emboss: Default
10- Effects > Plugin > Filter Unlimited > Special Effects 1 > Venetian Blinds (vertical).
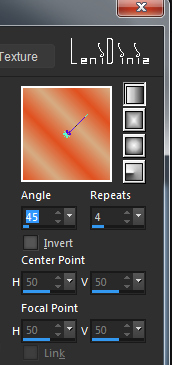
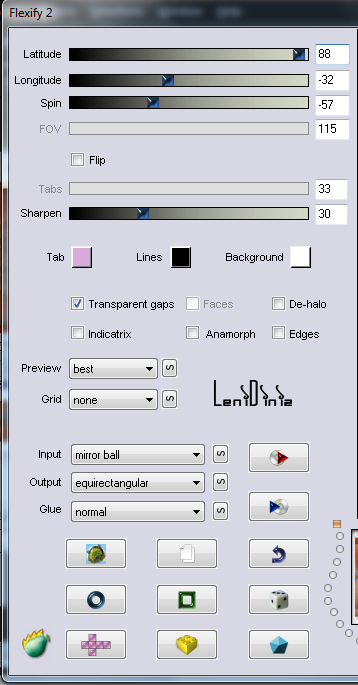
11- Effects > Plugin > Flaming Pear > Flexity 2:
12- Adjust > Sharpness > Sharpen. Effects > 3D Effects > Drop Shadow: 0 > 0 > 100 > 25, color: #000000. 13- Edit > Copy on misted landscape or floral. Edit > Paste As New Layer. Position to the right. Adjust > Sharpness > Sharpen. 14- Image Add Borders : Symmetric: 2 px - color: foreground 2 px - color: background 2 px - color: foreground. 15- Selections > Select All. Image > Add Border > Symmetric: 50 px - any color. Selection > Invert. 16- Paint with the gradient in use:
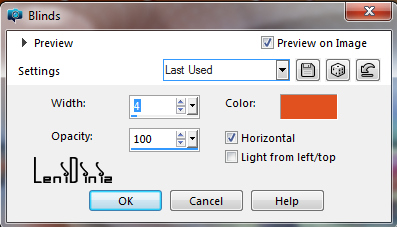
Effects > Texture Effects > Blind: Color: foreground
17- Effects > Plugins > AP [Lines] > Lines - SilverLining: Dotty Grid
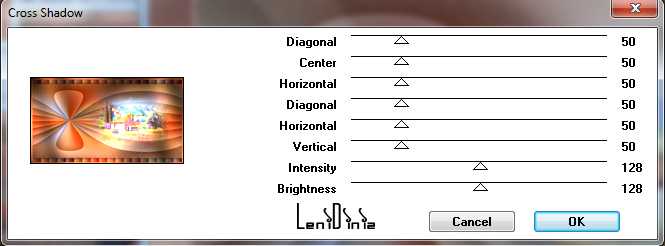
18- Adjust > Sharpness > Sharpen. Effects > Plugins > Graphics Plus > Cross Shadow: Default
19- Selections > Invert. Effects > 3D Effects > Drop Shadow: 0 > 0 100 > 40, color: #000000. Selections > Select None. 20- Edit > Copy the Main Tube.
Image > Resize if necessary. Adjust Sharpness > Sharpen Effects > 3D Effects > Drop Shadow: your choice. 21- Edit > Copy no decor_moments_leni-1. With the Pick Tool tool, position: Position X 245 Position Y 237 22- Edit > Copy no decor_moments_leni_2. With the Pick Tool tool, position: Position X 66 Position Y 22 23- Edit > Copy no t�tulo_moments_leni Edit > Paste As New Layer Position of your choice. Effects > 3D Effects > Drop Shadow:1 > 1 > 80 > 3, color: #000000. 24- Image > Add Borders > Symmetric: 2 px - color: foreground.
25- Apply your watermark or signature.
CREDITS: Tutorial by LeniDiniz English Translation by Moderation SIM-PSP Main Tube: Tubed by Animabelle Misted Landscape: by Lenidiniz
Feel free to send your versions.
|