  MATERIAL 1 Main Tube 1 Misted Landscape creation.tine_masque249 Decor1_by Roberta Sel-Stranger_roberta* Titulo_Strager in Paradise_by Roberta NOTE: Save the Sel-Stranger_roberta file in the psp selections folder.
PLUGINS Bkg Designer sf10 II Carolaine and Sensibility Plugin Flaming Graphics Plus Mehdi
Tutorial :1 - Open the material on the PSP, duplicate and close the original. Choose two colors to work with. Foreground #0d151a Background #fffef3
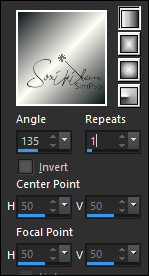
2 - Open a 900 x 550 px transparent image. Paint with the Linear gradient, Angle 135, Repeats 1.
Selections > Select All.
3 - Edit > Copy in the Misted Landscape Edit > Paste Into Selection. Adjust > Sharpness > Sharpen Selections > Select None.
4 - Effects > Image Effects > Seamless Tiling: Default
5 - Adjust > Blur > Gaussian Blur: 10.
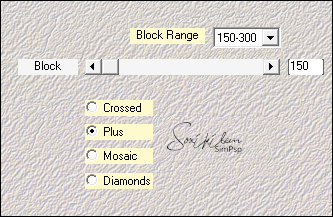
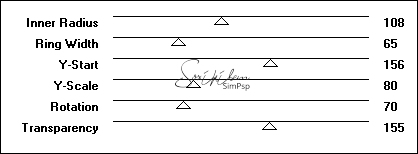
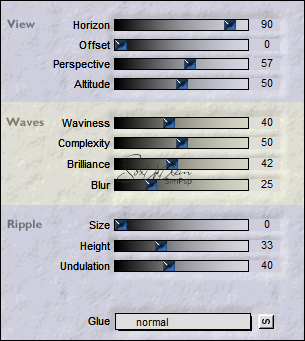
6 - Effects > Plugins Mehdi > Sorting Tiles.
7 - Effects > Edge Effects > Enhance
8- Layers > Duplicate.
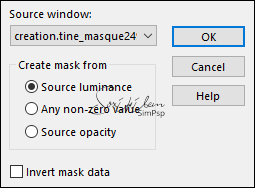
9 - Layers > New Mask layer > From Image: creation.tine_masque249.
Layers > Merge > Merge Group Layers > Duplicate.
10- Activate the Group layer (mask) - (Group - Copy of Raster 1)
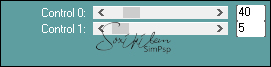
11- Effects > Plugin Caroline and Sensibility > CS-D Lines
12 - Activate Group copy (Copy of Group - Copy of Raster 1)
13 - Effects > Plugin Factory Gallery B > Circulator ...
Layers > Properties: Blend Mode Hard Light.
14 - Selection /loads /save selection /loads selection from disk: Sel-Stranger_robertaPress the delete key on the keyboard Still selected
15 - Layers > New Raster Layer Paint the layer with the gradient in use.
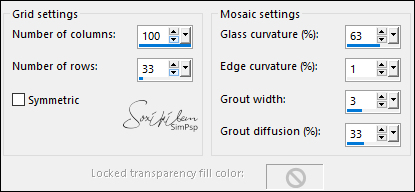
16 - Effects > Texture Effects > Mosaic - Glass
17 - Edit > Copy in the Misted Landescape Edit > Paste Into Selection. Adjust > Sharpness > Sharpen Selections > Select None. Layers > Arrange > Move Down.
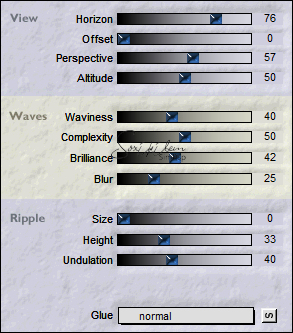
18 - Effects > Plugins Flaming > Flood
19- Activate Group copy (Copy of Group - Copy of Raster 1) Effects > 3D Effects > Drop Shadow: 0, 0, 80, 30, black color. Still in the copy of the
Group (Copy of Group - Copy of Raster 1)
20 -
Selection /loads /save selection /loads selection from disk:
Sel-Stranger_roberta
21- Selection > modify > select selection bords 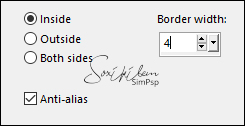 22 - Layers
> New Raster Layer
Paint the layer with the gradient in use.
23 - Effects > 3D Effects > Inner Bevel 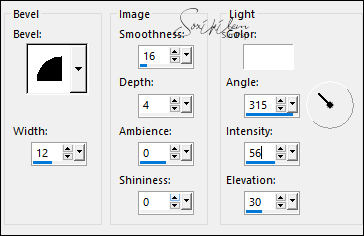 Layers > Merge
> Merge Down.
Selections > Select None.
24 -
Activate Group copy (Copy of Group - Copy of Raster 1)
25 - Effects
> Plugin Flaming > Flood
 26-
Activate the raster 1
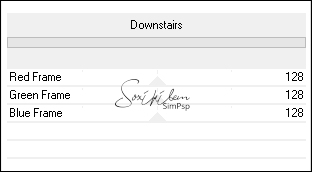
Effects > Filters
Unlimited 2.0 > Bkg Designer sf10 II > Downstairs >
Defauld
 27 - Repeat item 25> Effects> Flaming plugins>
Flood
28 - Activate the top layer. Edit > Copy in the Main Tube. Resize if necessary Position. Apply the same plugin as item 25 > Effects> Flaming Plugin > Flood
Effects > 3D Effects > Drop Shadow as you prefer
29-
Image > Add Borders:
1px light color 3 px dark color 1px light color Selections > Select All. Image > Add Broders: 40 px with any color. Selections > invert. Paint this border with the gradient in use
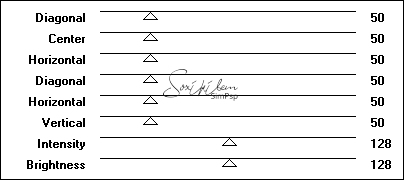
30 - Effects > Plugins > Graphics Plus > Cross Shadow > Default
Selections > invert.
31 - Effects > 3D Effects > Drop Shadow: 0, 0, 100, 40, black color. Selections > Select None.
32 - Image > Add Borders: 1px light color 3 px dark color 1px light color
33 - Edit > Copy in the decor_ByRoberta. Edit > Paste a New Layer. With the pick tool, position: Position X 27, Position Y 26. 34 - Edit > Copy in the titulo_roberta. Edit > Paste a New Layer. With the pick tool, position: Position X 608, Position Y 312.
If you wish, resize your work. Apply your watermark or signature. File > Export > JPEG Optimizer.  Créditos
Tube by Verlaine - Misted by Nicole - Mask:
creation.tine_masque249
Remaining
material provided by Roberta Maver
Feel free to send your versions. I will be happy to publish them on our website.
|