|
TRADUÇÕES:


Obrigada aos nossos
tradutores!
MATERIAL
1 Tube Principal à sua escolha
1 Misted Paisagem à sua escolha
Alpha_Beautiful_Day_byRoberta
Decor_Beautiful_Day_byRoberta
Titulo_Beautiful_Day_byRoberta

PLUGINS
FM Tile Tools
Richard Rosenman
ROTEIRO
1 - Abrir o material no PSP, duplique e feche o original.
Escolher duas cores para trabalhar.
Foreground #a48556
Background #2e2619

2 - Abra o arquivo Alpha_Beautiful_Day_byRoberta
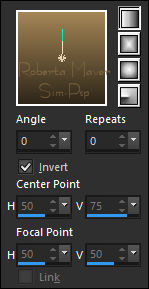
Pintar com o gradiente Linear, Angle 0, Repeats 0, Invert: Marcado
formado pelas cores em uso.
3 - Layers > New Raster Layer.
Selections > Select All.
Edit > Copy no Misted de Paisagem.
Edit > Paste Into Selection.
Selections > Select None.
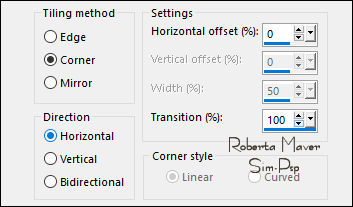
Effects > Image Effects > Seamless Tiling: Default
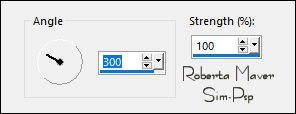
4 - Adjust > Blur > Motion Blur: por 2 vezes
Layers > Duplicate.
Image > Mirror > Mirror Horizontal.
Layers > Merge > Merge Down.
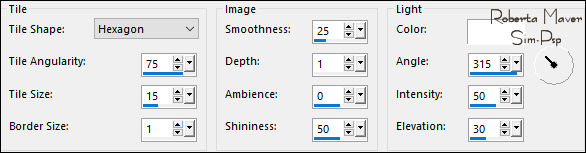
5 - Effects > Texture Effects > Tiles:
Color: #FFFFFF
6 - Effects > Geometric Effects
> Perspective Horizontal:
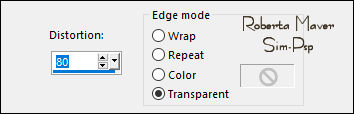
Image > Mirror > Mirror Horizontal.
Repetir o Effects > Geometric Effects
> Perspective Horizontal:
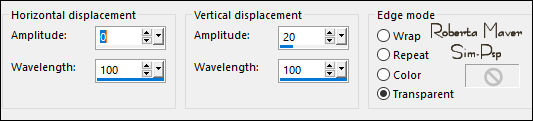
7 - Effects > Distortion Effects > Wave:
Com a ferramenta Pick Tool, posicionar: Position X:
-1, Position
Y: 177.
Selections > Select All.
Selections > Float.
Selections > Defloat.
Layers > Duplicate.
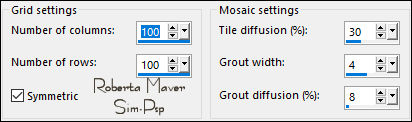
8 - Effects > Texture Effects > Mosaic - Antique:
Layers > Properties General > Blend Mode: Ovelay > Opacity: 100%
9 - Effects > 3D Effects > Drop Shadow:
Cor do Background #2e2619
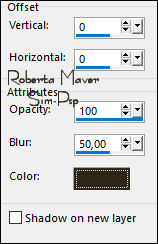
Ativar a Layer Raster 2
Repetir o Drop Shadow: agora com a cor #000000 (Preto)
Ativar a Layer Topo.
Layers > Merge > Merge Down.
Selections > Select None.
Ativar a Raster 1
10 - Layers > New Raster Layer.
Selections > Load/Save Selection > Load Selection From Alpha
Channel: Selection #1
Edit > Copy no fundo1.
Edit > Paste Into Selection.
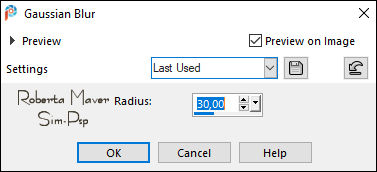
Adjust > Blur > Gaussian Blur: 30.
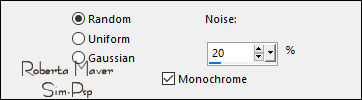
Adjust > Add/Remove Noise > Add Noise:
11- Effects > Plugins > FM Tile Tools > Blend Emboss:
Default
Selections > Invert.
12 - Layers > New
Raster Layer.
Pintar com o gradiente em uso.
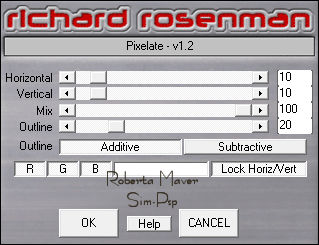
Effects > Plugins > Richard Rosenman > Pixelate:
Selections > Select None.
Layers > Merge > Merge Down.
13 - Layers > New Raster Layer.
Selections > Select All.
Edit > Copy no Misted de Paisagem.
Edit > Paste Into Selection.
Selections > Select None.
Effects > Image Effects > Seamless Tiling :
Selections > Load/Save Selection > Load Selection From Alpha
Channel: Selection #1
14 - Effects > Art Media Effects > Brush Strokes:

Selections > Invert.
Pressionar a tecla
Delete no teclado.
Selections > Select None.
Layers > Properties > General > Opacity: 75%
Ativar a Layer Topo
15 - Layers > New Raster Layer.
Selections > Load/Save Selection > Load Selection From Alpha Channel:
Selection #2
Pintar com o gradiente em uso.
Edit > Copy no Misted de Paisagem.
Edit > Paste Into Selection.
Adjust > Sharpness > Sharpen.
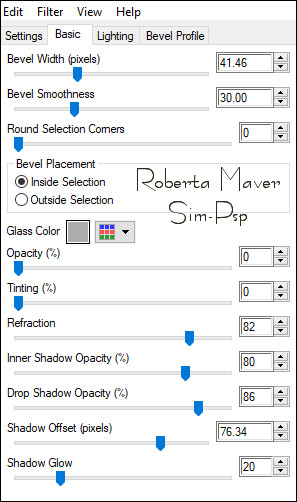
16 - Effects > Plugins > Alien Skin Eye Candy 5 Impact >
Glass.
Em Settings escolha Clear.
Selections > Select None.
17 - Layers > New Raster Layer.
Selections > Load/Save Selection > Load Selection From Alpha Channel:
Selection #3
Pintar com o gradiente em uso.
Edit > Copy no Misted de Paisagem.
Edit > Paste Into Selection.
18 - Effects > Art Media Effects > Brush Strokes:
a mesma configuração usada anteriormente.
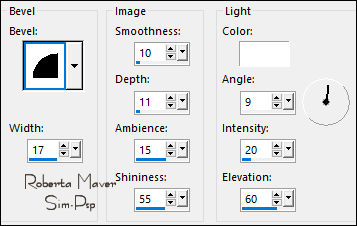
19 - Effects > 3D Effects > Inner Bevel:
20 - Effects > 3D Effects > Drop Shadow: 0, 0, 100, 50,
Color: #000000 (preto)
Repeat Drop Shadow Selections > Select None. Ativar a Layer Raster 4
21 - Edit > Copy no Deco_Beuatiful_Day_byRobertaM.
Edit > Paste as New Layer.
Não mova
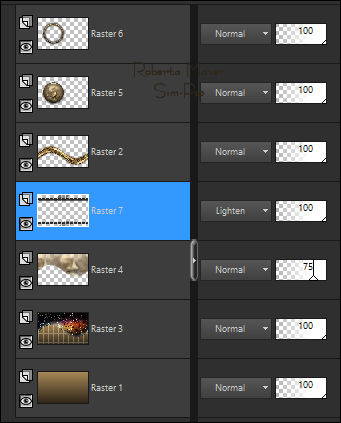
22 - Verificar a disposição das Layers
23
- Image > Add Borders > Symmetric:
1 px - color: Background
3 px - color: Foreground
1 px - color: Background
Selections > Select All.
Edit> Copy.
Image > Add Broders > Symmetric: 50 px com qualquer cor
Selections > Invert.
Edit > paste into selection.
Adjust > Blur > Gaussian Blur: 30.
24 - Effects > Art Media Effects > Brush Strokes:
Selections > Invert.
Effects > 3D Effects > Drop Shadow: 0, 0, 100, 50, Color: #000000
(preto)
Repeat Drop Shadow
Selections > Select None.
25 - Edit > Copy no Tube Principal.
Edit > Paste as new Layer.
Image > Resize se necessário.
Adjust > Sharpness > Sharpen.
Posicionar à sua escolha.
Effects > 3D Effects > Drop Shadow à sua escolha.
26 - Edit > Copy no
Titulo_Beautiful_Day_byRoberta
Edit > Paste as New Layer.
Posicione como desejar.
Effects > 3D Effects > Drop Shadow à sua escolha.
27- Image > Add Borders > simmetric: 1px color: Preto
28 -
Se você desejar, redimensiona seu trabalho.
Aplicar sua marca d'água ou assinatura.
File > Export > JPEG Optimizer.
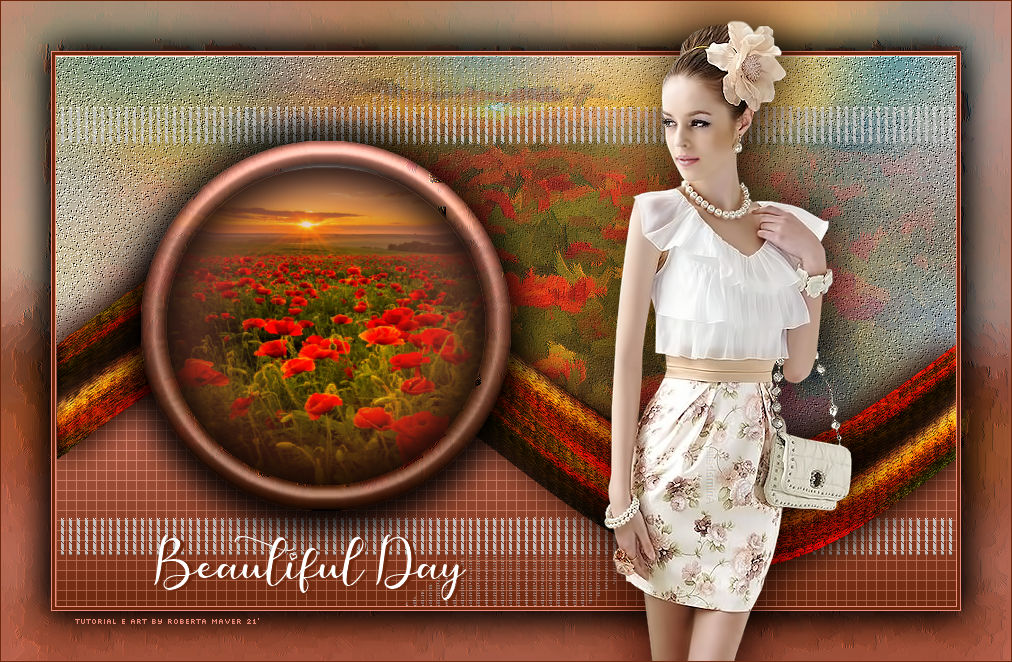
Créditos:181_Femmes_Page7_Animabelle / Paisagem: SuizaBella_Ref_AG-001160


Créditos
Tutorial e Art final criado por Roberta Maver
Tube: woman tubes 153-HaZaL
Paisagem: mtfp_misted_scenic
09/11/2021
Sinta-se à vontade para enviar suas versões.
Terei todo o prazer em publicá-las em nosso site.


|
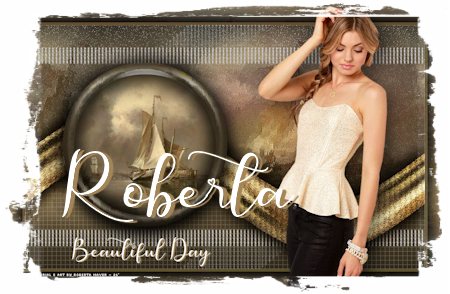
Tutorial criado por
Roberta Maver em Novembro/2021,
para
SIM-PSP.
Não poderá ser copiado, retirado de seu lugar, traduzido
ou utilizado em listas de aprendizados ou grupos sem o
consentimento prévio da autora. |
|