|
TRADUÇÕES:
Obrigada aos nossos
tradutores!
MATERIAL
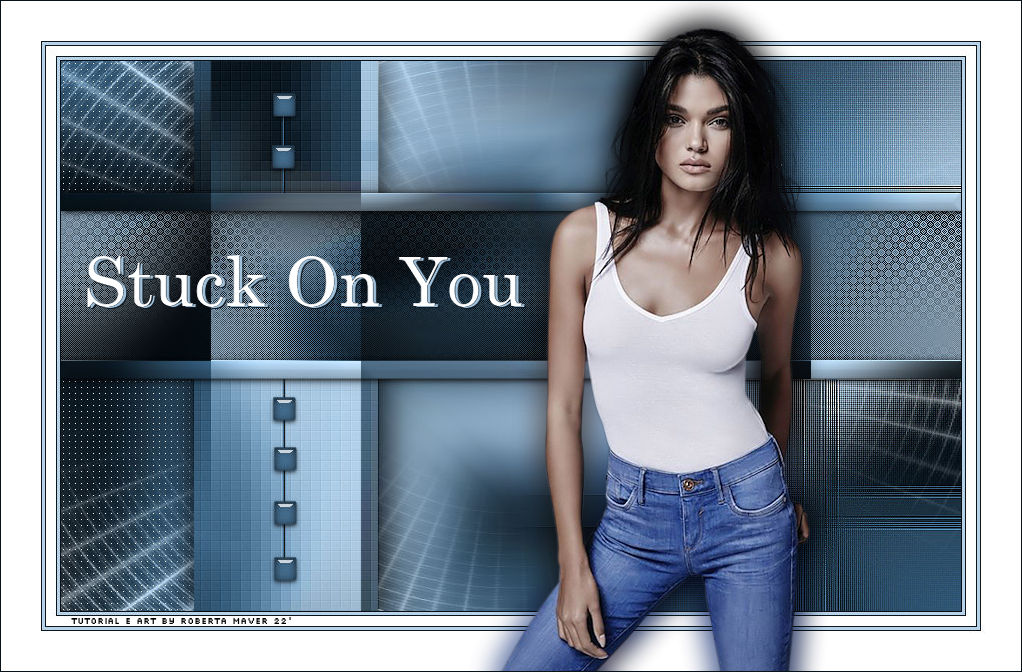
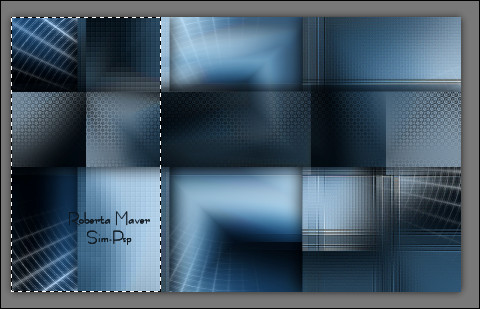
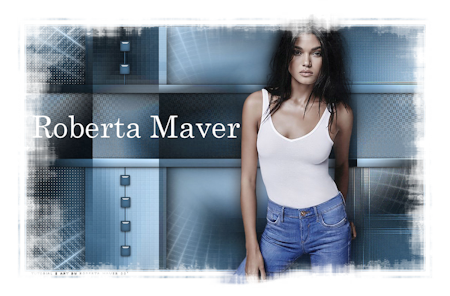
Alpha_Stuck_On_You_byRobertaMaver Deco1_Stuck_On_You_byRobertaMaver titulo_Stuck_On_You_byRobertaMaver
3-
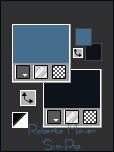
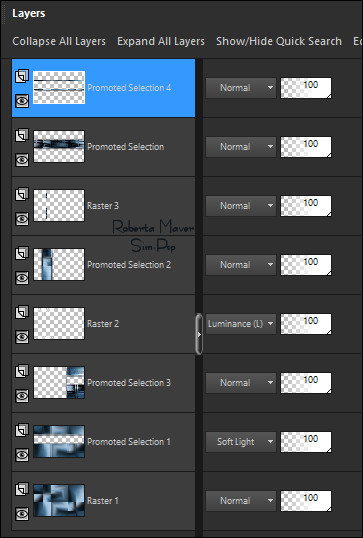
Cor Extra #b6d3ea Configuração da paleta Materials:
Comfigure as cores na ordem: 2 - 1 - 3
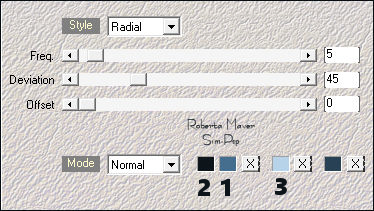
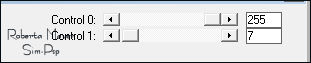
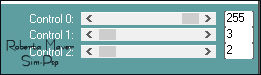
Effects > Plugins > Mehdi > Sorting Tiles:
Effects > 3D Effects > Drop Shadow: Color: #000000
Ativar a Layer Raster 1
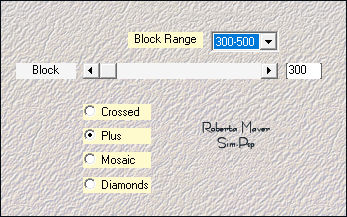
7 - Effects > Plugins > Toadies > What Are You?:
Layers > Properties > General > Blend Mode: Soft Light - Opacity: 100% Ativar a Layer Raster 1
8 - Selections > Load/Save Selection > Load Selection From
Alpha Channel: Selection #3
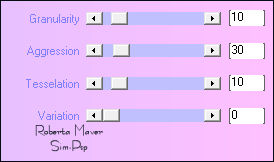
9 - Effects > Plugins > Xero > Fritillary:
Ativar a Layer Promoted Selection 1
10 - Selections > Load/Save Selection > Load Selection
From Alpha Channel: Selection #4 Ainda selecionada...
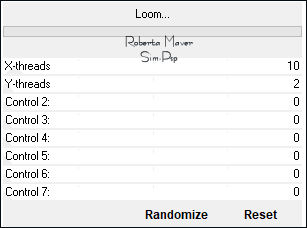
11 - Effects > Plugins > Unlimited 2.0 > FunHouse > Loom: Default
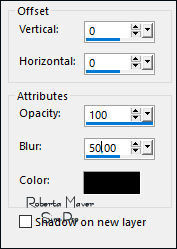
Effects > Edge effects > Enhance. Effects > 3D Effects > Drop Shadow: 0 / 0 / 100 /50, Color: #00000 Selections > Select None.
12 - Edit > Copy no Deco_Stuck_On_You_byRobertaMaver Layers > Properties > General > Blend Mode: Luminance (legacy) - Opacity: 100% Ativar a Layer Promoted Selection 1
13 - Com a Ferramenta Selection Tooll (S): Feather: 0, selecionar como no exemplo:
14 - Effects > Plugins > Carolaine & Sensibility > CS-LDots:
Selections > Select None. Ativar a Layer Promoted Selection 2
15 - Edit > Copy no Deco1_Stuck_On_You_byRobertaMaver. Com a Ferramenta Pick Tool, posicionar: Position X: 205 Position Y: 28 Ativar a Layer Raster 1
16 - Selections > Load/Save Selection > Load Selection From
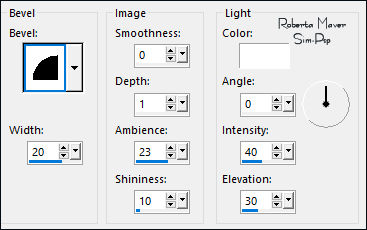
Alpha Channel: Selection #5 Selections > Select None. Effects > 3D Effects > Inner Bevel:
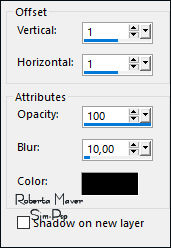
Effects > 3D Effects > Drop Shadow:
Posição da Layers:
1px - color: Background #0d151b 10 Cor: #FFFFFF (branco) 1px - color: Background #0d151b 3 px - Cor extra #b6d3ea
1px - color: Background #0d151b
19- Edit > Copy no titulo_Stuck_On_You_byRobertaMaver
Effects > 3D Effects > Drop Shadow: 1/3/100/0, Color:
Foreground #446d8e ou à sua escolha.
Créditos Tube Principal: Tubed by KarineDreams 10/02/2022
Sinta-se à vontade para enviar suas versões. Terei todo o prazer em publicá-las em nosso site.
|