|
TRADUÇÕES
Obrigada aos nossos tradutores!
MATERIAL: 1 Tube Principal à sua
escolha Alpha_LaBelle_byRobertaMaver Deco01_LaBelle_ByRobertaMaver Deco02_LaBelle_ByRobertaMaver Titulo_LaBelle_ByRobertaMaver @nn_230314_mask_352_1tdstudio
PLUGINS: Carolaine & Sensibility >
CS-DLines
Nota: Fique à
vontade para alterar os Blends de acordo com o material
Selections > Select All. Edit > Copy no Misted
Paisagem Selections > Select None.
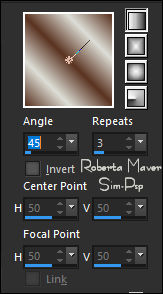
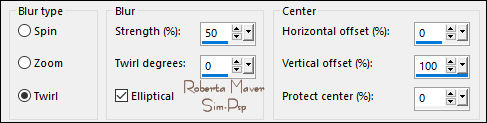
Adjust > Blur > Radial Blur:
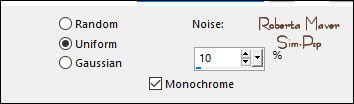
Effects > Edge Effects > Enhance. Adjust > Add/Remove Noise > Add Noise
5 - Layers > Duplicate Image > Mirror > Mirror Vertical. Layer > Properties > General > Blend Mode: Normal - Opacity: 50% Layers > Merge > Merge Visibile. Layers > Duplicate Layer > Properties > General > Blend Mode: Overlay - Opacity: 100% Layers > Merge > Merge Down.
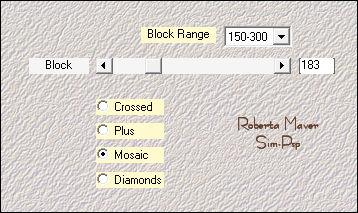
6 - Layers > Duplicate Effects > Plugins > Mehdi
> Sorting Tiles: Com a Ferramenta Selection Tool: Feather:0, selecionar como no exemplo:
Ainda Selecionada...
7 - Edit > Copy no Misted Paisagem Edit > Paste Into Selection. Adjust > Blur > Radial Blur.
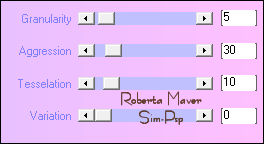
8 - Effects > Plugins > Xero
> Fritillary:
9 -
Effects > Plugins > [AFS IMPORT] > sqborder2: Selections > Select None. Layer > Properties > General > Blend Mode: Normal - Opacity: 50% Effects > 3D Effects > Drop Shadow: 0, 0, 80, 60, Color: #000000 (preto)
Pintar com a cor do Foreground #5a3321 Layers > New Mask Layer > From Image: @nn_230314_mask_352_1tdstudio
11 - Layers > New
Raster Layer. Selections > Select None.
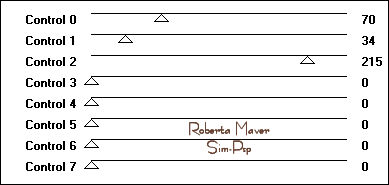
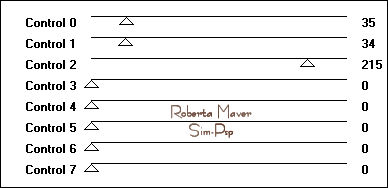
12 - Effects > Image Effects > Seamless Tiling: Default. Effects > Plugins > Carolaine and Sensibility > CS-D Lines:
Effects > 3D Effects > Drop Shadow: 0, 0, 80, 60, Color: #000000 (preto)
13 - Layers > New
Raster Layer.
Adjust > Blur > Gaussian Blur: 20
14 - Edit > Copy no Misted Paisagem Edit > Paste Into Selection. Effects > Plugins > [AFS IMPORT] > sqborder2:
Selections > Select None.
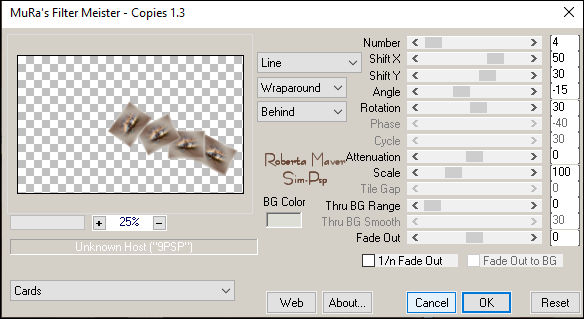
15 - Effects > Plugins > Mura's Meister > Copies:
Com a Ferramenta Pick Tool: Position X 26, Position Y 72. Adjust > Sharpness > Sharpen. Effects > 3D Effects >
Drop Shadow: 0, 0, 80, 60, Color: #000000 (preto) 16 - Edit > Copy
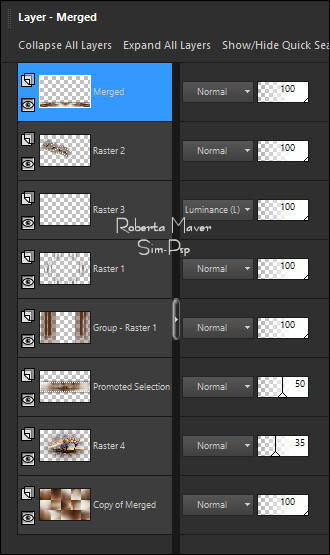
no Deco01_LaBelle_ByRobertaMaver Layers > Arrange > Move Down. Ativar a Layer Merged
17 - Layers >
Arrange > Bring to Top.
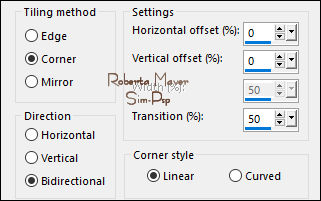
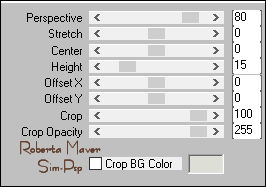
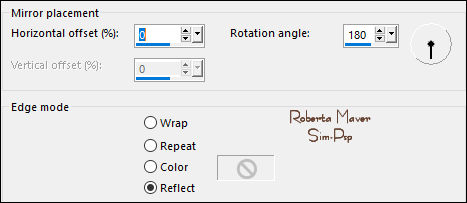
Effects > Reflection Effects > Rotating Mirror:
Effects > 3D Effects > Drop Shadow: 0, 0, 100, 50, Color: #000000 (preto) Ativar a Layer Copy of Merged
18 - Edit > Copy no Misted Paisagem Edit > Paste as New Layer. Layer > Properties >
General > Blend Mode: Normal - Opacity: 35%
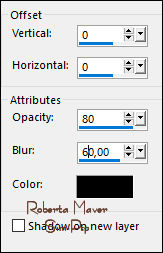
Effects > 3D Effects > Drop Shadow: 0, 0, 100, 40, Color: #000000 (preto) Selections > Select None.
Adjust > Sharpness > Sharpen. Effects > 3D Effects > Drop Shadow: 1, 2, 100, 0, Color: #ddded6 (cor do Background) ou outra cor à sua
escolha Colorizar à sua escolha. Effects > 3D Effects > Drop Shadow: à sua escolha
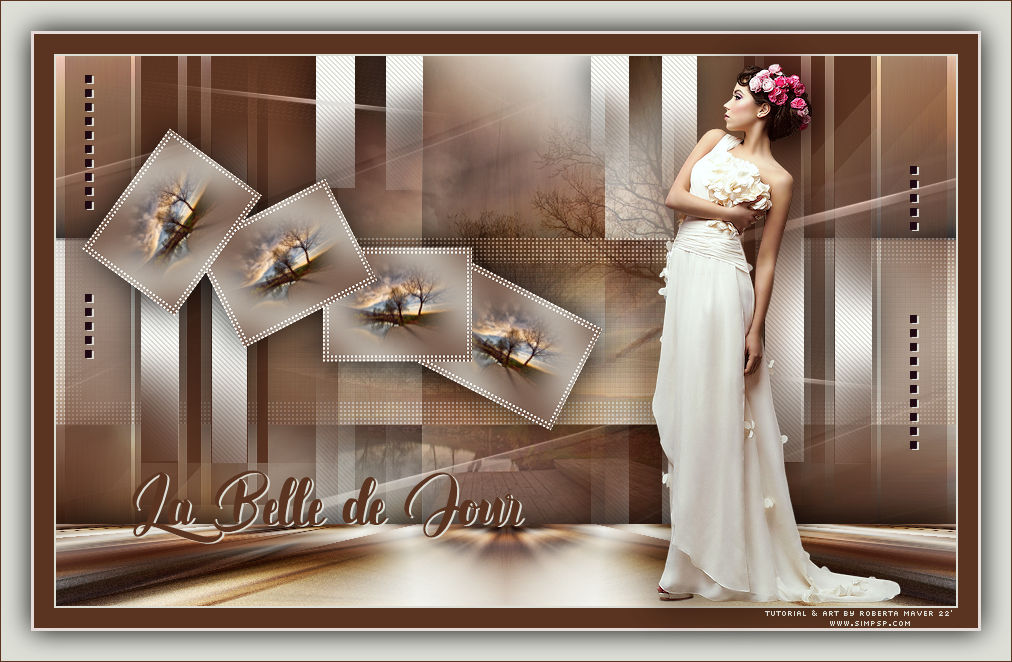
Créditos
Formatação e Tutorial by
Roberta Maver 15/05/2022
Sinta-se à vontade para enviar suas versões. Terei todo o prazer em publicá-las em nosso site.
|