|
MATERIAL 1 Main Tube 1 Flower Tube Título_Leni_Diniz-1 mask_leni2 mask2
PLUGINS AAA Frames AP [Lines] Carolaine & Sensibility Mura's Seamless
TUTORIAL Choose two colors to work with.
#44237c (dark color)
Paint with the darkest color (#cd4142).
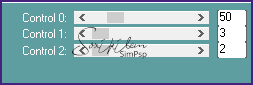
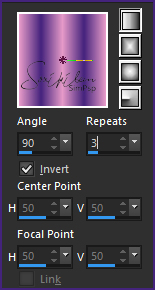
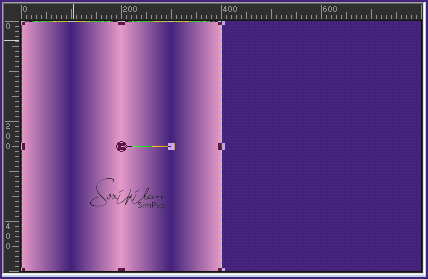
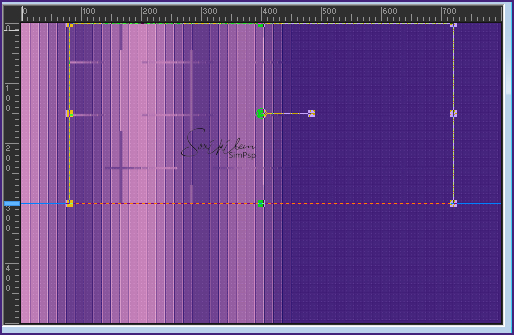
Layers > New Layer and paint with the gradient.
4- Adjust > Blur > Guassian Blur > 25.
5 - Layers > Merge > Merge Down.
6- Effects > Distortion Effects > Pixelate: 15, with Symmetric checked.
Effects > Edge Effects > Enhance, 2 times.
7- Repeat item 2, plugin Carolaine and Sensibility > CS-LDots.
8- Layers > Duplicate. Layers > New Mask Layer > From Image: mask_leni2. Layers > Merge > Merge Group.
9- Image > Resize 80%, All layers unchecked.
10- Objects > Align > Top. With the Pick Tool, decrease to a height of 300 pixels.
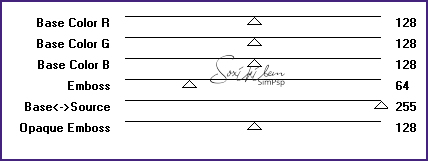
12- Plugin Mura's Seamless > Emboss at Alph.
13- Effects > 3D Effects > Drop Shadow: 0, 0, 80, 20, black color.
14- Layers > New Raster Layer. Paint with the darkest color (#44237c). Layers > New Mask Layer > From Image: mask2. Layers > Merge Group.
15- Plugin Mura's Seamless > Emboss at Alph.
Adjust height up to 200 pixels.
Repeat item 15.
17- Edit > Copy in the Flower tube. Edit > Paste As New Layer. Position with the pick tool: Position X 0 e Position Y 44.
18- Enable layer raster 1. Edit > Copy.
19- Image > Add Border: 2 px color, #000000 (black) 2 px with the darkest color (#cd4142) 2 px color, #000000 (black)
20- Selections > Select All. Imagem > Add Border: 50 px with any color. Selections > Invert. Edit > Paste Into Selection. Image > Mirror Horizontal.
21- Adjunt > Blur > Guassian Blur > 5. Selections > Invert.
22- Effects > 3D Effects > Drop Shadow: 0, 0, 80, 30, black color. Selections > None.
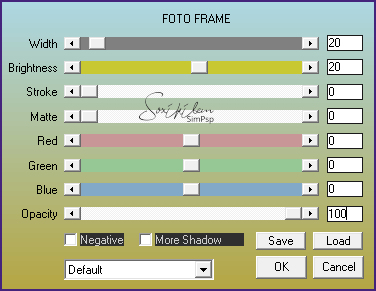
23- Plugin > AAA Frames > Photo Frames.
Imagem > Add Border: 2 px, color #000000 (black).
23- Edit > Copy in the Main Tube.
24- Edit > Paste As New Layer, position to the right. If you need to resize, apply Adjust> Sharpness> Sharp. Effects > 3D Effects > Drop Shadow as you prefer.
25 - Edit > Copy in the Título_Leni_Diniz-1. Edit > Paste a New Layer. Position with the pick tool: Position X 77, Position Y 79.
26- Layers> New Raster Layer to sign or place your watermark.
27- File > Export > JPEG Optimizer.
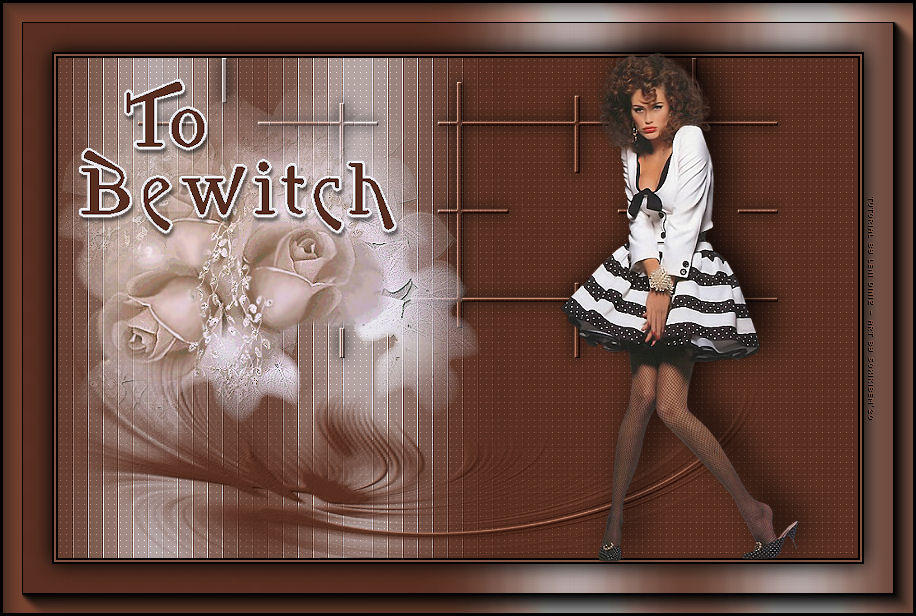
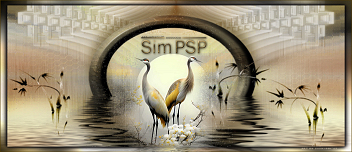
Credits Tutorialby Leni Diniz - Art by Soxikibem Version 1: Main Tube by Gabry - Flower Tube by Gini Version 2: Main Tube by Nicole - Tube flower received in group of exchanges without credits
Mask2
Aqui - titulo by Leni Diniz Tutorial by Leni Diniz'20
Feel free to submit your versions. I'll be happy to post them on our site.
|