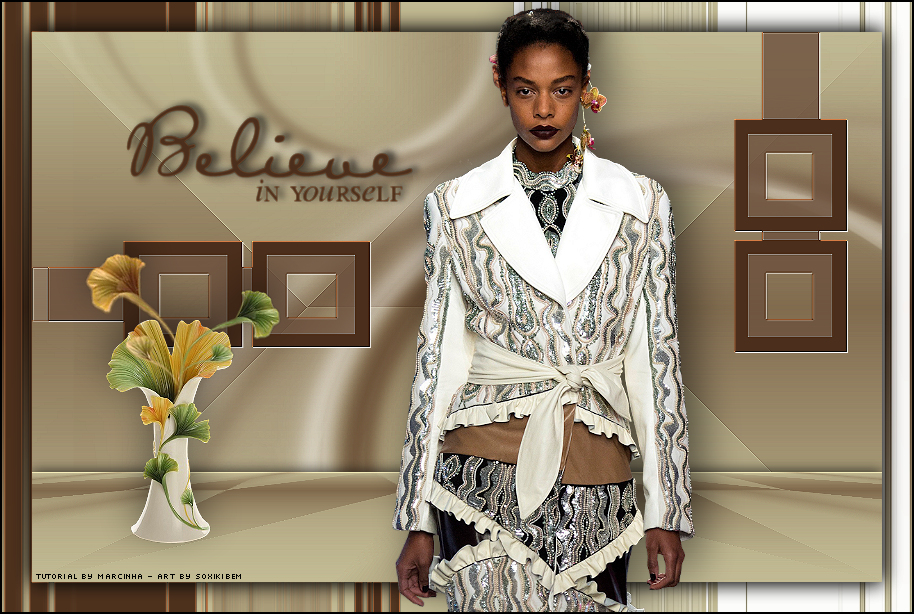
|
English Translation by Soxikibem Original Tutorial
Obrigada aos nossos tradutores!
MATERIAL 1 Main Tube of your choice 1 decorative Tube of your choice masktutorialsienna2_camerontags Astrid masker 112 masktutorialsienna2_camerontags
PLUGINS Simple > Pizza Slice Mirror MuRa's Meister > Perspective Tiling
TUTORIAL 1 - Open tubes and masks in PSP..
2 - Choose two colors. Here I used : Foreground: #f8c14f and background #030303
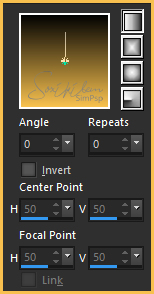
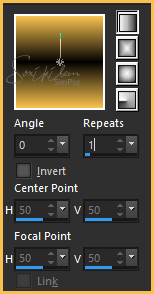
3 - Form a grandient> Linear: Angle 0, Repeats 0, Invert unchecked.
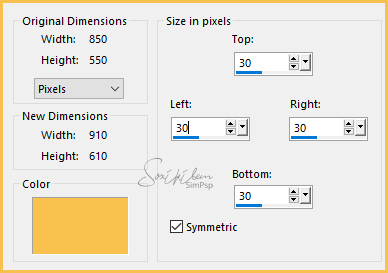
4 - Open a new 850x550px image. Paint with the gradient.
5 - Plugin Simple > Pizza Slice Mirror.
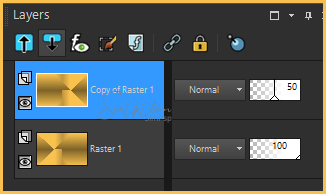
6 - Layers > Duplicate.
7 - Image > Mirror > Mirror Horizontal.
8 - Decrease the opacity of this layer by 50%.
9 - Layers > Merge > Merge down.
10 - Effects > Edge Effects > Enhance.
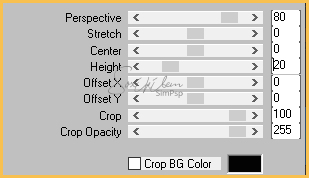
11 - Layers > Duplicate. Plugin MuRa's Meister > Perspective Tiling.
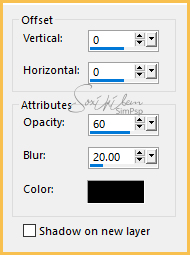
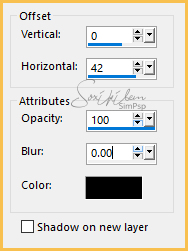
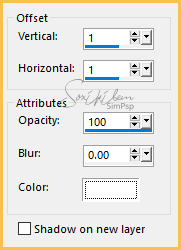
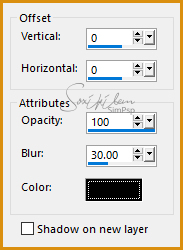
12 - Effects > 3D Effects > Drop Shadow.
13 - Adjust > Shapness > Sharpen.
14 - Layers > New Raster Layer. Paint with the color #FFFFFF (white)
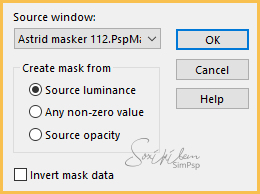
15 - Layers > New Mask Layer > From Image: Astrid masker 112
16 - Layers > Merge > Merge Group.
17 - Effects > 3D Effects > Drop Shadow with the background color.
18 - Adjust > Shapness > Sharpen.
19 - Layers > Arrange > Move Down.
20 - Layers > New Raster Layer. Paint with the background color.
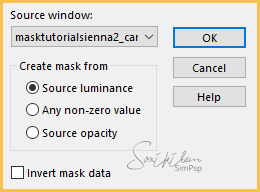
21 - Layers > New Mask Layer > From Image: masktutorialsienna2_camerontags
22 - Layers > Merge > Merge Group.
23 - Layers > Arrange > Move UP.
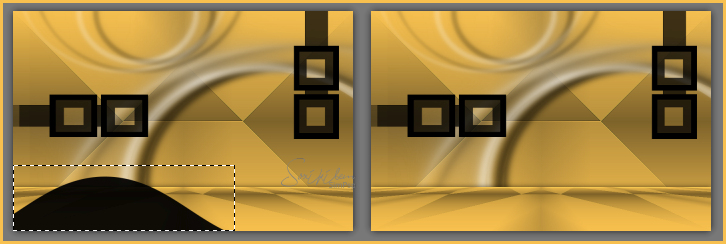
24 - With the Selection Tool, select this part of Mask and Edit> Cut.
25 - Selections > Select None.
26 - Effects > 3D Effects > Drop Shadow
with the color #FFFFFF (white)
27 - Effects > Edge Effects > Enhance.
28 - Layers > Merge > Merge Visible.
29 - Selections > Select All.
30 - Image > Add Boders:
30
31 - Selections > Invert.
Paint with the
Gradient formed by chosen colors
32 - Layers > New Raster Layer. Paint with the background color.
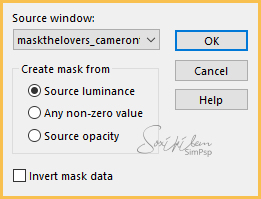
33 - Layers > New Mask Layer > From Image:
maskthelovers_camerontags
34 - Layers > Merge > Merge Group.
35 - Layers > New Raster Layer. Paint with the color #FFFFFF (white)
36 - Layers > New Mask Layer > From Image:
maskthelovers_camerontags
37 - Layers > Merge > Merge Group. Selections > Select None.
38 - Image > Mirror > Mirror Horizontal.
39 - Layers > Merge > Merge down.
40 - Effects > Edge Effects > Enhance.
41 - Selections > Select All.
42 - Selections > Modify > Contract: 30.
43 - Effects > 3D Effects > Drop Shadow
with the color #000000 (black).
44 - Selections > Select None.
45 - Edit > Copy in tube. Edit > Paste a New Layer. Position and apply Drop Shadow as you prefer.
46 - Edit > Copy in decorative tube. Edit > Paste a New Layer. Position and apply Drop Shadow as you prefer.
47 - Edit > Copy in WordArt. Edit > Paste a New Layer. Position and apply Drop Shadow as you prefer.
48 - Finish with a 2px border in black color.
49 - Sign your work and save in jpeg.
Créditos
Version 1 & 2:
Tube by Cady - Tube Vase by CibiBijoux
Tutorial by
Márcinha
|