|
TRADUÇÕES:
Obrigada aos nossos tradutores!
MATERIAL 1 Tube Principal à sua escolha 1 Misted Paisagem à sua escolha 1 Tube Decorativo à sua escolha decor1_leni titulo_leni *Ao usar o material lembre-se de apagar a Marca D'água.
Plugins AAA Frames Alien Skin Eye Candy 5 Carolaine & Sensibility Déformations Flaming Pear Mura's Meister
* Os Blends podem variar de acordo com as cores que esta usando. Fique à vontade para testar outros blends.
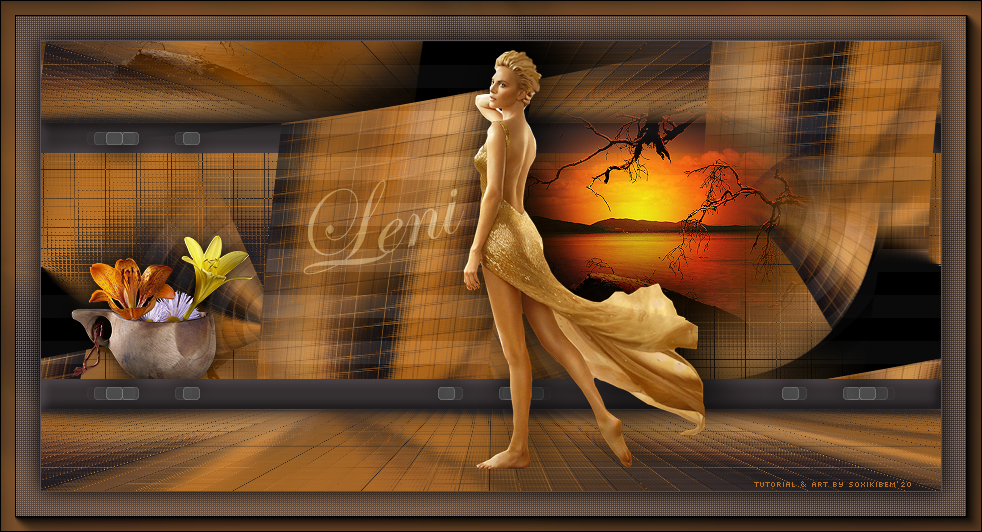
Tutorial
1 - Abrir o material no PSP, duplique e feche o original. Escolher 2 cores para trabalhar. Foreground #574e52 Background #bf7425
2 - Abra uma imagem transparente de 900x450px. Pintar com a cor do background Selections > Select All.
3 - Edit > Copy no Tube principal. Edit > Paste Into Selection. Selections > Select None.
4 - Effects > Image Effects > Seamless Tiling: Default.
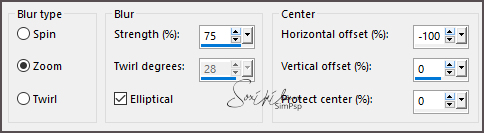
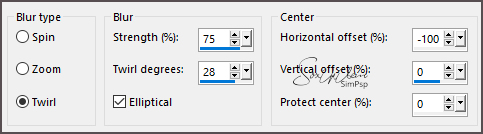
5 - Adjust > Blur > Radial Blur.
6 - Plugin D éformations > Mosaique de verre (hr).
7 - Layers > Duplicate. Image > Resize: 60%, all layers desmarcado. Image > Free Rotate: Left, 90, all layers desmarcado.
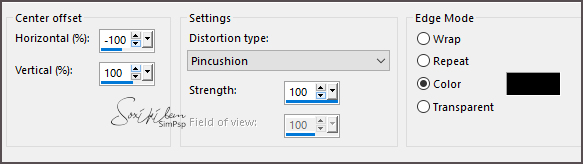
8 - Effects > Distortion Effects > Lens Distortion. Com a cor preta em color ou a cor do foreground.
9 - Effects > Image > Effects > Seamless Tiling: Default.
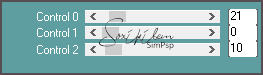
10 - Plugin Carolaine & Sensibility > CS-HLines.
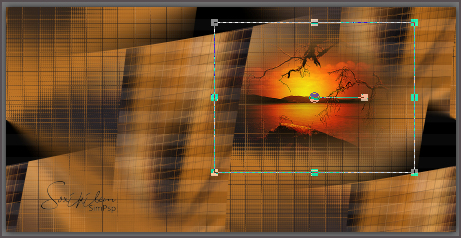
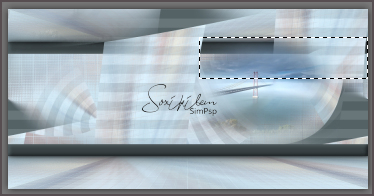
11 - Edit > Copy no Misted Paisagem. Edit > Paste a New Layer. Posicione como no print abaixo.
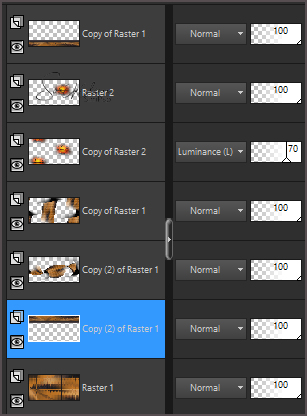
12 - Layers > Duplicate. Effects > Image Effects > Seamless Tiling: Default. Layers > Arrange > Move Down. Layers > Properties > Blend Mode: Luminence, Opacity: 70%.
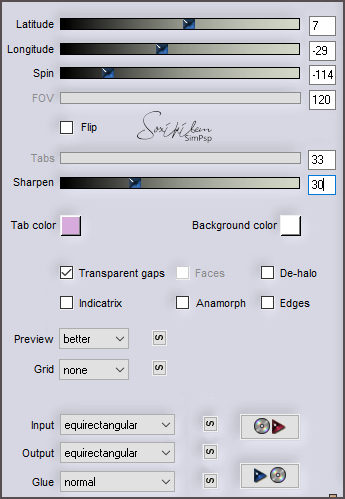
13 - Ative a layer Copy of Raster 1. Layers > Duplicate. Plugin Flaming Pear > Flexify 2.
Layers > Arrange > Move Down.
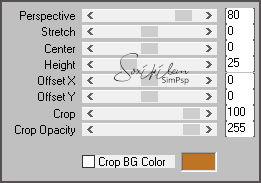
14 - Ativar a Layer Raster 1. Layers > Duplicate. Layers > Arrange > Bring to Top. Plugin Mura's Meister > Perspective Tiling.
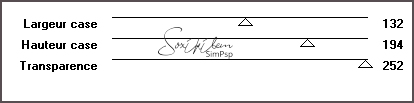
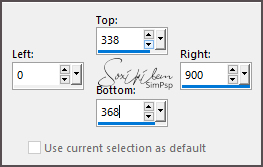
15 - Layers > New Raster Layer. Ferramenta Selection Tool > Custon Selection.
Pintar esta seleção com a cor do foreground. Selections > Select None.
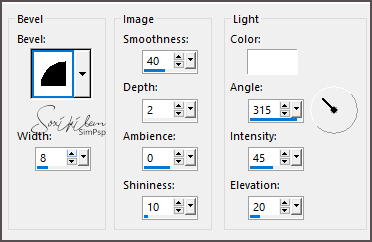
17 - Effects > 3D Effects > Inner Bevel.
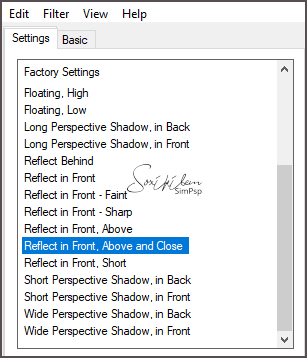
18 - Plugin Alien Skin > Eye Candy 5 > Impact > Perspective Shadow. Em Settings selecione Reflect in Front, Above and Close.
19 - Layers > Merge > Merge Down. Layers > Duplicate. Image > Mirror > Mirror Vertical. Mover esta layer para ficar acima da Raster 1.
*Se estiver usando tonalidades claras como usei no segundo exemplo, selecione como no print abaixo e aperte a tecla Delete do teclado. Selections > Select None.
20 - Ativar a layer do topo de todas. Edit > Copy no decor1_leni. Edit > Paste a New Layer.
21 - Edit > Copy no Tube Principal. Edit > Paste a New Layer. Posicione. Effects > 3D Effects > Drop Shadow: como preferir.
22 - Edit > Copy no titulo_leni. Edit > Paste a New Layer. Com a ferramenta Pick Tool posicione: Position X 262, Position Y 139. Layers > Properties > Blend Mode: Soft Light.
* Você pode usar a Fonte Edwardian Script ITC.ttf (em material) para escrever com a cor de seu trabalho e aplicar Drop Shadow a gosto.
23 - Edit > copy no Tube decorativo. Edit > Paste a New Layer. Posicione. Effects > 3D Effects > Drop Shadow: como preferir.
24 - Image > Add Borders: 1px cor foreground. Edit > Copy. Selections > Select All.
25 - Image > Add Borders: 40px com qualquer cor. Selections > Invert. Edit > Paste Into Selection. Adjust > Blur > Radial Blur.
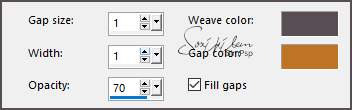
26 - Effects > Texture Effects > Weave. com as cores do foreground e background.
27 - Selections > invert. Effects > 3D Effects > Drop Shadow: 0, 0, 100, 30. Selections > Invert.
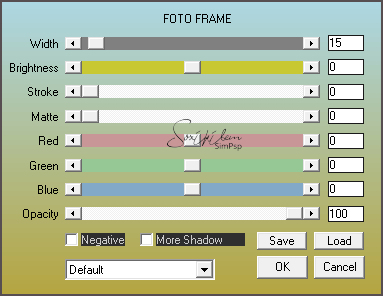
28 - Plugin AAA Frames > Foto Frame.
29 - Selections > Select None.
30 - Se você desejar, redimensiona seu trabalho.Aplicar sua marca d'água ou assinatura. File > Export > JPEG Optimizer.
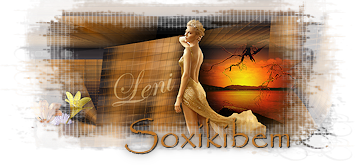
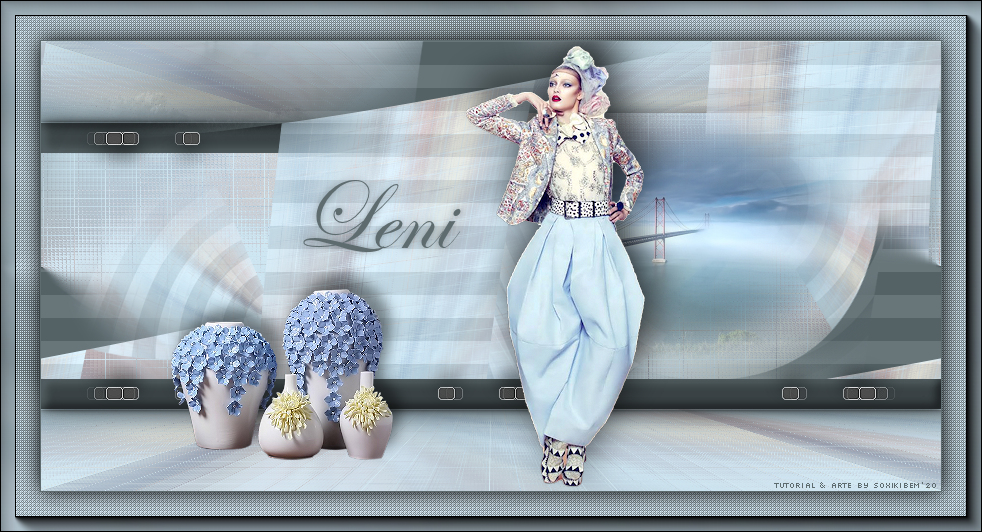
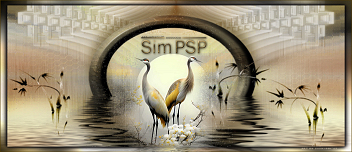
CREDITOS Versão 1 & 2: Tube by Josy - Misted Paisagem by Maryse - Tube Vaso by L&B Tubes
Sinta-se à vontade para enviar suas versões. Terei todo o prazer em publicá-las em nosso site.
|