|
TRADUÇÕES:
Obrigada aos nossos tradutores!
MATERIAL 1 Tube à sua escolha 1 Misted Paisagem à sua escolha tituloBySoxikibem DecorBySoxikibem
Pluguins Alien Skin Eye Candy 5: Textures Alien Skin Eye Candy 5: Impact Mura's Meister Toadies
TUTORIAL
1 - Abrir o material no PSP, duplique e feche os originais. Escolher duas cores para trabalhar, aqui usei as cores:
Foreground: #5d63a2 Background: #d4b1b6 Prepare um gradient Rectangular.
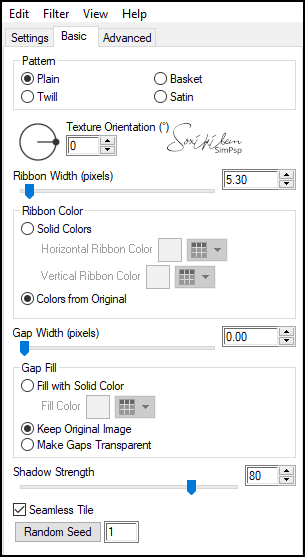
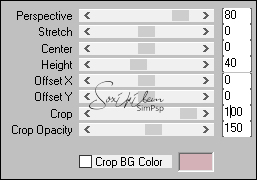
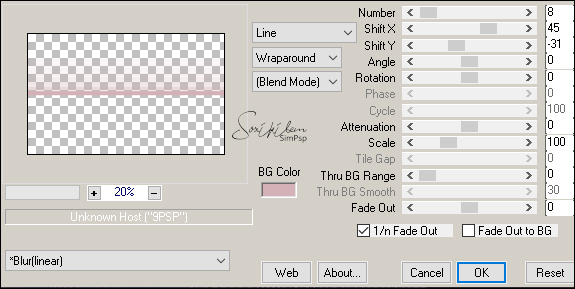
2 - Abra uma transparência de 980x600px. Pintar com o gradient. Effects > Plugin > Alien Skin Eye Candy 5: Textures > Weave. Em Setting escolha Plain, Solid Fill Configure a aba Basic como no print abaixo.
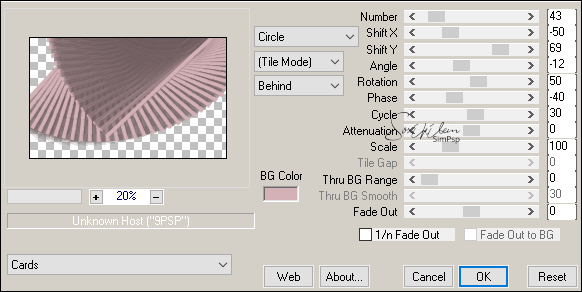
3 - Effects > Plugin Toadies > Weaver
Effects > Edge Effects > Enhance.
4 - Layers > Duplicate. Effects > Plugin Mura's Meister > Perspective Tiling.
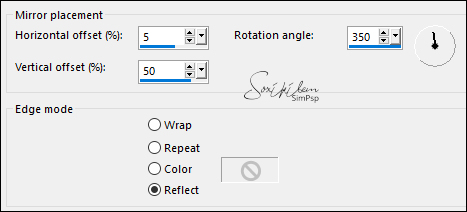
5 - Effects > Reflection Effects > Rotating Mirror.
Effects > 3D Effects > Drop Shadow: 0, 0, 100, 80, com a cor do foreground.
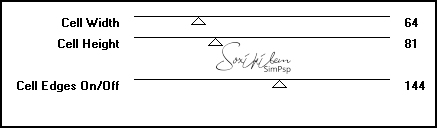
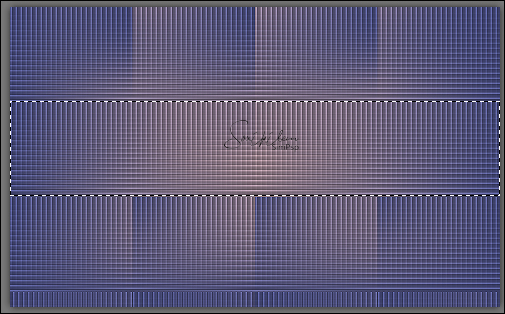
6 - Feche a visibilidade da layer Copy of Raster 1. Ative a layer Raster 1. Com a ferramenta Selection, selecione como abaixo.
Layers > New Raster Layer. Pintar esta seleção com a cor do background. Selections > Select None. Layers > Properties > General > Blend Mode: Screen, Opacity: 80%.
7 - Layers > Duplicate. Effects > Gemetric Effects > Perspective - Horizontal: 90, Transparent. Effects > Gemetric Effects > Perspective - Horizontal: -90, Transparent. Layers > Properties > General > Mude o Blend Mode: para Multiply.
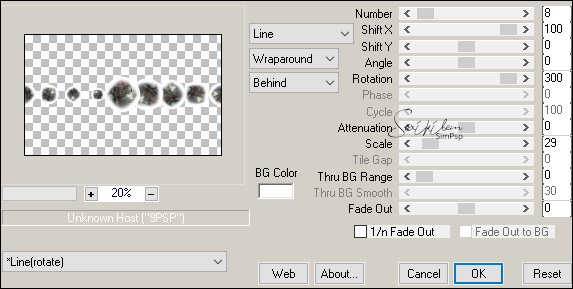
8 - Effects > Plugin Mura's Meister > Copies.
9 - Effects > 3D Effects > Drop Shadow: 1, 1, 100, 0, cor preta.
10 - Layers > Duplicate. Effects > Plugin Mura's Meister > Copies.
Layers > Properties > General > Blend Mode: Screen, Opacity 50%.
11 - Layers > New Raster Layer. Selections > Select All. Edit > Copy no Misted Paisagem. Edit > Paste Into Selection. Selections > Select None. Layers > Properties > General > Blend Mode: Overlay, Opacity 50%.
12 - Layers > New Raster Layer. Pintar com a cor branca. Selections > Select All. Edit > Copy no Misted Paisagem. Edit > Paste Into Selection. Selections > Select None.
13 - Effects > Geometric Effects > Circle: Transparent. Image > Resize: 30%, all layers desmarcado.
14 - Effects > Plugin Mura's Meister > Copies.
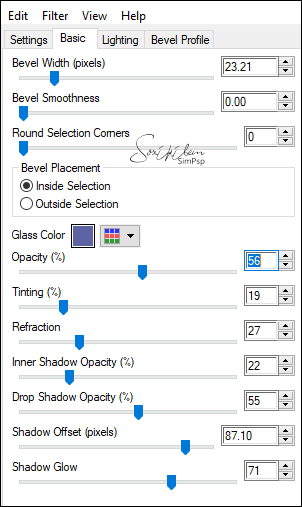
15 - Effects > Plugin > Alien Skin Eye Candy 5: Impact > Glass. Settings: Clear Em glass color coloque a cor do foreground.
16 - Pick Tool: Position X 0, Position Y 158. Layers > Properties > General > Blend Mode: Hard Light.
17 - Ativar e abrir a layer Copy of Raster 1. Edit > Copy no Tube Principal. Edit Paste a New Layer. Posicione. Effects > 3D Effects > Drop Shadow como preferir.
18 - Image > Add Borders. 1px cor foreground 5px cor background 1px cor foreground 30px cor background. 1px cor foreground
19 - Edit > Copy no DecorBySoxikibem. Edit > Paste a New Layer.
20 - Edit > Copy no tituloBySoxikibem. Edit > Paste a New Layer. Pick Tool: Position X 223, Position Y 43.
21 - Aplicar sua marca d'água ou assinatura. File > Export > JPEG Optimizer.
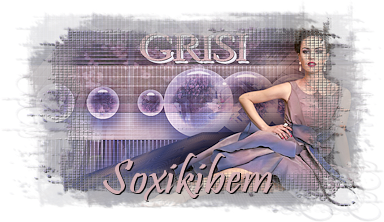
CREDITOS Tube Principal & Paisagem by Grisi Tutorial by Soxikibem'20
Sinta-se à vontade para enviar suas versões. Terei todo o prazer em publicá-las em nosso site.
|