|
Tutorial By Soxikibem English Translation by SIM-PSP moderation Original Tutorial
MATERIAL 1 Main Tube of your choice 1 Decorative tube of your choice. tituloMariaTbySoxikibem
Plugins Flaming Pear Mura's Meister VM Distortion
Tutorial
1 - Open the material on the PSP, duplicate and close the original. Choose two colors to work with. Foreground: #040204 Background: #f0ab00
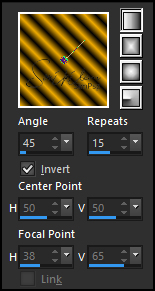
2 - Open a transparent image of 980x600px. Paint with the gradient: Radial - Angle: 182 - Repeats: 3 - Invert: marked
3 - Effects > Art Media Effects > Brush Strokes.
4 - Effects > Plugins VM Distortion > Vision Impossible.
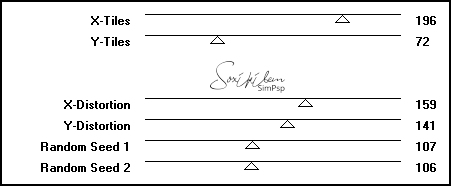
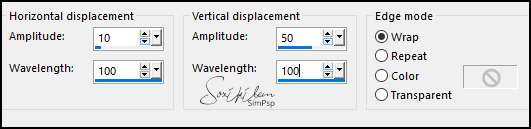
5 - Effects > Distortion Effects > Wave.
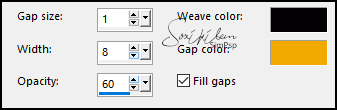
6 - Effects > Texture Effects > Weave.
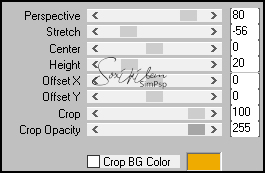
7 - Layers > Duplicate. Effects > Plugins Mura's Meister > Perspective Tiling.
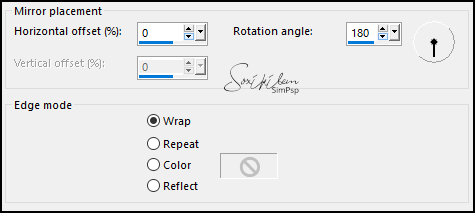
8 - Effects > Reflection Effects > Rotating Mirror.
9 - Effects > 3D Effects > Drop Shadow. Color: Background.
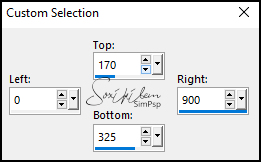
10 - Activate the layer Raster 1. Selection Tool > Custom Selection.
Selections > Promote Selection to Layer. Selections > Select None.
11 - Effects > Plugins VM Distortion > FlipChop
Image > Mirror > Mirror Vertical.
12 - Effects > Plugins Flaming Pear > Ghost.
13 - Effects > 3D Effects > Drop Shadow: -5, 0, 100, 15, color: Background.
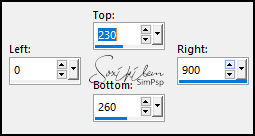
14 - Layers > New Raster Layer. Selection Tool > Custom Selection.
Paint this selection with the background color. Selections > Select None. Layers > Properties > General: Opacity 80%.
15 - Effects > 3D Effects > Drop Shadow: 40, 0, 100, 0, color: Foreground.
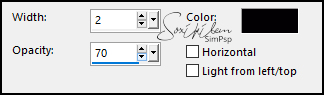
16 - Effects > Texture Effects > Blinds. Color: Foreground.
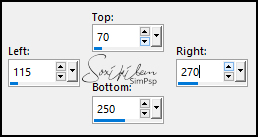
17 - Layers > New Raster Layer. Selection Tool > Custom Selection.
Paint with the gradient: Linear - Angle: 45 - Repeats: 15 - Invert: marked
18 - Selections > Modify > Contract: 4. Press the Delete key on the keyboard. Paint this selection with the background color. Selections > Select None. Layers > Properties > General: Opacity 75%.
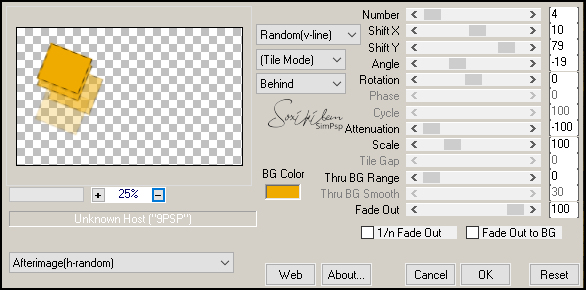
19 - Effects > Plugins Mura's Meister > Copies.
Note: This step may be different
because of the plugin that applies different positions
20 - Layers > Duplicate. Image > Mirror > Mirror Horizontal. Image > Flip > Flip Vertical.
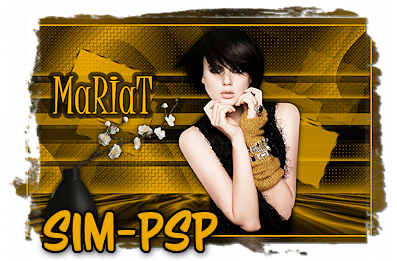
21 - Activate the top layer (Copy of Raster 1) Edit > Copy on tituloMariaTbySoxikibem. Edit > Paste a New Layer. Pick Tool > Position X 50, Position Y 118.
22 - Edit > Copy in the decorative tube. Edit > Paste a New Layer Position to your left. Effects > 3D Effects > Drop Shadow: à sua escolha
23 - Edit > Copy in the Main Tube. Edit > paste a New Layer. Position to your right. Effects > 3D Effects > Drop Shadow: à sua escolha
24 - Edit > Copy Especial > Copy Merged. Image > Add Borders: 1px color: foreground 3px color: background 1px color: foreground Selections > Select All. Image > Add Bordes > 50px - simmetric - Any color. Selections > Invert. Edit > Paste Into Selection.
25 - Adjust > Blur > Gaussian Blur: 30.
26 - Effects > Art Media Effects > Brush Strokes.
Selections > Select None.
27 - Image > Add Borders: 1px color: foreground 3px color: background 1px color: foreground
28 - Apply your watermark or signature. File > Export > JPEG Optimizer.
CREDITS: Tutorial by Soxikibem'21 English Translation by Moderation SIM-PSP Main Tube: Tubed by Annelies Decorative tube: Tubed by L&B Tubes
Feel free to send your versions.
|