|
TRADUÇÕES:
Obrigada aos nossos tradutores!
MATERIAL 1 Tube Flor à sua escolha Narah_Mask_1240 NarahsMasks_1592 tituloCalleBiancheBySoxikibem Seleção GM2020 (Salvar na Pasta Selections do PSP)
Plugins Graphics Plus ScreenWorks Simple
TUTORIAL
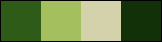
1 - Abrir o material no PSP, duplique e feche os originais. Escolher 4 cores para trabalhar, aqui usei as cores:
Co1 - Foreground: #2e5b17 Cor 2 - Background: #a4c05e Cor 3: #d4d2ab Cor 4: #133108
2 - Abra uma transparência de 900x600px. Pintar com a cor do foreground. Selections > Select All. Edit > Copy no tube da flor. Edit > Paste Into Selection. Selections > Select None.
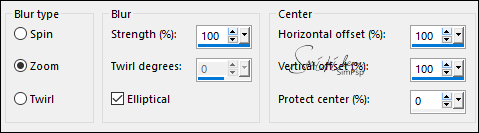
3 - Effects > Image Effects > Seamless Tiling: Default. Adjust > Blur > Radial Blur.
4 - Effects > Plugin Simple > Top Left Mirror.
5 - Selections > Load/Save Selections > Load Selection From Disk: GM2020. Selections > Promote Selection to Layer. Selections > Select None.
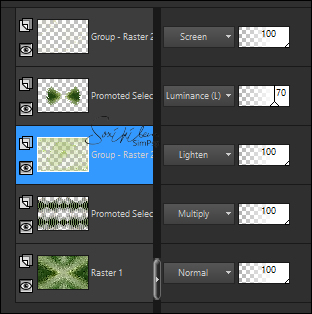
6 - Effects > Geometric Effects > Circle: Transparent. Effects > Plugin Filters Unlimited 2.0 > Bkg Designers sf10 IV > @ THE BLAST: 20, 211. Layers > Properties > General > Blend Mode: Luminance (L), Opacity: 70%.
7 - Ativar a layer Raster 1. Selections > Load/Save Selections > Load Selection From Disk: GM2020. Selections > Invert. Selections > Promote Selection to Layer. Selections > Select None.
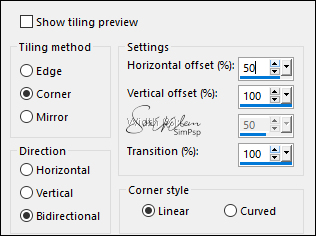
8 - Effects > Plugin Simple > Zoom Out and Flip. Effects > Image Effects > Seamless Tiling.
Layers > Properties > General > Blend Mode: Multiply.
9 - Effects > Plugin Graphics Plus > Horizontal Mirror: 170, 170.
10 - Effects > Plugin ScreenWorks > Dot Screen.
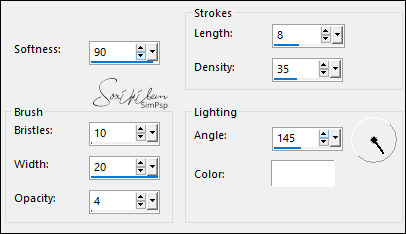
11 - Ativar a layer Raster 1. Effects > Art Media Effects > Brush Strokes.
12 - Ativar a layer do topo. Layers > New Raster Layer. Pintar com a cor 3. Layers > New Mask layer > From Image: Narah_Mask_1240. Effects > Edge Effects > Enhance. Layers > Merge > Merge Group.
13 - Effects > Image Effects > Seamless Tiling: Default. Layers > General > Properties > Blend Mode: Screen.
14 - Layers > New Raster Layer. Pintar com a cor 2. Layers > New Mask layer > From Image: NarahsMasks_1592. Layers > Merge > Merge Group. Layers > Duplicate. Layers > Merge > Merge Down. Layers > General > Properties > Blend Mode: Lighten.
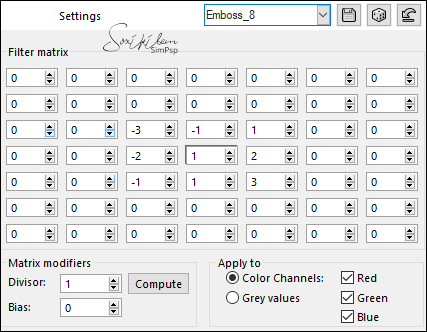
15 - Effects > User Defined Filter: Emboss_8.
16 - Layers > Arrange > Move Down... Repetir Layers > Arrange > Move Down:
17 - Ativar a layer do topo. Edit > Copy no Tube da Flor. Edit > Paste a New Layer. Objects > Align > Horz Center in Canvas. Objects > Align > Bottom.
18 - Layers > Duplicate. Na layer original da flor aplique: Adjust > Blur > Gaussian Blur: 45. Layers > General > Properties > Blend Mode: Screen.
19 - Ativar a layer Copy da Flor. Effects > Plugin Alien Skin Eye Candy 5 Impact > Motion Trail > Settings: Slight Movement from left.
20 - Image > Add Borders: 1px color 4 5px color 3 1px color 4 15px color 3 1px color 4 5px color 3 1px cor 4 30px color 3 1px color 4 5px color 3 1px color 4
21 - Com a Ferramenta Magic Wand: Tolerance e Feather: 0, selecionar a borda de 30px. Layers > New Raster Layer. Pintar a seleção com a cor do Foreground. Layers > New Mask layer > From Image: NarahsMasks_1592. Layer > Merge > Merge Group. Layers > Duplicate. Layers > Merge > Merge Down.
22 - Effects > User Defined Filter: Emboss_8.
Selections > Select None. Layers > Merge > Merge Down.
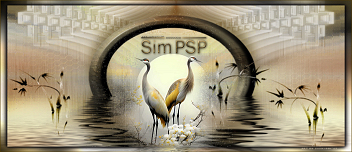
23 - Edit > Copy no tituloCalleBiancheBySoxikibem. Edit > Paste a New Layer. Pick Tool: Position X 75, POsition Y 342. Layers > General > Properties > Blend Mode: Luminance.
24 - Aplicar sua marca d'água ou assinatura.File > Export > JPEG Optimizer.
CREDITOS Tube by Gabry - Masks by Narah - WordArt by Soxikibem
Tutorial by Soxikibem'20
Sinta-se à vontade para enviar suas versões. Terei todo o prazer em publicá-las em nosso site.
|