TRADUÇÕES:
Obrigada aos nossos tradutores!
MATERIAL 1 Tube Personagem à sua escolha AlphaChannel_SilvieBySoxikibem tituloBySoxikibem DecorSilvieBySoxikibem
PLUGINS Plugin Alien Skin | Eye Candy 5 Impact Filters Unlimited 2.0 > Distort Mehdi > Weaver
Este Tutorial foi escrito por
Soxikibem, qualquer semelhança é mera coincidência. Tutorial elaborado no PSP 2022
O meu agradecimento as Tubeiras pelos Tubes e Masks
Fique a vontade para mudar os Blends das layers, pois, dependendo das cores e imagens o resultado poderá mudar.
TUTORIAL
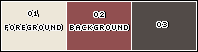
1 - Abrir o material no PSP, duplique e feche os originais. Escolha três cores para trabalhar. Foreground: #ede7d9 Background: #914f50 Cor 3: #524b48
2 - Abra a cópia do AlphaChannel_SilvieBySoxikibem. Pintar com a cor 3. Selections > Select All.
3 - Edit > Copy no Tube Personagem. Edit > Paste Into Slection. Selections > Select None.
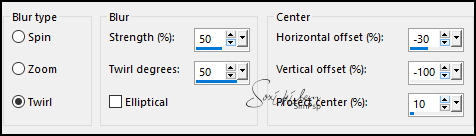
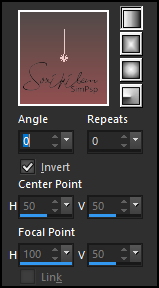
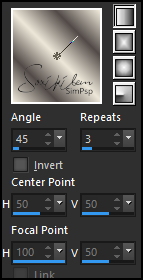
4 - Effects > Image Effects > Seamless Tiling: Default. Adjust > Blur > Radial Blur:
Effects > Edge Effects > Enhance.
5 - Layers > Duplicate. Image > Mirror > Mirror Vertical. Layers > Properties > General > Blend Mode: Multiply. *Na segunda versão eu usei o Blend Screen. Layers > Merge > Merge Down.
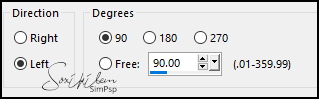
6 - Layers > Duplicate. Image > Free Rotate:
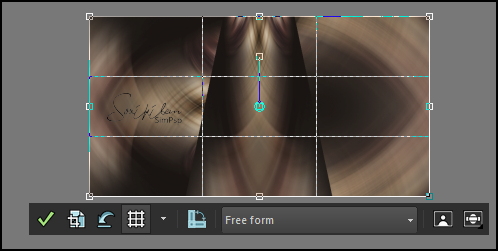
7 - Effects > Geometric Effects > Perspective - Vertical:
Ferramenta Crop Tool > Merged Opaque:
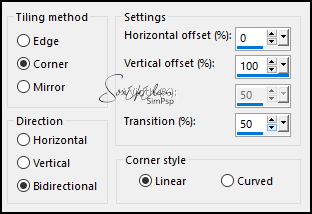
8 - Effects > Image Effects > Seamless Tiling:
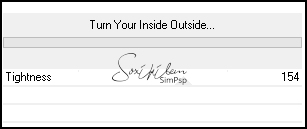
9 - Effects > Plugins > Filters Unlimited 2.0 > Distort > Turn Your Inside Outside: 154
10 - Layers > New Raster Layer. Selections > Load/Save Selections > Load Selection From Alpha Channel: Selection #1. Pintar a seleção com um gradiente Linear formado pela cor 3 no Foreground e a cor do Background:
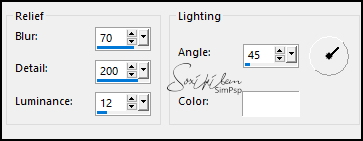
11 - Effects > Texture Effects > Sandstone:
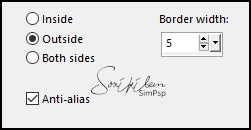
12 - Selections > Modify > Select SelectionBorders:
Pintar essa seleção com a Cor 3: #524b48
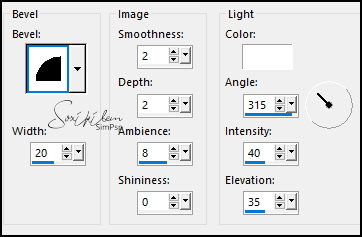
13 - Effects > 3D Effects > Inner Bevel:
Selections > Select None. Effects > 3D Effects > Drop Shadow: 0, 0, 100, 20, Color: #000000 (preto) Edit > Repeat Drop Shadow.
14 - Ativar a Layer Copy of Raster 1. Selections > Load/Save Selections > Load Selection From Alpha Channel: Selection #2. Pressionar a tecla Delete do teclado por 6 vezes. Selections > Select None.
15 - Layers > Duplicate. Ativar a Layer Copy of Raster 1. Effects > Plugins > It@lian Editors Effect > Effetto Fantasma:
Layers > Properties > General > Blend Mode: Luminance*. *Na segunda versão eu usei o Blend Screen.
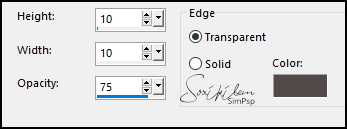
16 - Effects > Texture Effects > Blinds: Color: #000000 (preto)
17 - Ativar a Layer Raster 1. Effects > Plugins > Mehdi > Weaver:
Effects > Edge Effects > Enhance.
18 - Ativar a Layer Copy of Raster 1. Layers > New Raster Layer. Pintar com a cor do Foreground. Layers > New Mask Layer > From Image: 050_Silvie_Mask_Dandelion11. Layers > Merge > Merge Group. Layers > Duplicate. Layers > Properties > General > Blend Mode: Saturation.
19 - Ativar a Layer Copy (2) of Raster 1. Image > Mirror > Mirror Vertical. Effects > 3D Effects > Drop Shadow: 0, 0, 100, 60, Color: #000000 (preto) Edit > Repeat Drop Shadow.
20 - Ativar a Layer do topo. Edit > Copy no tituloBySoxikibem. Edit > Paste as New Layer. Pick Tool: Position X 404, Position Y 287. Layers > Properties > General > Blend Mode: Overlay.
21 - Edit > Copy no tube personagem. Edit > Paste as New Layer. Image > Resize se necessário. Posicionar à esquerda. Aplique Drop Shadow ou efeito como preferir.
22 - Image > Add Borders > Symmetric: 2px - Color: cor 2 (Background) Selections > Select All. Image > Add Borders > Symmetric: 10px com qualquer cor. Selections > Invert.
23 - Pintar a seleção com um gradiente Linear formado pelas cores 1 e 3:
24 - Effects > Texture Effects > Blinds: Color: #000000 (preto)
Effects > 3D Effects > Drop Shadow: 0, 0, 100, 20, Color: #000000 (preto) Selections > Select None.
25 - Image > Add Borders > Symmetric: 2px - Color: cor 2 (Background). Selections > Select All. Image > Add Borders > symmetric: 25px com qualquer cor. Selections > Invert. Pintar a seleção com o gradiente Linear em uso:
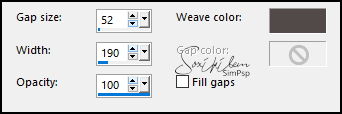
Effects > Texture Effects > Weave: Weave color: com a cor 3
26 - Effects > 3D Effects > Buttonize: Color: com a cor 3.
Selections > Invert. Effects > 3D Effects > Drop Shadow: 0, 0, 100, 20, Color: #000000 (preto) Selections > Select None.
27 - Image > Add Borders > Symmetric: 2px - Color: cor 2 (Background) Selections > Select All. Image > Add Borders > Symmetric: 30px com qualquer cor. Selections > Invert. Pintar a seleção com o gradiente Linear em uso:
Effects > 3D Effects > Buttonize Color: com a cor 3.
Selections > Invert. Effects > 3D Effects > Drop Shadow: 0, 0, 100, 20, Color: #000000 (preto) Selections > Select None.
28 - Image > Add Borders > Symmetric: 2px - Color: cor 2 (Background).
29 - Edit > Copy no DecorSilvieBySoxikibem. Edit > Paste as New Layer.
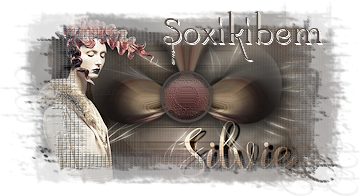
30 - Aplicar sua marca d'água ou assinatura. File > Export > JPEG Optimizer.
CRÉDITOS: Versão 1 & 2 Criação - Formatação e Art Final by Soxikibem Tube Personageml: Tubed by Pqna&Alice Mask: by Silvie
Sinta-se à vontade para enviar suas versões. Terei todo o prazer em publicá-las em nosso site.
|