|
TRADUÇÕES:
O Sim
PSP valoriza e reconhece o trabalho das tradutoras que tornam os
tutoriais acessíveis a diferentes idiomas.
Tutorial elaborado no PSP 2022 e PSP 2020 Testado e revisado por Inácia Neves no PSP 2022.
Agradecemos às Tubeiras pelos Tubes e Masks, pois sem eles não seria
possível criar este trabalho.
MATERIAL
1 Tube Principal à sua escolha
*Salvar as Seleções na pasta Selections do PSP.
PLUGINS Flaming Pear > Flood Mura's Meister > Copies Mura's Seamless > Shift at Zigzag
Tutorial elaborado no PSP 2020 e 2022
1- Abrir o material no PSP, duplique e feche os originais. Cor extra 3: #522810
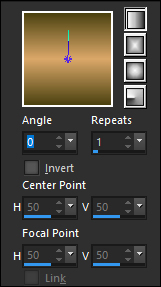
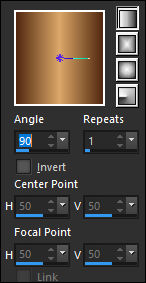
2- Abra uma Transparência de 900 x 550px. Preencha transparência com um gradiente Linear, formado pelas cores do Foreground e Background:
3- Layers > New Raster Layer. Selections > Select All.
4- Ative o
Misted Paisagem. Volte a imagem que estamos trabalhando... Edit > Paste Into Selection. Selections > Select None.
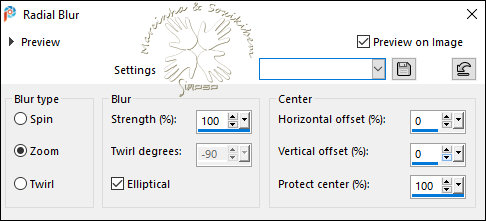
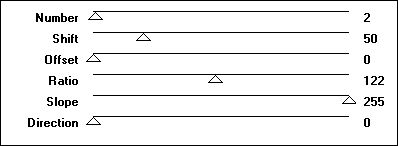
5- Adjust > Blur > Radial Blur:
6- Effects > Image Effects > Seamless Tiling: Default
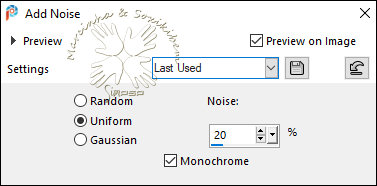
7- Adjust > Add/Remove Noise > Add Noise:
8- Layers > Properties > General > Opacity: 50% Layers > New Raster Layer. Preencha a layer com a Cor 3: #522810
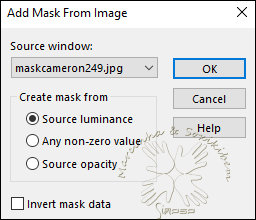
9- Layers > New Mask Layer > From image: maskcameron249
Layers > Merge > Merge Group.
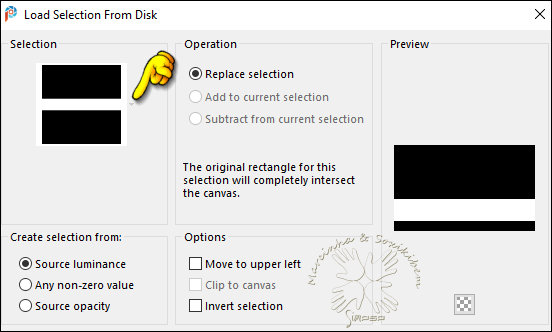
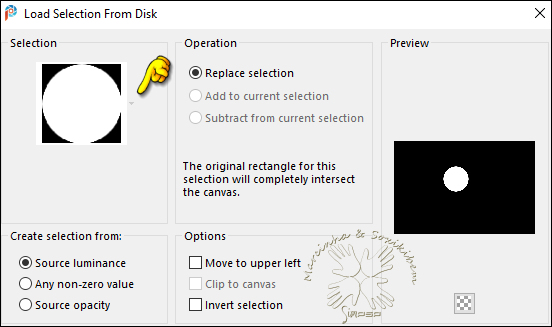
10- Selections > Load/Save Selections > Load Selection From Disk: Reflected_Sel1.
Pressione a tecla Delete do teclado. Selections > Select None.
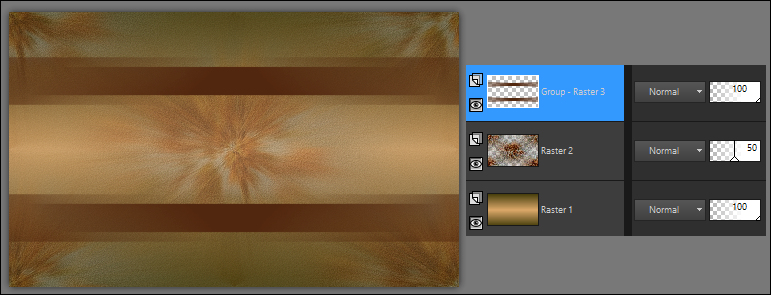
11- Layers > Duplicate. Image > Mirror > Mirror Vertical. Layers > Merge > Merge Down. Teremos esse resultado:
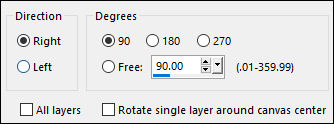
12- Image > Free Rotate.
Crop Tool > Merged Opaque > Apply
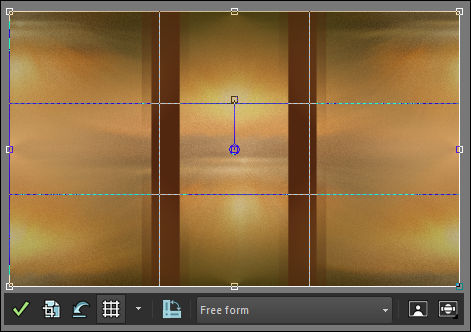
13 - Effects > Distortion Effects > Warp.
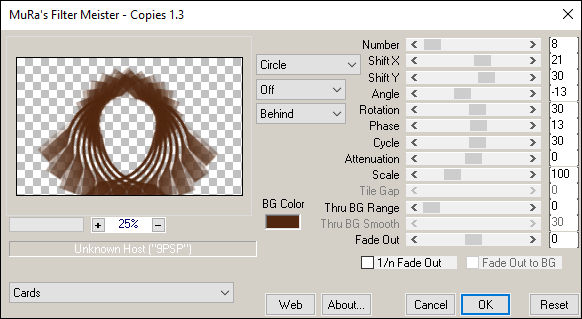
14 - Image > Resize: 90%, all layers desmarcado. Effects > Plugins > Mura's Meister > Copies:
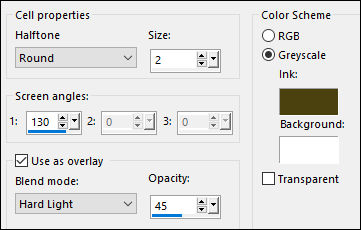
15- Effects > Artistic Effects > Halftone. Com a cor do Foreground.
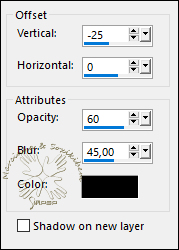
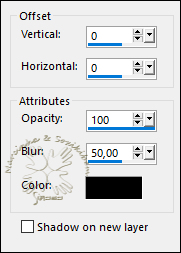
16- Effects > 3D Effects > Drop Shadow: -25, 0, 60, 45, color: #000000 (Preto)
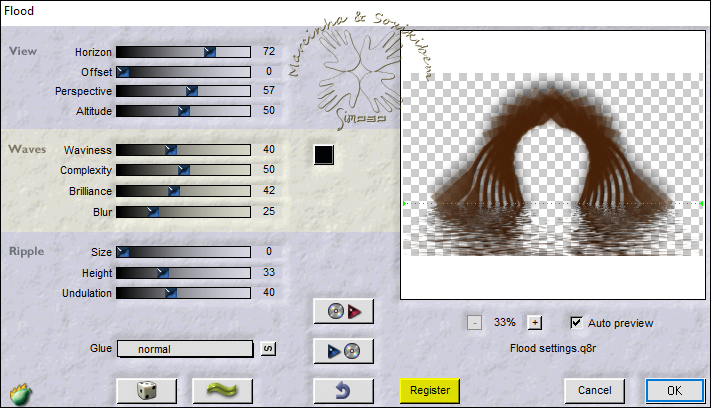
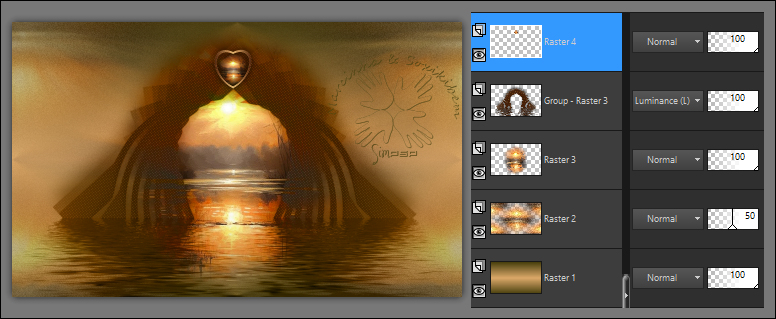
17- Effects > Plugins > Flaming Pear > Flood:
18 - Layers > Properties > General > Blend Mode: Luminance (L). Ativar a Layer Raster 2.
19- Ativar o Misted Paisagem. Edit > Copy. Volte a imagem que estamos trabalhando... Edit > Paste as New Layer. Image > Resize se necessário: no misted do material foi de 67%. Adjust > Sharpness > Sharpen. Posicionar ao centro do efeito.
20- Ativar a Layer Group of Raster 3. Layers > New Raster Layer. Selections > Load/Save Selections > Load Selection From Disk: Reflected_Sel2
Pintar com um gradiente Linear formado pelas, cores 3 no Foreground e com a cor do Background:
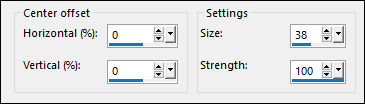
21- Selections > Modify > Contract: 10. Edit > Cut ou aperte a tecla Delete. Selections > Select None. Effects > Plugins > Mura's Seamless > Shift at Zigzag:
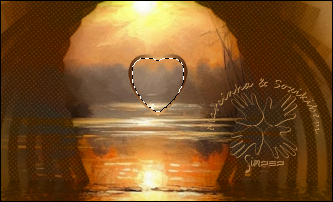
22- Image > Resize: 40%, all layers desmarcado. Adjust > Sharpness > Sharpen. Com a ferramenta Magic Wand: Tolerance e Feather 0, selecione o centro do coração:
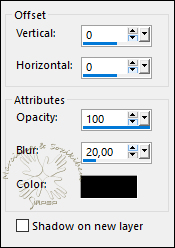
23- Ativar o Misted Paisagem. Edit > Copy. Volte a imagem que estamos trabalhando... Edit > Paste Into Selection. Adjust > Sharpness > Sharpen. Selections > Select None. Com a ferramenta Pick Tool: Position X: 405 - Position Y: 56. Effects > 3D Effects > Drop Shadow: 0, 0, 100, 20, color: #000000 (Preto)
Teremos esse resultado:
24- Edit > Copy Special > Copy Merged. Image > Add Borders > Symmetric: 2 px - color: com a cor 3 Image > Add Borders > Symmetric: 2 px - color: Background Selections > Select All.
25- Image > Add Borders > Symmetric: 60 px - com qualquer cor Selections > Invert. Edit > Paste Into Selection.
26- Effects > Artistic Effects > Halftone. Com a cor do Foreground.
Selections > Invert. Effects > 3D Effects > Drop Shadow: 0, 0, 100, 50, color: #000000 (Preto)
Selections > Select None.
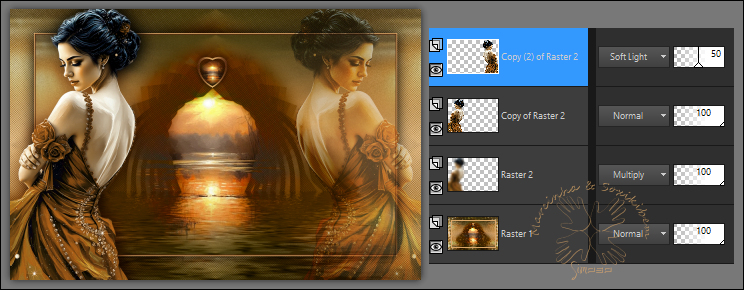
27- Ativar o Tube Principal. Edit > Copy. Volte a imagem que estamos trabalhando... Edit > Paste as New Layer. Image > Resize se necessário: no tube do material foi de 54%. Adjust > Sharpness > Sharpen. Posicionar à esquerda.
28- Layers > Duplicate. Ativar a layer Raster 2. Adjust > Blur > Gaussian Blur: 20 Layers > Properties > General > Blend Mode: Multiply - Opacity: 100%
29- Ativar a layer Copy of Raster 2. Layers > Duplicate. Image > Mirror > Mirror Horizontal. Layers > Properties > General > Blend Mode: Soft Light - Opacity: 50% Teremos esse resutado:
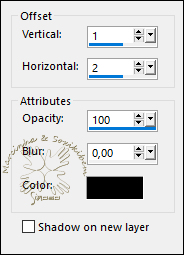
30- Ativar o Titulo_WordArt. Edit > Copy. Volte a imagem que estamos trabalhando... Edit > Paste as New Layer. Colorize o titulo com a cor de sua preferência... Posicionar conforme sua preferência... Effects > 3D Effects > Drop Shadow: 1, 2, 100, 0, color: #000000 (Preto)
31- Image > Add Borders > Symmetric: 1 px - color: BackgroundImage > Add Borders > Symmetric: 2 px - color: com a cor 3
32 - Aplicar sua marca d'água ou assinatura.
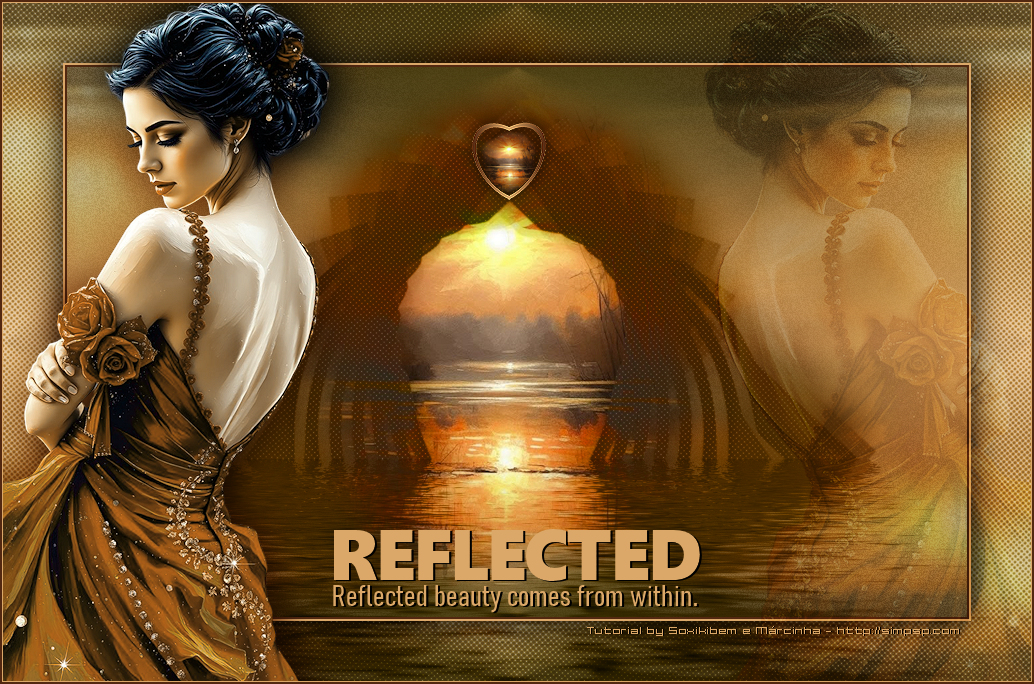
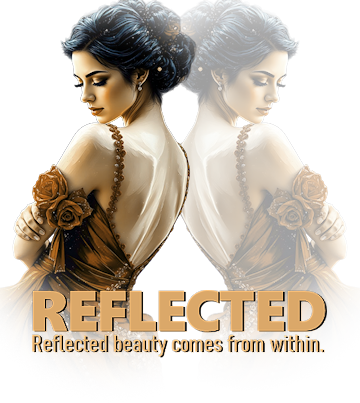
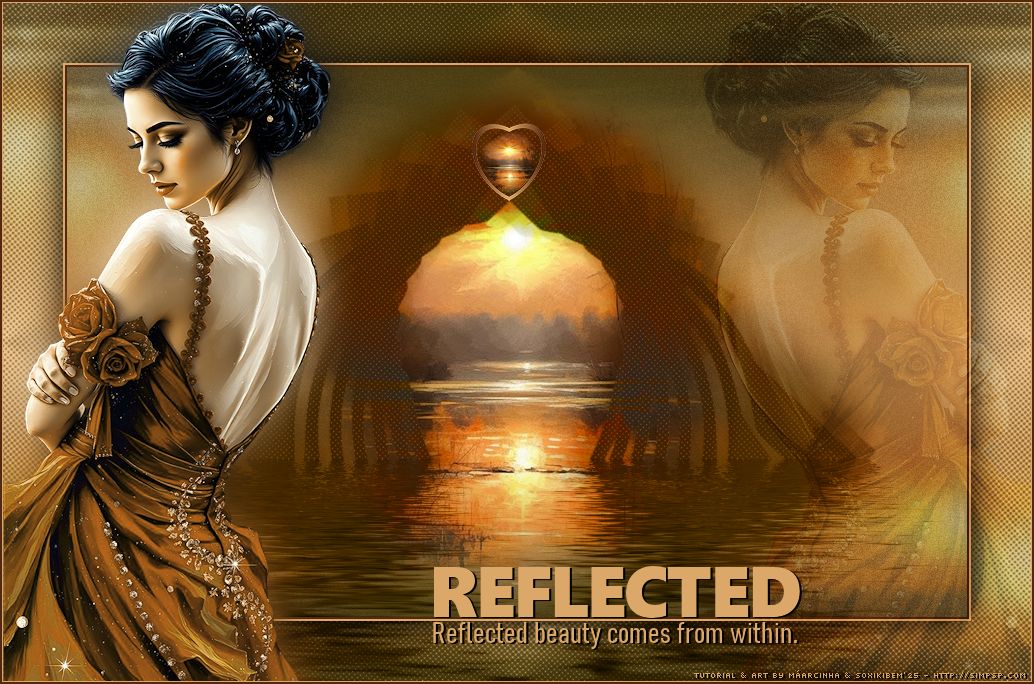
Créditos Versão Principal: Tutorial "Reflected" by Soxikibem & Márcinha Tube Principal & Misted: Tubed by Pqna&Alice Inglaterra/Brasil - 10/08/2025
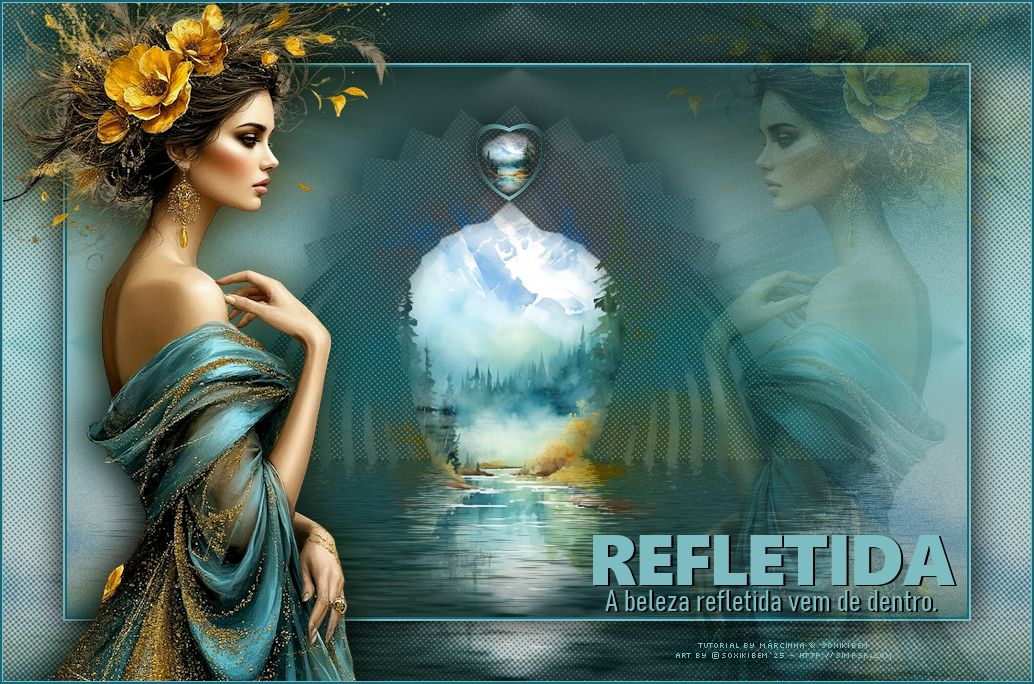
VERSÕES by Soxikibem
Créditos: Tube Principal & Misted: Tubed by Pqna&Alice
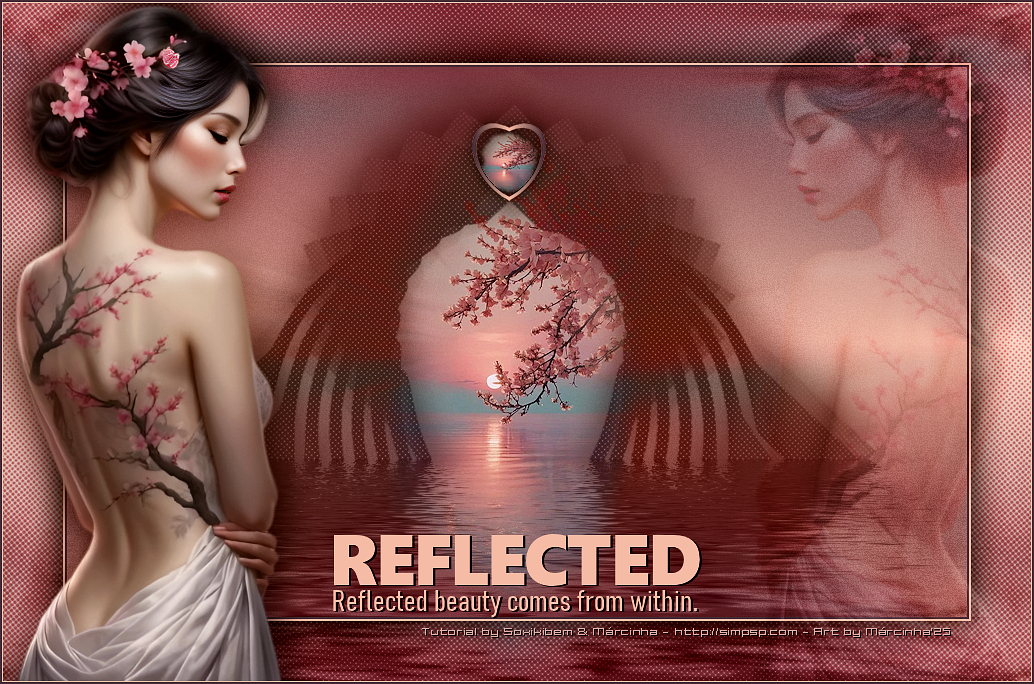
VERSÃO by Márcinha
Créditos: Tube Principal & Misted: Tubed by Pqna&Alice
Sinta-se à vontade para enviar suas versões. Terei todo o prazer em publicá-las em nosso site.
|