|
Celebrating creativity, connection, and the art of digital elegance.
Seven years of color, light, and digital emotion.
Sim PSP
values and recognizes the work of translators who make tutorials
accessible in different languages.
MATERIALS:
1 Character Tube of your choice
PLUGINS: Alien Skin | Eye Candy 5 Impact > Glass Filters Unlimited > Bkg designer sf10 III > Square Bumps FM Tile Tools > Blend Emboss Mura's Meister > Perspective Tiling Scribe > 4way mirror
Tutorial created in PSP 2022 Translated into English by Soxikibem Tested and proofread by Marcinha in PSP 2020.
I would like to thank all
tube creators for their Tubes and Masks, as this work would not have
been possible without them. When sharing or using them, please keep
the Tubes intact and preserve the proper credits. Feel free to adapt the
blends according to the colors you are using.
TUTORIAL
*Delete
the watermark from all materials. Color 3: #ffffff
2 - Open a new
transparent image: 850x580px. Selections > Select All.
3 - Edit > Copy the Character Tube. Edit > Paste Into Selection. Selections > Select None.
4 - Effects > Image Effects > Seamless Tiling: Default.
5 - Adjust > Blur > Radial Blur.
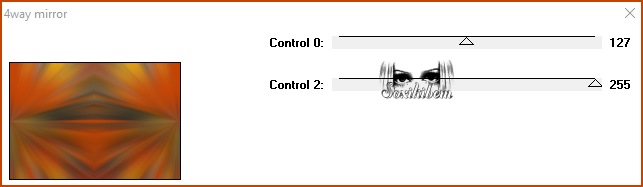
6 - Plugin Scribe > 4way mirror.
7 - Effects > Texture Effects > Mosaic - Antique.
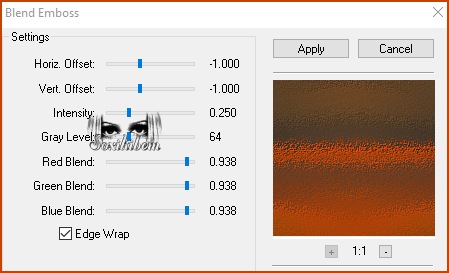
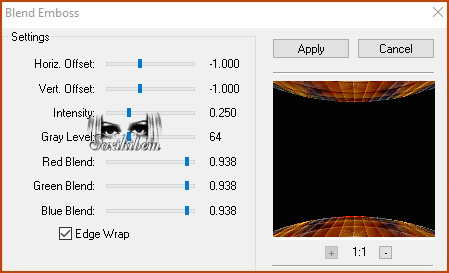
8 - Plugin FM Tile Tools > Blend Emboss: Default.
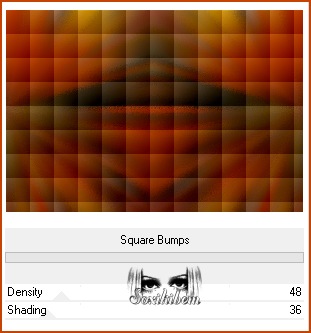
9 - Layers > Duplicate. Filters Unlimited > Bkg designer sf10 III > Square Bumps.
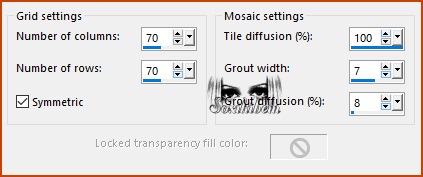
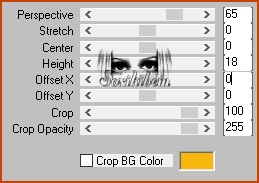
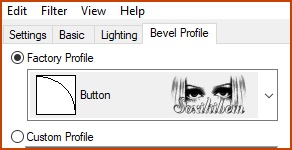
10 - Plugin Mura's Meister > Perspective Tiling.
11 - Using the Magic Wand Tool, set: Tolerange 0, Feather 60. Click on the transparent area of this layer. Edit > Cut or press Delete on your keyboard 5 times. Selections > Select None.
12 - Layers > Duplicate. Image > Mirror > Mirror Vertical. Layers > Merge > Merge Down.
13 - Effects > Distortion Effects > Warp.
14 - Plugin FM Tile Tools > Blend Emboss: Default.
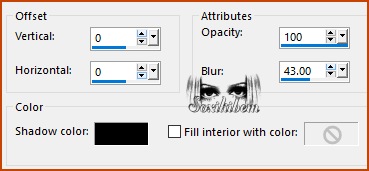
15 - Effects > 3D Effects > Drop Shadow: 30, 0, 80, 55, black color. Repeat the Drop Shadow using: -30, 0, 80, 55, black color.
16 - Layers > New Raster Layer. Selections > Load/Save Selections > Load Selection From Disk: DD_xiki1. Fill with the Background color.
17 - Selections > Modify > Contract: 5. Edit > Cut or Delete.
18 - Flood Fill > Opacity 50%, fill with the Foreground color..
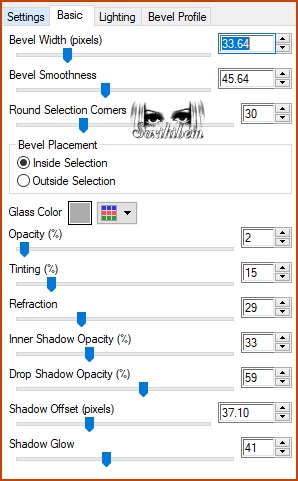
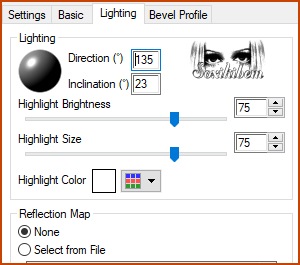
19 - Layers > New Raster Layer. Plugin Alien Skin | Eye Candy 5 Impact > Glass. *Settings: Clear
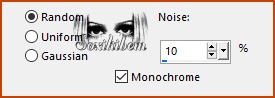
20 - Selections > Select None. Activate Raster Layer2. Adjust > Add/Remove Noise > Add Noise.
21 - Edit > Copy the Decorative Tube. If using the one supplied in the materials, resize by **30%**, with **Resize All Layers** unchecked. Adjust > Sharpness > Sharpen.
22 - Layers > Arrange > Move Down, twice. Pick Tool: Position X: 39, Position Y: 151 if using the image supplied in the materials.
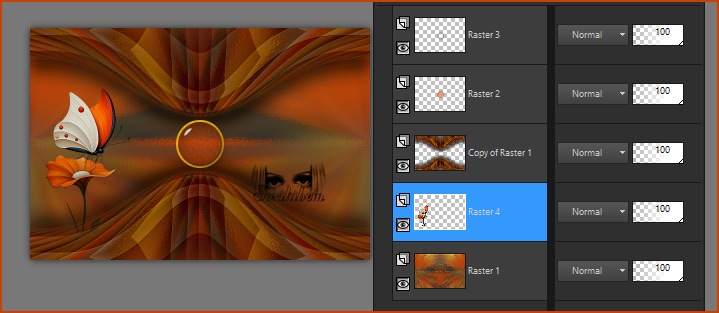
23 - Compare your work with the image below.
24 - Effects > 3D Effects > Drop Shadow: -8, -7, 25, 10, black color.
25 - Activate Raster Layer 3 (top layer). Edit > Copy the text 7Years_Xiki. Edit > Paste As New Layer. Pick Tool: Position X: 347, Position Y: 253.
26 - Layers > New Raster Layer. Selections > Select All. Effects > 3D Effects > Cutout, color black.
Selections > Select None.
27 - Image > Add Borders > Symmetric: 2px Foreground color. 4px Color 3 (white) 2px Foreground color 4px Color 3 (white) 2px Foreground color 45px Color 3 (white)
28 - Edit > Copy the text DigitalDreams_Xiki. Edit > Paste As New Layer. Pick Tool: Position X: 239, Posiiotn Y: 428.
29 - Edit > Copy the Character Tube Edit > Paste As New Layer. If using the tube supplied in the materials, resize by 60%. Position it on the right side. Apply a Drop Shadow or any effect of your choice.
30 - Edit > Copy DecorDD_Xiki. Edit > Paste As New Layer. Do not move it; it is already correctly positioned.
31 - Image > Add Borders > Symmetric: 4px with the Foreground color
32 - Edit > Copy Credit-Tutorial_bySoxikibem. Edit > Paste As New Layer. Position it wherever you prefer. Apply your watermark or
signature.
***Because every detail makes a difference...
for you to use in your artwork.
Versão:
Créditos: Formatting, Final Artwork and Tutorial by Soxikibem Main & Decorative Tube: Tubed by Pqna&Alice Other Materials: by Soxikibem
Feel free to send your versions. I will be delighted to publish them on our website.
Send your version to:
Soxikibem Social Media
My notebooks on Amazon
My art collections on Redbubble
SimPSP Social Media
|