|
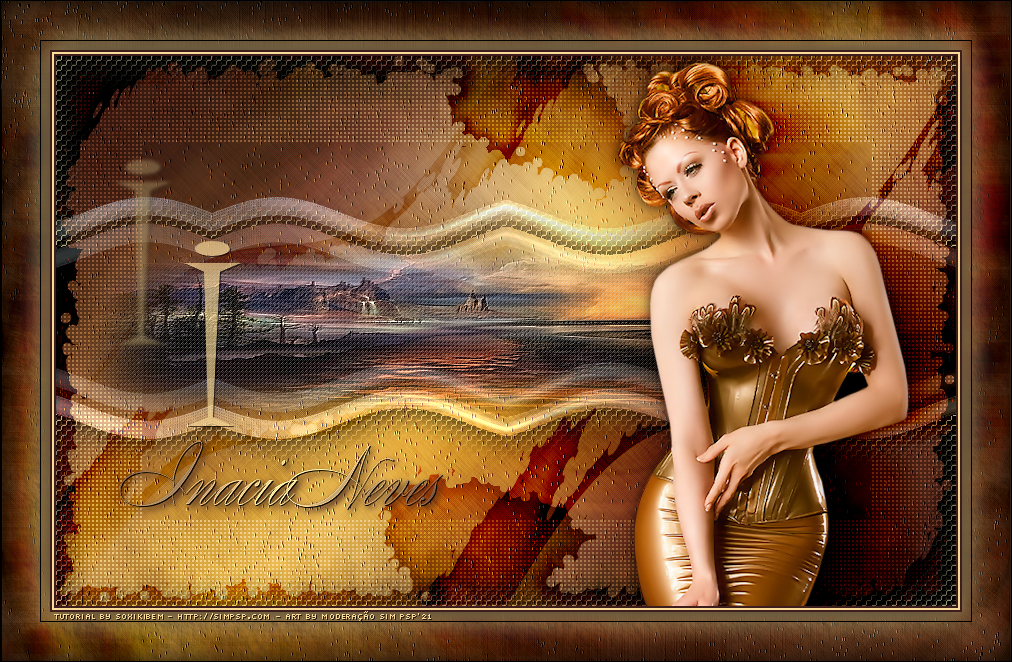
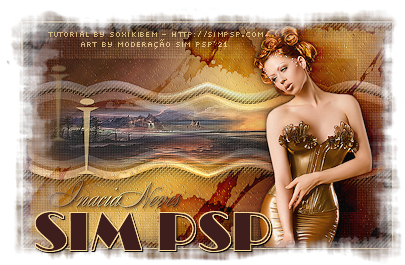
S IM Tutorial created to symbolize the second letter of SimPsp.O SimPsp is the union of three friends: Soxikibem, Inácia and Marcinha Inácia you are a great friend and an incomparable artist. I have a lot of respect and affection for you ... Love You Soxikibem.
Tutorial by Soxikibem English Translation by Moderation SIM-PSP Original Tutorial
MATERIAL 1 Main Tube of your choice 1 Misted Landscape of your choice titulo_i_inaciaBySoxikibem
PLUGINS AAA Frames AFS Import FM Tile Tools
TUTORIAL
1 - Open the material on the PSP, duplicate and close the original. Choose two colors to work with. Foreground: #3d1e1d Background: #fadb97
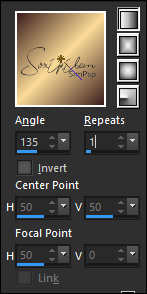
2 - Open a new transparent image of 900x550px. Paint with a Linear gradient formed from the foreground and background colors.
3 - Adjust > Blur > Gaussian Blur: 40. Effects > Texture Effects > Straw Wall: Color: #242424
4 - Edit > Copy the BurntEdgesBySoxikibem. Edit > Paste a New Layer.
5 - Layers > New Raster Layer. Selections > Select All. Edit > Copy the Misted Landscape. Edit > Paste Into Selection. Selections > Select None.
6 - Effects > Image Effects > Seamless Tiling: Default.
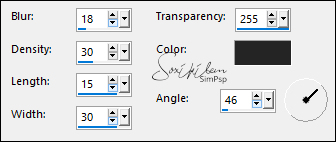
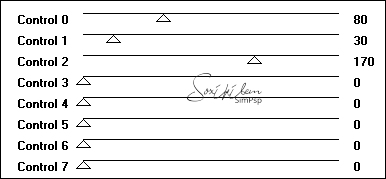
7 - Adjust > Blur > Radial Blur.
8 - Layers > Properties > General: Blend Mode: Overlay.
9 - Effects > Pugins > AFS Import > sqborder2.
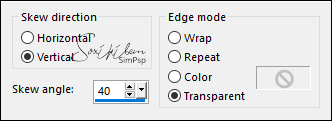
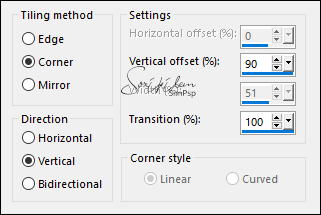
10 - Activate Layer Raster 2. Layers > Duplicate. Layers > Arrange > Bring To top. Effects > Geometric Effects > Skew.
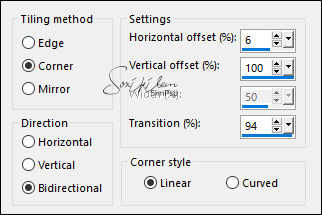
11 - Effects > Image Effects > Seamless Tiling: Side by Side.
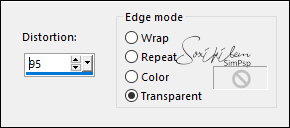
12 - Effects > Distortion Effects > Wave.
13 - Activate Layer Raster 3. Layers > Duplicate. Layers > Arrange > Bring to Top. Effects > Geometric Effects > Perspective - Horizontal:
Image > Mirror > Mirror Horizontal. Effects > Geometric Effects > Perspective - Horizontal.
14 - Effects > Distortion Effects > Wave.
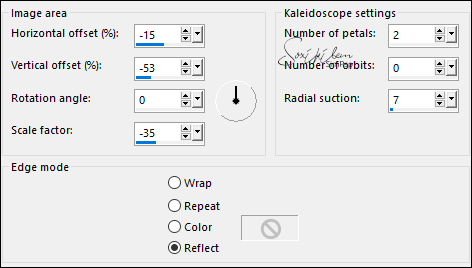
15 - Image > Negative Image. Layers > Properties > General: Blend Mode: Screen - Opacity: 50%. Effects > Reflection Effects > Kaleidoscope.
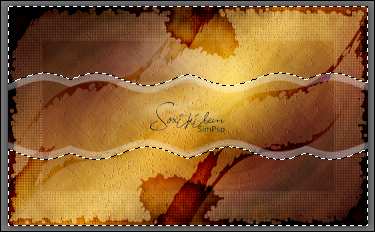
16 - With Magic Wand Tool: Mode: Add(Shift) - Tolerance and Feather at 0, select the top and bottom as in the print.
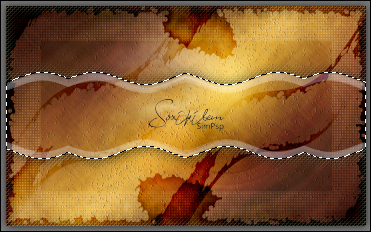
17 - Layers > New Raster layer. Effects > 3D Effects > Cutout: Color: #000000
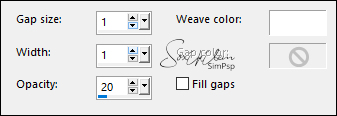
18 - Effects > Texture Effects > Weave: Weave color: background.
Selections > Select None. Effects > Plugins > FM Tile Tools > Blend Emboss: Default.
19 - Continue on the same layer. With the Magic Wand Tool: Tolerance and Feather at 0, select the center:
Layers > New Raster Layer. Edit > Copy the Misted Landscape. Edit > Paste Into Selection. Layers > Arrange > Move Down. Edit > Repeat Layer Move Down.
20 - Adjust > Sharpness > Sharpen. Effects > Texture Effects > Weave: Weave color: #FFFFFF
Effects > Plugins > FM Tile Tools > Blend Emboss: Default. Selections > Select None.
21 - Activate Layer Copy of Raster 3. Effects > Image Effects > Seamless Tiling.
Layers > Duplicate. Layers > Properties > General > Blend Mode: Dodge - Opacity: 50%.
22 - Activate top layer (Raster 4). Edit > Copy the Main Tube. Edit > Paste as New Layer. Position to the right. Rename this layer to Tube. Layers > Duplicate twice. On the Tube layer, apply: Effects > Distortion Effects: Wind.
Layers > Properties > General > Blend Mode: Burn.
23 - Activate Copy of Tube layer and apply: Adjust > Blur > Gaussian Blur: 40. Layers > Properties > General > Blend Mode: Multiply.
24 - Activate the Copy (2) layer of Tube. Effects > 3D Effects > Drop Shadow: as you prefer.
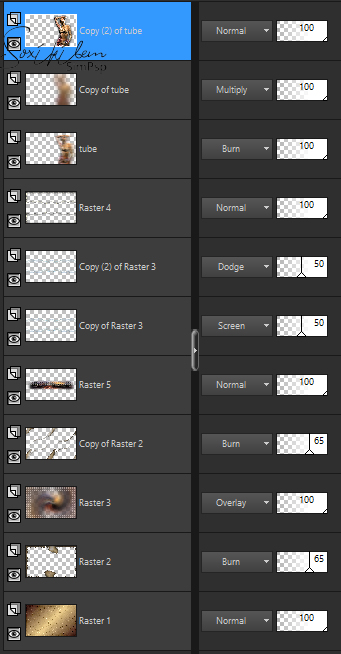
25 - Check the position of the layers. Change the Blends if necessary to match the colors you are using.
26 - Edit > Copy Special > Copy Merged. Image > Add Borders > Symmetric: 2 px - color: foreground 2 px - color: background 2 px - color: foreground
27 - Selections > Select all. Image > Add Borders > Symmetric: 50px with any color. Selections > Invert. Edit > Paste > Into Selection. Adjust > Blur > Radial Blur.
28 - Effects > Texture Effects > Straw Wall.
Adjust > Sharpness > Sharpen.
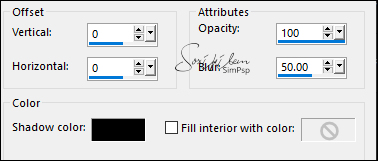
29 - Selections > Invert. Effects > 3D Effects > Drop Shadow: 0, 0, 100, 50, color: background. Edit > Repeat Drop Shadow.
30 - Layers > New Raster Layer. Selections > Invert. Effects > 3D Effects > Cutout.
Layers > Merge > Merge Down.
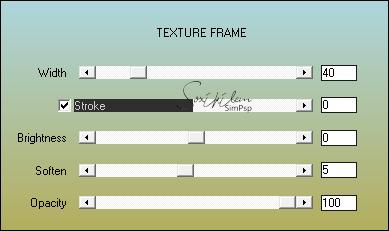
31 - Effects > Plugins > AAA Frames > Texture Frame.
Selections > Select None.
32 - Edit > Copy the titulo_i_inaciaBySoxikibem. Edit > Paste as New Layer. Position as you prefer.
33 -
Apply your watermark or signature.
CREDITS: Tutorial by Soxikibem English Translation by Moderation SIM-PSP Main Tube: Tubed by Paulina Misted Landscape: by Nicole WordArt: by Soxikibem
Feel free to send your versions. I will be happy to publish them on our website.
|
