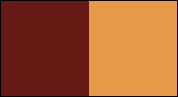
02- Escolha duas cores para trabalhar.
Foreground: #671a13 (cor escura)
Background: #e7994a (cor clara)
03- Abra uma nova transparente 900X550 px.
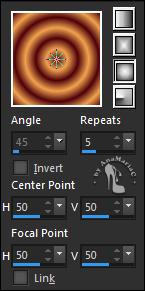
04- Preencher com o um gradiente Sunburst, formado pelas
cores em uso:
05- Layers > Layer Duplicate.
Image > Flip > Flip Horizontal.
06- Layers > Properties > General > Blend Mode: Overlay -
Opacity: 50%
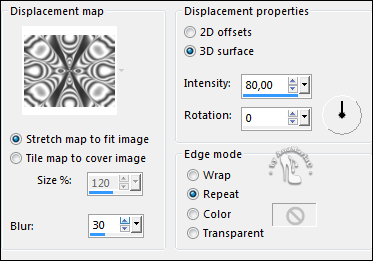
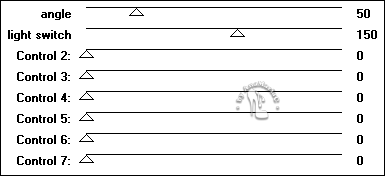
07- Effects > Distortion Effects > Displacement Map:
08- Effects > Edge Effects > Enhance More.
09- Effects > Plugins > Divers > Penzilla:
10- Layers > Merge > Merge Down.
Layers > Duplicate.
Effects > Image Effects > Seamless Tiling > Default.
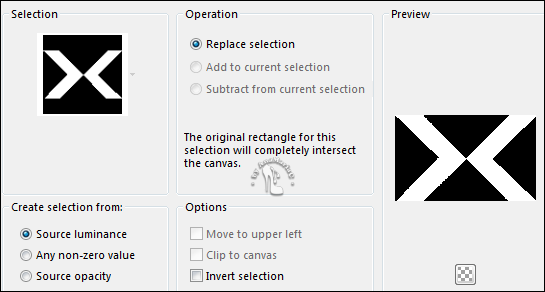
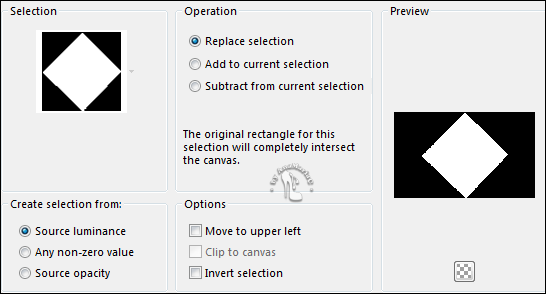
11- Selections > Load/Save Selections > Load Selection From
Disk > Inácia_1byAnaMariaC.

Selections > Promote Selection to Layer.
12- Layers > New Raster Layer.
Preencher com o um gradiente Sunburst, formado pelas
cores em uso:
Selections > Select None.
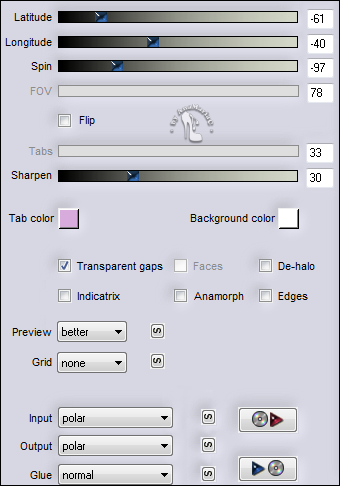
13- Effects > Plugins > Flaming Pear > Flexify 2:
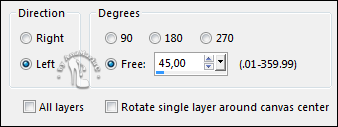
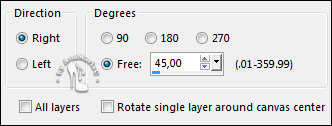
14- Image > Free Rotate:
15- Com a ferramenta Pick Tool, posicionar: Position X: (56)
Y: (37).
Layers > Duplicate.
Imagem > Mirror > Mirror Horizontal.
Layers > Merge > Merge Down.
Imagem > Resize > 20% > Resize all layers desmarcado.
Layers > Arrange > Send to Bottom.
16- Ativar a Layer Prometed Selection.
17- Selections > Load/Save Selections > Load Selection From
Disk > Inácia_1byAnaMariaC.
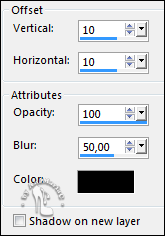
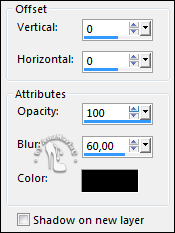
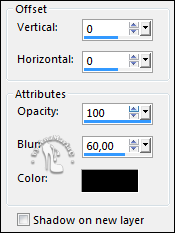
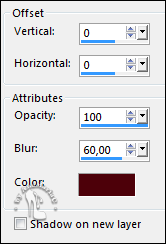
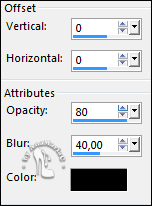
18- Effects > 3D Effects > Drop Shadow: Color: #000000
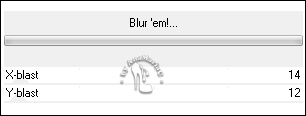
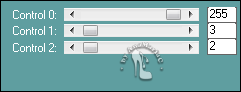
19- Effects > Plugins > Unlimited > &<Bkg Designer sf10 I>
Blur ’em!...
Selections > Select None.
20- Effects > Plugins > Itali@n Editors Effect > Efeito
Fantasma:

21- Layers > Duplicate.
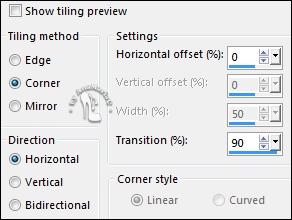
22- Effects > Image Effects > Seamless Tiling:
Layers > Duplicate.
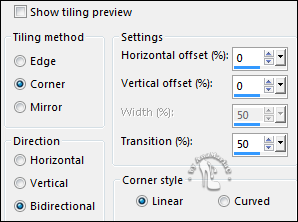
23- Effects > Image Effects > Seamless Tiling:
24- Effects > 3D Effects > Drop Shadow: Color: #000000
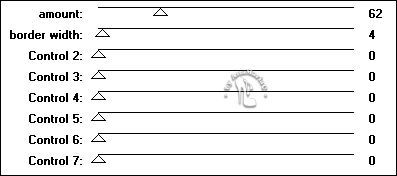
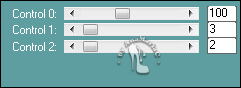
25- Effects > Plugins > Carolaine and Sensibility > CS-LDots:
Adjust > Sharpness > Sharpen More.
26- Ativar a Layer Copy of Promoted Selection.
27- Effects > Plugins > Penta.Com > Jeans:
28- Effects > Plugins > Sabercat > Sabers Navaho:

Layers > Properties > General > Blend Mode: Hard Light -
Opacity: 70%.
29- Ativar a Layer Copy (2) of Promoted Selection.
Layers > Merge > Merge Down.
30- Selections > Load/Save Selections > Load Selection From
Disk > Inácia_2by AnaMariaC
Selections > Promote Selection to Layer.
31- Edit > Copy no misted.
Edit > Edit > Paste Into Selection.
Adjust > Sharpness > Sharpen.
32- Layers > New Raster Layer.
33- Effects > 3D Effects > Cutoud:
Shadow color: cor do Background.
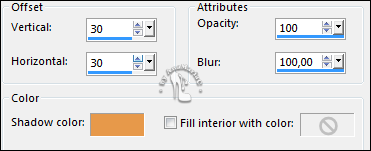
Layers > New Raster Layer.
Repetir Effects > 3D Effects > Cutoud: V (-30) / H (-30)
Selections > Select None.
Layers > Merge > Merge Down.
Edit > Repeat > Layer Merge Down.
34- Ativar a Layer Copy of Raster 1.
Layers > Arrange > Bring to Top.
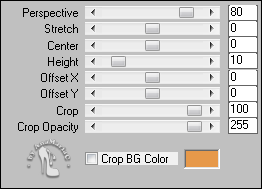
35- Effects > Plugins > MuRa’s Filter Meister > Perspective
Tilling:
Layers > Arrange > Move Down.
36- Effects > 3D Effects > Drop Shadow: Color: #000000.
37- Ativar a Layer Raster 2.
Layers > Arrange > Bring to Top.
38- Image > Free Rotate:

Image > Resize > 80%, all layer desmarcado.
Com a ferramenta Pick Tool, posicionar: Position: X (34) / Y
(5).
39- Adjust > Sharpness > Sharpen.
Layers > Duplicate.
40- Image > Free Rotate:
Edit > Repeat Rotate.
Com a ferramenta Pick Tool, posicionar: Position: Y (655) /
X (366).
Layers > Merge > Merge Down.
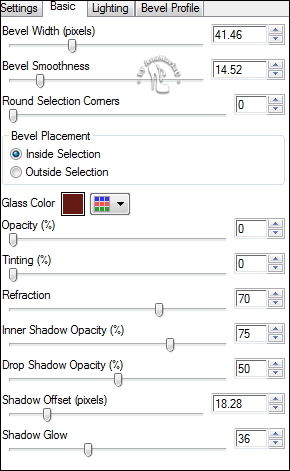
41- Effects > Plugins > Alien Skin Eye Candy 5: Impact >
Glass:
42- Ativar a Layer Promoted Selection 1.
43- Effects > 3D Effects > Drop Shadow: Color: #671a13 (Foreground).
44- Ativar a Layer Copy of Promoted Selection.
Layers > Properties > General > Blend Mode: Hard Light -
Opacity: 50%.
Layers > Arrange > Move Up.
45- Image > Add Borders > Symmetric:
1px - Color: #e7994a (background).
2 px - Cor: #671a13 (Foreground).
1px - Color: #e7994a (background).
46- Edit Copy.
Selections > Select All.
Image > Add Borders > Symmetric: 40 px com qualquer cor.
Selections > Invert.
Edit > Paste Into Selection.
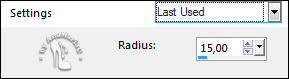
47- Adjust > Blur > Gaussian Bur:
48- Effects > Plugins > Carolaine and Sensibility > CS-LDots.
Adjust > Sharpness > Sharpen.
Selections > Invert.
49- Effects > 3D Effects > Drop Shadow: Color: #000000
Selections > Select None.
50- Edit > Copy no tube principal.
Edit > Paste as New Layer.
Image > Resize se
necessário.
Adjust > Sharpness > Sharpen.
Posicionar à sua escolha.
Effects > 3D Effects > Drop Shadow: à sua escolha.
51- Edit > Copy no WordArt_InaciaNeves_ byAnaMariaC.
Edit > Paste as New Layer.
Posicionar à sua escolha.
Efeitos à sua escolha.
Effects > 3D Effects > Drop Shadow: à sua escolha.
52- Image > Add Borders > Symmetric: 1px - Color: #671a13 (Foreground).
53- Se preferir redimensione seu trabalho.
Aplicar sua marca d'água ou assinatura.
File > Export > JPEG Optimizer.