02-
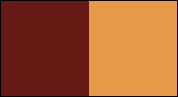
Choose two colors to work with.
Foreground: #671a13 (dark color)
Background: #e7994a (light colour)
03- Open a 900x550px transparency.
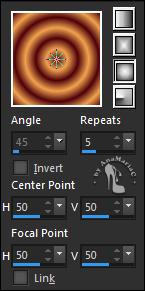
04- Fill with a Sunburst gradient, formed by the
colors in use:
05- Layers > Layer Duplicate.
Image > Flip > Flip Horizontal.
06- Layers > Properties > General > Blend Mode: Overlay -
Opacity: 50%
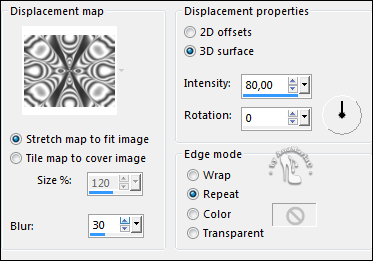
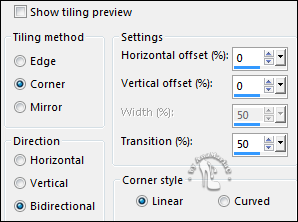
07- Effects > Distortion Effects > Displacement Map:
08- Effects > Edge Effects > Enhance More.
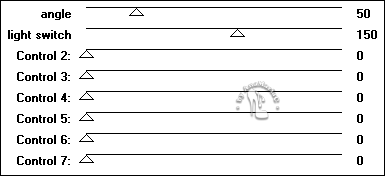
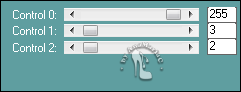
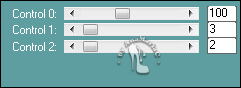
09- Effects > Plugins > Divers > Penzilla:
10- Layers > Merge > Merge Down.
Layers > Duplicate.
Effects > Image Effects > Seamless Tiling > Default.
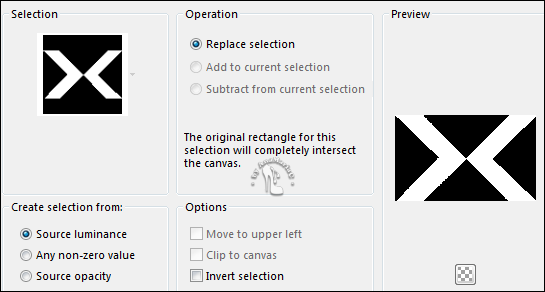
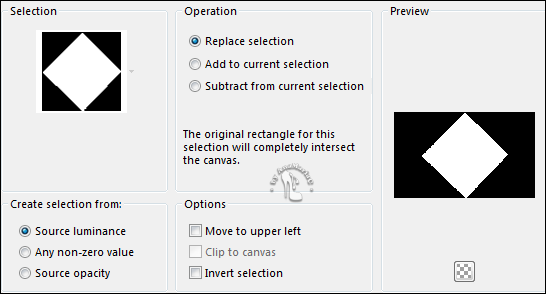
11- Selections > Load/Save Selections > Load Selection From
Disk > Inácia_1byAnaMariaC.

Selections > Promote Selection to Layer.
12- Layers > New Raster Layer.
Fill with a Sunburst gradient, formed by the colors in use:
Selections > Select None.
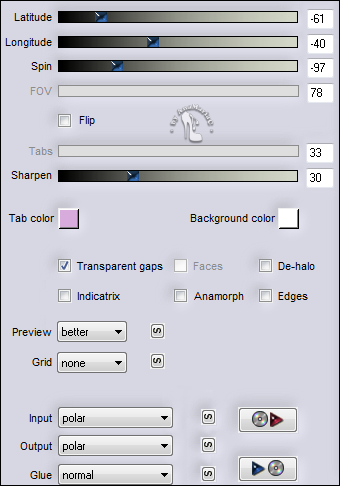
13- Effects > Plugins > Flaming Pear > Flexify 2:
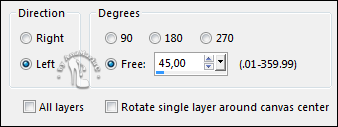
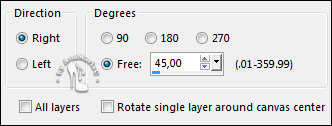
14- Image > Free Rotate:
15- With the Pick Tool, position: Position X: (56)
Y: (37).
Layers > Duplicate.
Image > Mirror > Mirror Horizontal.
Layers > Merge > Merge Down.
Image > Resize > 20%, Resize all layers unchecked.
Layers > Arrange > Send to Bottom.
16- Activate the Layer Prometed Selection.
17- Selections > Load/Save Selections > Load Selection From
Disk > Inácia_1byAnaMariaC.
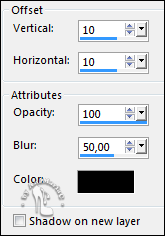
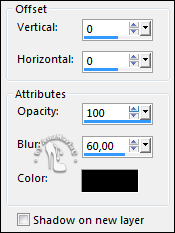
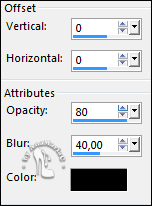
18- Effects > 3D Effects > Drop Shadow: Color: #000000
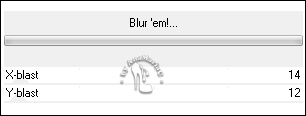
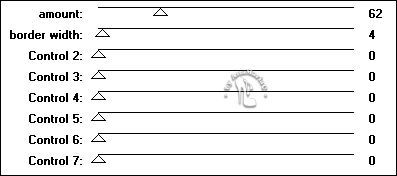
19- Effects > Plugins > Unlimited > &<Bkg Designer sf10 I>
Blur ’em!...
Selections > Select None.
20- Effects > Plugins > Itali@n Editors Effect > Efeito
Fantasma:

21- Layers > Duplicate.
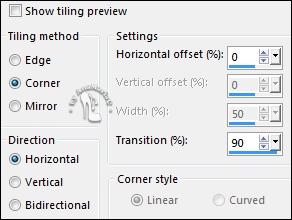
22- Effects > Image Effects > Seamless Tiling:
Layers > Duplicate.
23- Effects > Image Effects > Seamless Tiling:
24- Effects > 3D Effects > Drop Shadow: Color: #000000
25- Effects > Plugins > Carolaine and Sensibility > CS-LDots:
Adjust > Sharpness > Sharpen More.
26- Activa the Layer Copy of Promoted Selection.
27- Effects > Plugins > Penta.Com > Jeans:
28- Effects > Plugins > Sabercat > Sabers Navaho:

Layers > Properties > General > Blend Mode: Hard Light -
Opacity: 70%.
29- Activate the Layer Copy (2) of Promoted Selection.
Layers > Merge > Merge Down.
30- Selections > Load/Save Selections > Load Selection From
Disk > Inácia_2by AnaMariaC
Selections > Promote Selection to Layer.
31- Edit > Copy no misted.
Edit > Edit > Paste Into Selection.
Adjust > Sharpness > Sharpen.
32- Layers > New Raster Layer.
33- Effects > 3D Effects > Cutoud:
Shadow color: Background color.
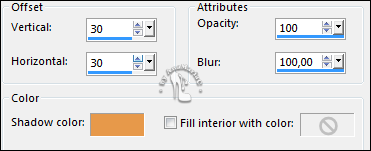
Layers > New Raster Layer.
Repeat > Effects > 3D Effects > Cutoud: V (-30) / H (-30)
Selections > Select None.
Layers > Merge > Merge Down.
Edit > Repeat > Layer Merge Down.
34- Activate the Layer Copy of Raster 1.
Layers > Arrange > Bring to Top.
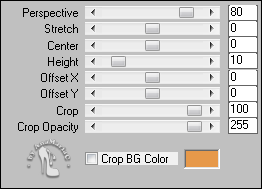
35- Effects > Plugins > MuRa’s Filter Meister > Perspective
Tilling:
Layers > Arrange > Move Down.
36- Effects > 3D Effects > Drop Shadow: Color: #000000.
37- Activate the Layer Raster 2.
Layers > Arrange > Bring to Top.
38- Image > Free Rotate:

Image > Resize > 80%, Resize all layers
unchecked.
With the Pick Tool, position: Position: X (34) / Y
(5).
39- Adjust > Sharpness > Sharpen.
Layers > Duplicate.
40- Image > Free Rotate:
Edit > Repeat Rotate.
With the Pick Tool, position: Position: Y (655) /
X (366).
Layers > Merge > Merge Down.
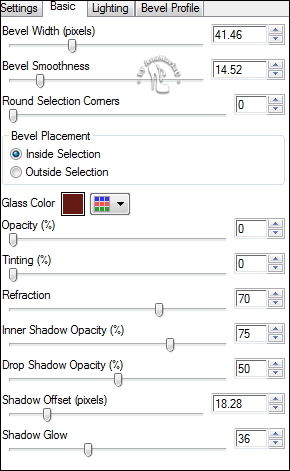
41- Effects > Plugins > Alien Skin Eye Candy 5: Impact >
Glass:
42- Activate the Layer Promoted Selection 1.
43- Effects > 3D Effects > Drop Shadow: Color: #671a13 (Foreground).
44- Activate the Layer Copy of Promoted Selection.
Layers > Properties > General > Blend Mode: Hard Light -
Opacity: 50%.
Layers > Arrange > Move Up.
45- Image > Add Borders > Symmetric:
1px - Color: #e7994a (background).
2 px - Cor: #671a13 (Foreground).
1px - Color: #e7994a (background).
46- Edit Copy.
Selections > Select All.
Image > Add Borders > Symmetric: 40 px with any color.
Selections > Invert.
Edit > Paste Into Selection.
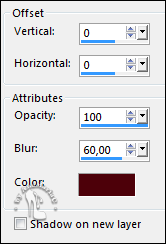
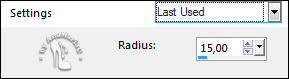
47- Adjust > Blur > Gaussian Bur:
48- Effects > Plugins > Carolaine and Sensibility > CS-LDots.
Adjust > Sharpness > Sharpen.
Selections > Invert.
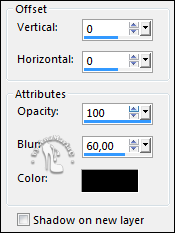
49- Effects > 3D Effects > Drop Shadow: Color: #000000
Selections > Select None.
50- Edit > Copy in the main tube.
Edit > Paste as New Layer.
Image > Resize if
necessary.
Adjust > Sharpness > Sharpen.
Position of your choice.
Effects > 3D Effects > Drop Shadow: your choice.
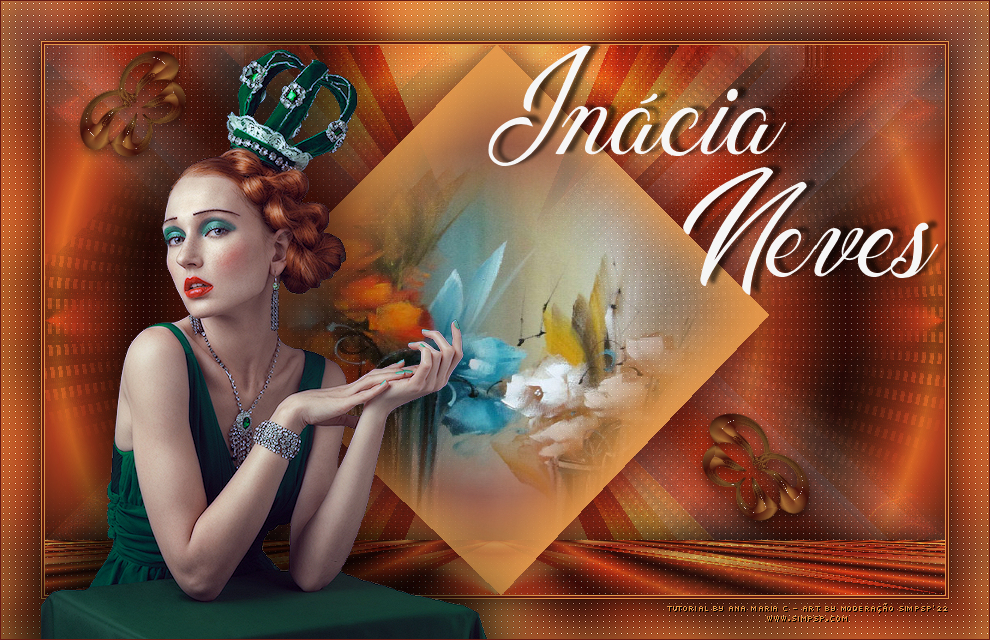
51- Edit > Copy no WordArt_InaciaNeves_ byAnaMariaC.
Edit > Paste as New Layer.
Position of your choice.
Effects > 3D Effects > Drop Shadow: your choice.
52- Image > Add Borders > Symmetric: 1px - Color: #671a13 (Foreground).
53- If you wish, resize your work.
Apply your watermark or signature.
File > Export > JPEG Optimizer.
Credits
Turorial
AnaMariaC
English Translation by Moderation SIM-PSP
Main Tube by
Pqna&Alice
Misted Landscape: by
SuizaBella
WordArt by
AnaMariaC
Feel free to submit your
versions.
I will be happy to publish them on our website.


|
Tutorial created by
AnaMariaC, in February/2022.
Translated into English in March/22, by Moderation of
SIM-PSP.
It cannot be copied,
removed from this place,
translated or use in learning lists or groups without the
author's prior consent.
|