|
Doce Magia TRADUÇÕES: Obrigada aos nossos tradutores!
MATERIAL 1 Tube Principal 1 Misted Paisagem 1 Tube Flor masklu909
NarahsMasks_1575 
PLUGINS AP [Lines] Italian Editors Effect Simple Mura's Meister Unlimited 2.0 Virtual Painter 4 Xero
TUTORIAL 1 - Abrir o material no PSP, duplique e feche o original. Escolher as cores para trabalhar. Foreground #d50002 Background #ffffff
2 - Abra uma imagem transparente de 900 x600 px. Selections > Select All.
3 - Edit > Copy no tube principal. Edit > Paste Into Selection. Selections > Select None.
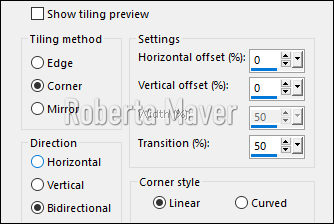
4 - Effects > Image Effects > Seamless Tiling.
Layers > Merge > Merge All (Flatten). Layers > Promote Background Layer.
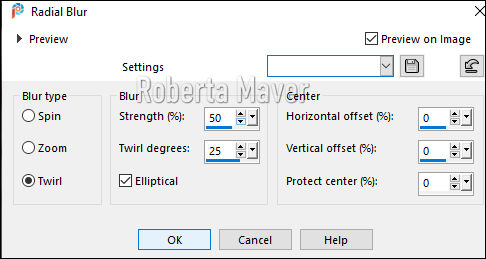
5 - Adjust > Blur > Radial Blur conforme print.
6- Effects > Edge Effects > Enhance.
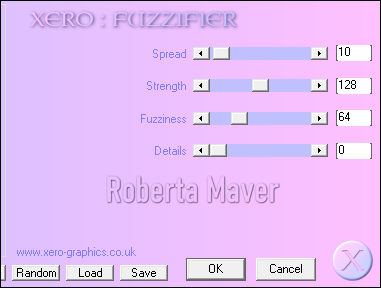
7 - Plugin Xero > Fuzzifier: Default. Aplicar (2 vezes).
8- Layers > New Raster Layer. Preencha com a cor do foreground.
9 - Layers > New Mask Layer > From Image: MaskLu_909. Layers > Merge > Merge Group.
10 - Effects > Geometric Effects > Skew.
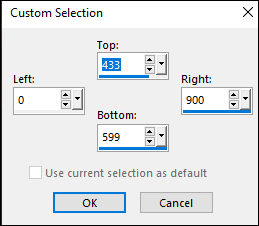
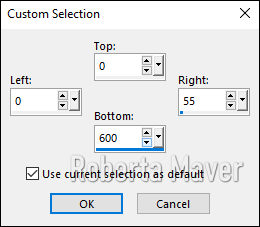
11 - Ferramenta Selection Tool > Custom Selection.
Aperte a tecla Delete no teclado. Selections > Select None.
12- Effects > Plugin AP [Lines] > Silver Lining.
Layers > Layers Properties: Blend Mode Soft Light (ou outro que preferir), Opacity 50. Adjust > sharpness > Sharpen. Layers > Duplicate. Image > Mirror > Mirror Horizontal. Layers > Merge > Merge Down.
13- Effects > Image Effects > Seamless Tiling: Default.
14- Effects > Plugin Simple > Pizza Slice Mirror.
15 - Effects > Edge Effects > Enhance More.
16 - Ative a layer Raster 1.
17 - Layers > Duplicate.
18 - Fechar a visibilidade da layer Copy of Raster 1. Ativar a layer Raster 1.
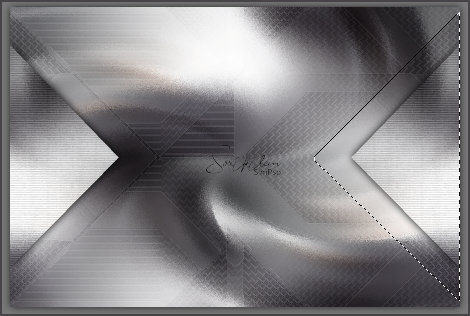
19 - Selecione com a ferramenta Freehand Selection Tool como mostro no print.
20- Selections > Promote Selection to Layer. Renomeie para triangulo menor.
21 - Layer > Arrange > Bring to Top.
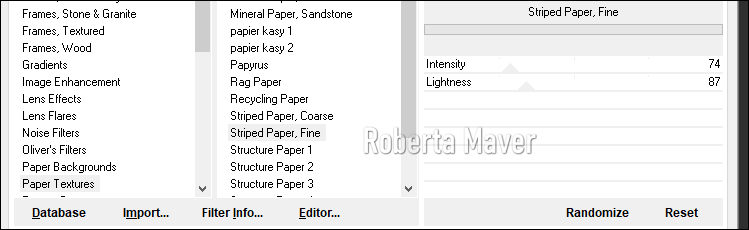
22- Effects > Filters Unlimited 2.0 > Paper Textures > Striped Paper, Fine.
Selections > Select None.
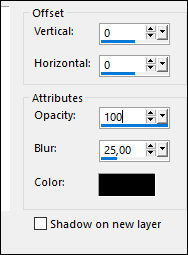
23- Effects > 3D Effects > Drop Shadow.
24 - Layers > Duplicate. Image > Mirror > Mirror Horizontal. Layers > Merge > Merge Down.
25 - Ative a Layer Raster 1.
26 - Selecione com a ferramenta Freehand Selection Tool o triangulo maior.
26 - Selections > Promote Selection to Layer. Renomeie para triangulo maior.
27 - Arraste a layer para baixo do triangulo menor.
28 - Effects > Plugin AP [Lines] > Silver Lining. Selections > Select None.
29 - Layers > Duplicate. Image >Mirror > Mirror Horizontal. Layers > Merge > Merge Down.
30- Plugin Italian Editors Effect > Effetto Fantasma: 21, 21.
31 - Effects > 3D Effects > Drop shadow.
32 - Effects > Plugin AP [Lines] > Silver Lining.
33 - Ativar e abrir a visibilidade da layer Copy of Raster 1.
34- Passe para baixo do Triangulo Menor.
35 -Plugin Mura's Meister > Perspective Tiling.
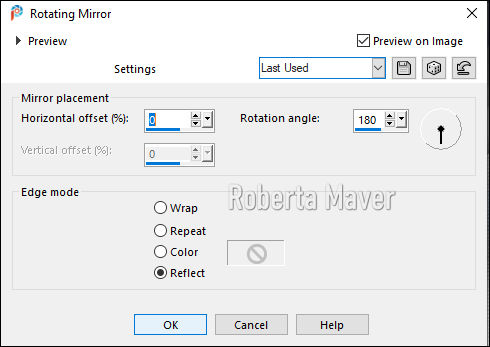
36 - Effects > Reflections Effects > Rotating Mirror.
37 - Ative a layer Raster 1.
38 - Plugin > Virtual Painter4. Filter: Oil Painting Material: Canvas (Fine)
39 - Edit > Copy no Misted Paisagem. Edit > Paste a New Layer. Centralize e mova como desejar.
40 - Adjust > Sharpness > Sharpen.
41 - Layers > New Raster Layer. Pintar esta layer com a cor branca.
42 - Layers > New Mask Layer > From Image: Narah_mask_1575. Layers > Merge > Merge Group. Layers > Arrange > Move Down.
43 - Effects > Reflections Effects > Rotating Mirror.
Layers > Properties General > Blend Mode: Luminance L. Ativar a Layer Raster 1.
44 - Ferramenta Selection Tool > Custom Selection.
45 - Selections > Promote Selection to Layer. Renomear esta layer para Tira.
46 - Layer > Arrange > Bring to Top.
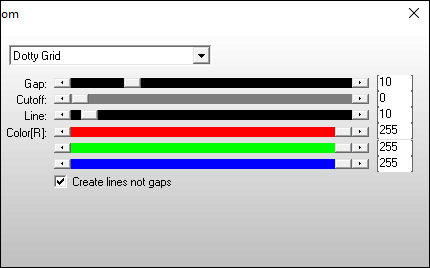
47 - Plugim > AFS IMPORT > Sqborder2.
Selections > Select None.
48 - Effects > 3D Effects > Drop shadow: 0, 0, 80, 30, cor preta. Layers > Duplicate Image >Mirror > Mirror Horizontal. Layers > Merge > Merge Down.
49 - Effects > Reflections Effects > Kaleidoscope.
Mova esta layer para baixo do triangulo menor.
50 - Edit > Copy no tube flor. Edit > Paste a New Layer. Posicione e aplique Drop Shadow como preferir. Layers > Duplicate. Image > Mirror > Mirror Horizontal.
51 - Image > Add Borders: 2px cor do foreground 2px cor do background 2px cor do foreground Selections > Select All. Image > Add Borders: 50 px cor background
52 - Effects > 3D Effects > Drop shadow: 0, 0, 80, 30, cor preta. Selections > Select None.
53 - Edit > Copy no tube principal. Edit > Paste a New Layer. Posicione e aplique Drop Shadow como preferir.
54 - Image > Add Borders: 2px cor do foreground 2px cor do background 2px cor do foreground
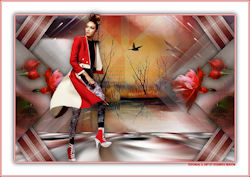
55 - Se você desejar, redimensione seu trabalho. Aplicar sua marca d'água ou assinatura. File > Export > JPEG Optimizer.
Créditos V1
Tutorial by Roberta Maver
Tutorial by Roberta Maver'20
Créditos V2
Sinta-se à vontade para enviar suas versões. Terei todo o prazer em publicá-las em nosso site.
|