|
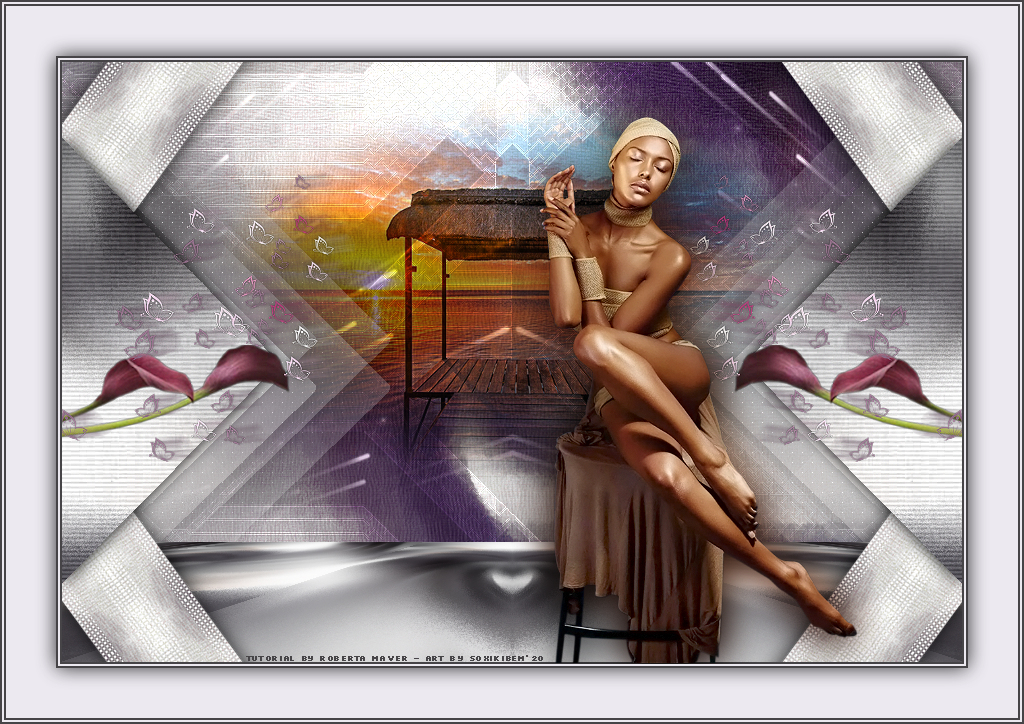
Tutorial By Roberta Maver English Translation by Soxikibem Original Tutorial
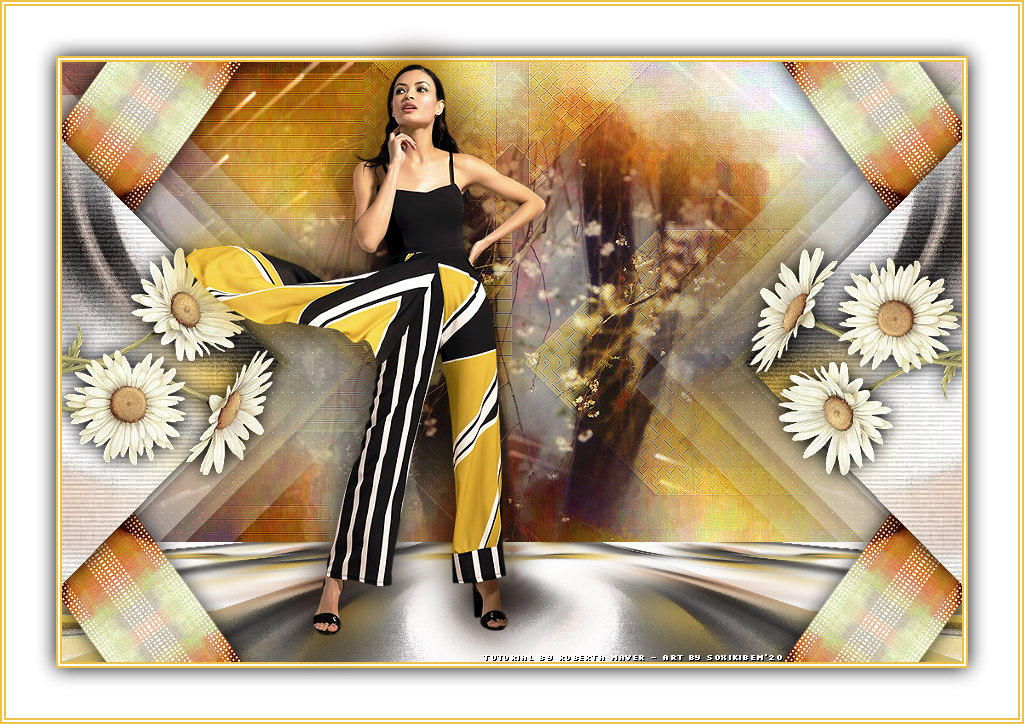
MATERIAL 1 Main Tube of your choice 1 Misted Landscape of your choice 1 Flower Tube of your choice masklu909
NarahsMasks_1575 
PLUGINS AP [Lines] Italian Editors Effect Simple Mura's Meister Unlimited 2.0 Virtual Painter 4 Xero
TUTORIAL 1 - Open the material on the PSP, duplicate and close the original. Choose colors to work with. Foreground #464447 Background #ece9f0
2 - Open a transparent 900 x600 px image. Selections > Select All.
3 - Edit > Copy on the Main tube. Edit > Paste Into Selection. Selections > Select None.
4 - Effects > Image Effects > Seamless Tiling: Default. Layers > Merge > Merge All (Flatten). Layers > Promote Background Layer.
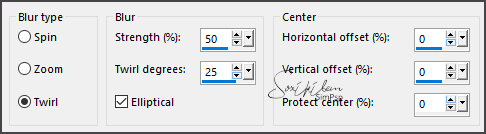
5 - Adjust > Blur > Radial Blur.
6- Effects > Edge Effects > Enhance.
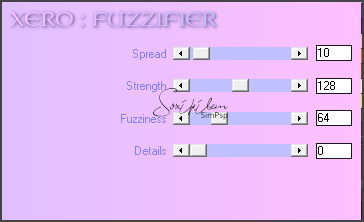
7 - Plugin Xero > Fuzzifier: Default. Apply the plugin twice.
8- Layers > New Raster Layer. Paint this layer with the color of the foreground.
9 - Layers > New Mask Layer > From Image: MaskLu_909. Layers > Merge > Merge Group.
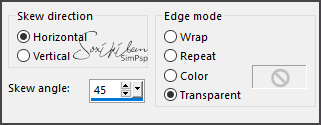
10 - Effects > Geometric > Skew.
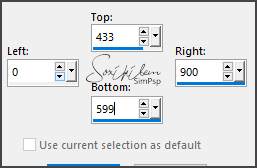
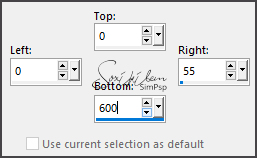
11 - Selection Tool > Custom Selection.
Press the delete key on the keyboard. Selections > Select None.
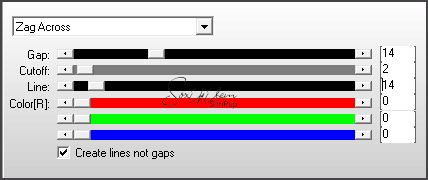
12- Effects > Plugin AP [Lines] > Silver Lining.
Layers > Properties: Blend Mode: Soft Light (or whatever you prefer), Opacity 50. Adjust > sharpness > Sharpen. Layers > Duplicate. Image > Mirror > Mirror Horizontal. Layers > Merge > Merge Down.
13- Effects > Image Effects > Seamless Tiling: Default.
14- Effects > Plugin Simple > Pizza Slice Mirror.
15 - Effects > Edge Effects > Enhance More.
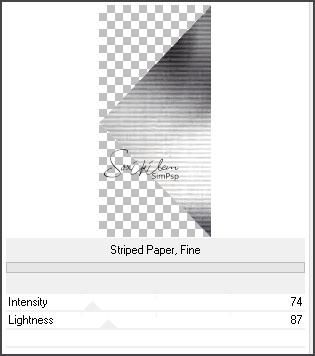
16 - Activate the Raster 1 layer.
17 - Layers > Duplicate.
18 - Close the visibility of the Copy of Raster 1 layer. Activate the Raster 1 layer.
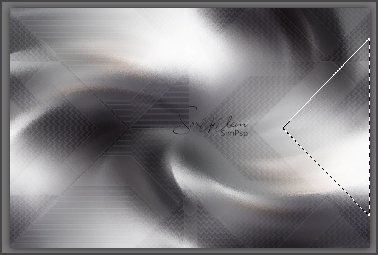
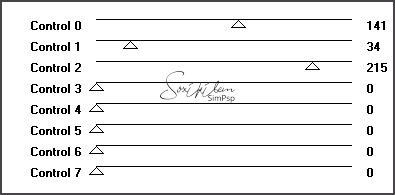
19 - Select with the Freehand Selection Tooll as shown in the print.
20- Selections > Promote Selection to Layer. Rename it to a smaller triangle.
21 - Layer > Arrange > Bring to Top.
22- Effects > Filters Unlimited 2.0 >Paper Textures> Striped Paper, Fine. Selections > Select None.
23- Effects > 3D Effects > Drop Shadow: 0, 0, 100, 25, black color.
24 - Layers > Duplicate. Image >Mirror > Mirror horizontal. Layers > Merge > Merge Down. 25 - Activate the Layer Raster 1.
26 - Select the largest triangle with the Freehand Selection Tool.
26 - Selections > Promote Selection to Layer. Rename it to a larger triangle.
27 - Drag the layer below the smaller triangle.
28 - Effects > Plugin AP [Lines] > Silver Lining. Selections > Select None.
29 - Layers > Duplicate. Image > Mirror > Mirror Horizontal. Layers > Merge > Merge Down.
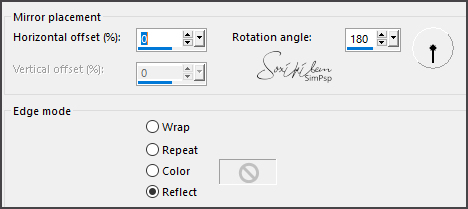
30- Plugin Italian Editors Effect > Effetto Fantasma: 21, 21.
31 - Effects > 3D Effects > Drop shadow: 0, 0, 80, 25, black color.
32 - Effects > Plugin AP [Lines] > Silver Lining.
33 - Activate and open the visibility of the Copy of Raster 1 layer.
34 - Pass down the smaller triangle.
35 - Plugin Mura's Meister > Perspective Tiling.
36 - Effects > Reflections Effects > Rotatin Mirror.
37 - Activate the Raster 1 layer.
38 - Plugin Virtual Painter4. Choose from Filter: Oil Painting, and in Material: Canvas (Fine).
39 - Edit > Copy in Misted Landscape. Edit > Paste a New Layer. Center and move as you wish.
40 - Adjust > Sharpness > Sharpen.
41 - Layers > New Raster Layer. Paint this layer with white.
42 - Layers > New Mask Layer > From Image: Narah_mask_1575. Layers > Merge > Merge Group. Arrange> Move Down
43 - Effects > Reflections Effects > Rotatin Mirror. Layers > Properties General > Blend Mode: Luminance L Activate Layer Raster 1.
44 - Selection Tool > Custom Selection.
45 - Selections > Promote Selection to Layer. Rename this layer to strip.
46 - Layer > Arrange > Bring to Top.
47 - Plugim AFS IMPORT > Aqborder2.
Selections > Select None.
48 - Effects > 3D Effects > Drop shadow: 0, 0, 80, 30, black color. Layers > Duplicate Image > Mirror > Mirror horizontal. Layers > Merge > Merge Down.
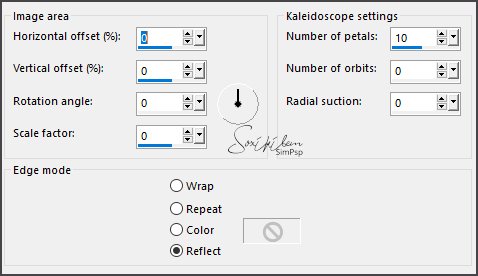
49 - Effects > Reflections Effects > Kaleidoscope
Move down the smaller triangle
50 - Edit > Copy on Flower tube. Edit > Paste a New Layer. Position and apply Drop Shadow as you prefer. Layers > Duplicate. Image > Mirror > Mirror Horizontal.
51 - Image > Add Borders: 2px foreground color 2px background color 2px foreground color Selections > Select All. Image > Add Borders: 50 px, background color
52 - Effects > 3D Effects > Drop shadow: 0, 0, 80, 30, black color. Selections > Select None.
53 - Edit > Copy on the Main tube. Edit > Paste a New Layer. Position and apply Drop Shadow as you prefer.
54 - Image > Add Borders: 2px foreground color 2px background color 2px foreground color
55 - If you wish, resize your work. Apply your watermark or signature. File> Export> JPEG Optimizer.
CREDITS Version 1: Main Tube by Colybrix - Misted Landscape by Animabelle - Flower by Isa
Version 2: Main
Tube by Lily - Misted Landscape by Nikita - Flower by
CibiBijoux
Feel free to send your versions. I will be happy to publish them on our website.
|