|
TRADUÇÕES:
Obrigada aos nossos tradutores!
MATERIAL 1 Tube Principal à sua escolha 1 Misted Paisagem à sua escolha 1 Tube Decoração à sua escolha AlphaColor_Roberta Decor_ Roberta Titulo_by Roberta
PLUGINS AAA Frames Plugin Mehdi Plugin Toadies Simple Plugins AP MuRa's Filters Meister Bkg Designer sf10 III > Importado pelo Filters Unlimited 2.0 Transparency > Importado pelo Filters Unlimited 2.0
ROTEIRO
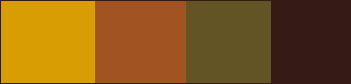
1 - Abrir o material no PSP, duplique e feche o original. Escolher quatro cores para trabalhar. Foreground #d79d03 Background #a15422 Cor Extra 1 #625424 Cor Extra 2 #361a15
2 - Abra o arquivo AlphaColor_by Roberta, duplique e feche o original.
3 - Effects > Plugin Mehdi > Wave Lab1.1: Configure as cores na sequência indicada...
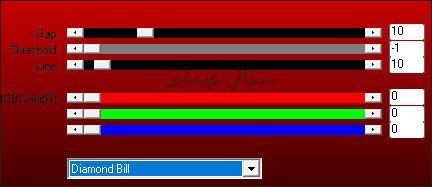
4 - Effects > Plugin Mehdi > Sorting Tiles
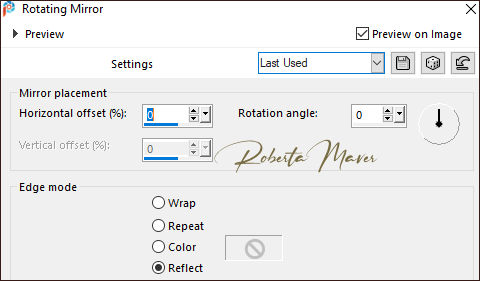
5 - Effects > Edges efects > Enhance 6 - Effects > Reflection Effects > Rotation Mirror.
7- Effects > Plugin > Simple > Pizza Slice Mirror. 8 - Effects > Reflection Effects > Rotation Mirror.
9 - Selections > Load/Save Selection > Load Selection From Alpha Channel: Selection #1 Selections > Promote Selection to Layer. Selections > Select None.
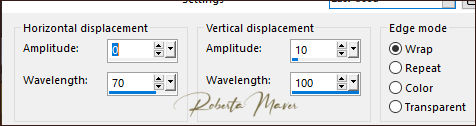
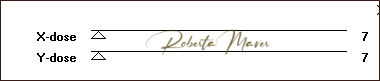
10 - Effects > Distortion Effects > Wave.
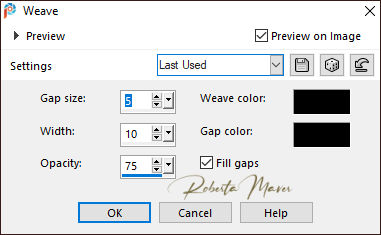
11 - Effects > Texture Effects > Weave.
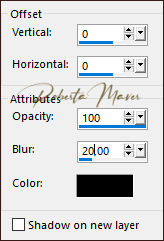
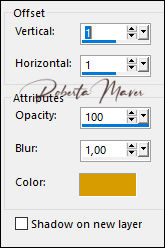
12 - Effects > 3D Effects > Drop Shadow:
Ative a Raster 1 13 - Selection > Load/Save Selection > Load Selection From Alpha Channel: Selection #2. Selections > Promote Selection to Layer. Selections > Select None.
14 - Effects > Plugins > AP Lines > SilverLining
15 - Effects > 3D Effects > Drop Shadow:
Ative a Raster 1
16- Selections > Load/Save Selection > Load Selection From Alpha Channel: Selection #3. Selections > Promote Selection to Layer. Layers > Arrange > Bring To Top. Selections > Select None.
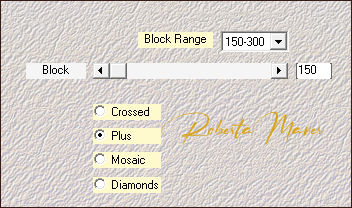
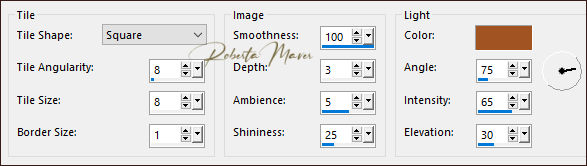
17 - Effects > Texture Effects > Tiles. Color Background #a15422
18 - Effects > 3D Effects > Drop Shadow:
Ative a Raster 1
19 - Selection /Load/Save Selections > Load Selection From Alpha Channel: Selection #4. Selections > Promote Selection to Layer. Layers > Arrange > Bring To Top. Selections > Select None.
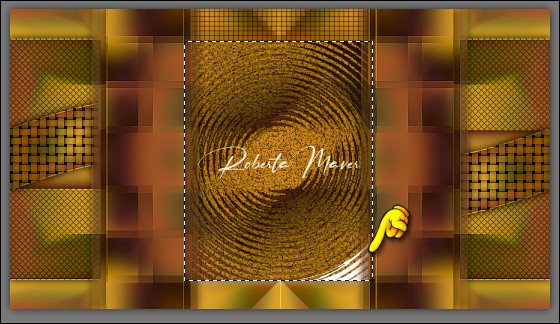
20 - Layers > Duplicate. Effects > Plugins > Toadies> What Are You?
Effects > 3D Effects > Drop Shadow:
Ativar a layer Promoted Selection 2
21 - Selections > Load/Save Selection > Load Selection From Alpha Channel: Selection #5 Selections > Promote Selection to Layer.
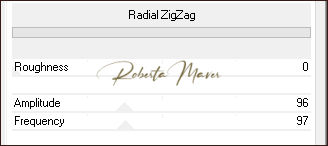
22- Effects > Filters Unlimited 2.0 > Bkg Designer sf10 III > Radial ZipZap.
* Caso aparecer um fundo branco aplique o Effects > Plugin > Filters Unlimited 2.0 > Transparency > Eliminate White.
Selections > Select None. Effects > 3D Effects > Drop Shadow:
Ativar a Layer do topo
23 - Edit > Copy no Decor1_Roberta Layers > Properties > General > Blend Mode: Luminance L.
24- Edit > Copy no Misted Paisagem Edit > Paste as new layer. Adjust > Sharpness > Sharpen
Ativar Layer Raster 1
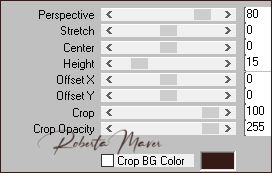
25 - Layers > Duplicate. Layers > Arrange > Bring To Top. Effects > Plugins > MuRa's Filters Meister > Perspective Tiling:
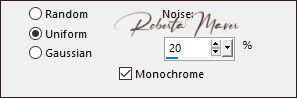
26 - Adjust > Add/Remove Noise > Add Noise.
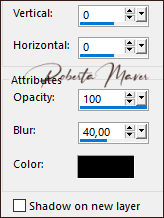
27 - Effects > 3D Effects > Drop Shadow.
Ativar Layer Raster 1
28 - Plugin > Carolaine & Sensibility > CS-LDots.
29 - Image > Add Borders: 1 px color: Foreground > #d79d03 2 px color: Background > #a15422 1 px color: Foreground > #d79d03
30 - Selections > Select All. Edit > Copy Image > Add Broders: 50 px com qualquer cor. Selections > invert. Edit > paste into selection. Adjust > Blur > Gaussian Blur: 25 31 - Effects > Plugins > AP Lines > SilverLining.
32- Selections > invert. Effects > 3D Effects > Drop Shadow:
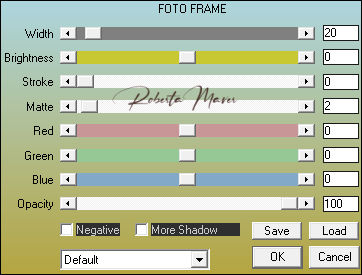
Selections > Select None. 33 - Effects > Plugins > AAA Frames > Foto Frame
34 - Edit > Copy no decor2_ByRoberta. Edit > Paste a New Layer. Adjust > Sharpness > Sharpen.
35 - Edit > Copy no Tube Principal. Edit > Paste a new Layer. De resize se necessário Posicionar à gosto. Effects > 3D Effects > Drop Shadow como preferir.
36 - Edit > Copy no Tube Decorativo. Edit > Paste a new Layer. De resize se necessário Posicionar à gosto. Effects > 3D Effects > Drop Shadow como preferir.
37 - Edit > Copy no Titulo. Edit > Paste a New Layer. Posicione como desejar. Effects > 3D Effects > Drop Shadow: No meu caso usei o color do foreground: #d79d03
38 - Image > Add Broders: 1 px color: #000000
39 - Se você desejar, redimensione seu trabalho. Aplicar sua marca d'água ou assinatura. File > Export > JPEG Optimizer.
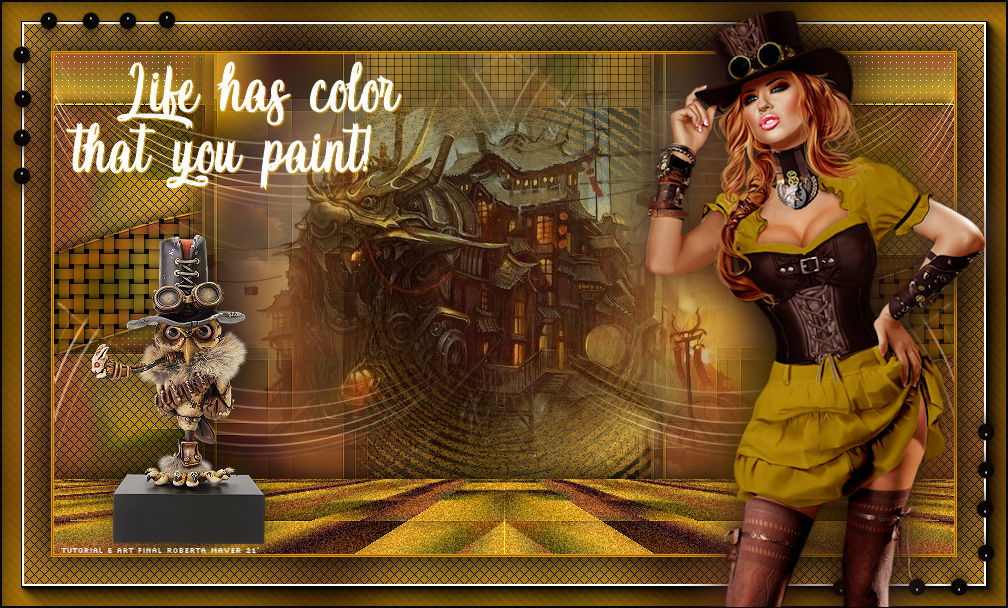
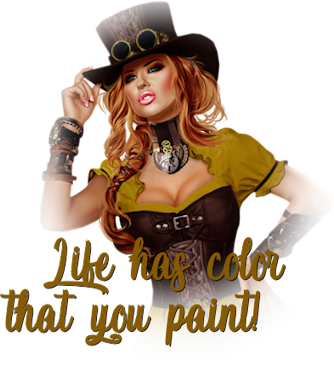
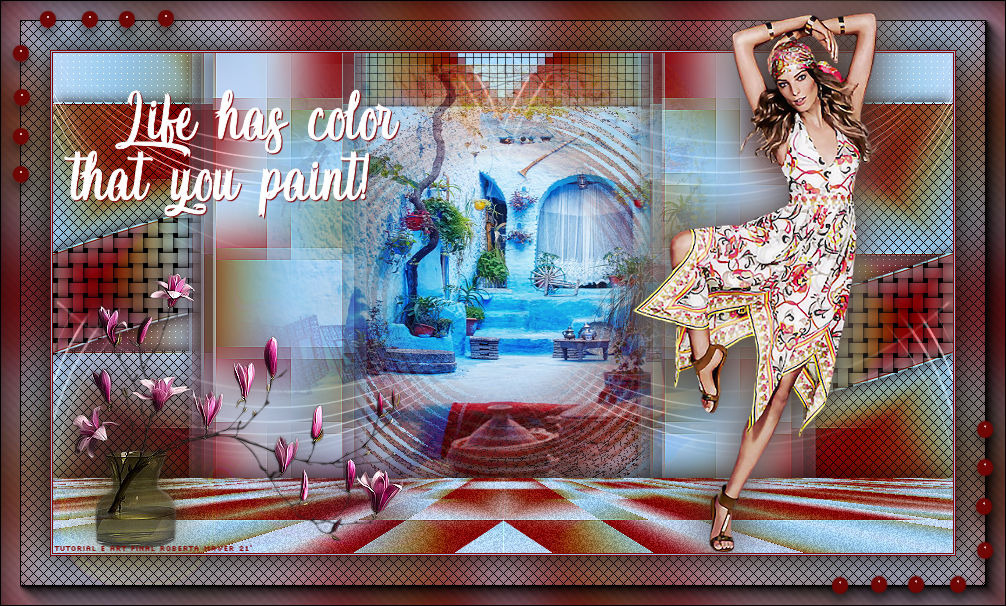
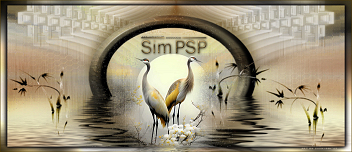
Créditos: Tube: SuizaBella / Paisagem: Suizabella Tube Decoração:LB_Tubes
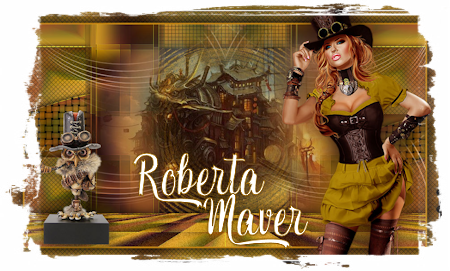
Créditos Tutorial e art final criado por Roberta Maver Tube:femme_steampunk_chapeau_tubed_by_thafs Paisagem:Imagem retirado do Pinterest Decor decorativo:steampunk owl-005 09/04/2021 Sinta-se à vontade para enviar suas versões. Terei todo o prazer em publicá-las em nosso site.
|