|
Tutorial By Soxikibem English Translation by SIM-PSP moderation Original Tutorial
MATERIAL 1 Main Tube of your choice 1 Misted landscape of your choice 1 Misted face of your choice NarahsMasks_1582 titulo_tiedinthepastSoxikibem *When using the material remember to erase the Watermark.
Plugins Mehdi Virtual Painter 4
Tutorial
* Blends may vary according
to the colors you are using.
1 - Open the material on the PSP, duplicate and close the original. Choose two colors to work with: Foreground #2f3c44 Background #e0d6a5 Extra Color: #FFFFFF (white)
2 - Open a transparent image of 850x500px. Paint with a Linear gradient formed by the chosen colors.
3 - Adjust > Blur > Gaussian Blur: 30.
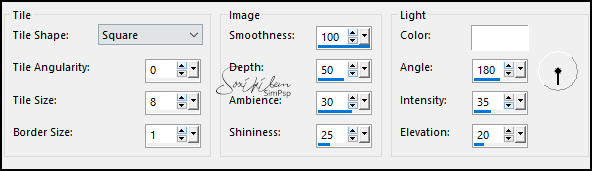
4 - Effects > Texture Effects > Tiles.
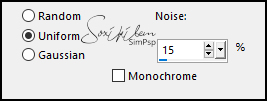
5 - Adjust > Add/Remove Noise > Add Noise.
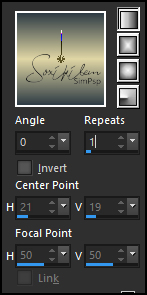
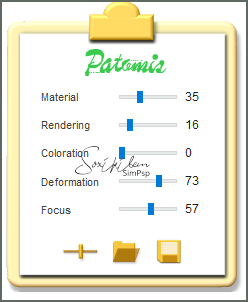
6 - Effects > Plugin Virtual Painter 4: Filter > Impasto, Material > Stucco (Sand)
Adjust the values as desired in Adjust by clicking on the
hand.
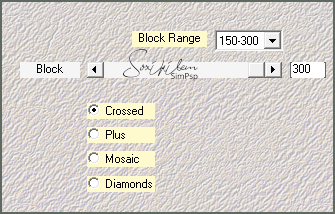
7 - Layers > Duplicate. Effects > Plugin Mehdi > Sorting Tiles.
Layers > Properties > General > Blend Mode: Lighten.
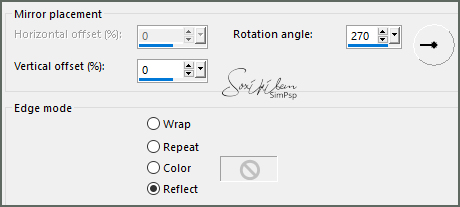
8 - Effects > Reflection Effects > Rotating Mirror.
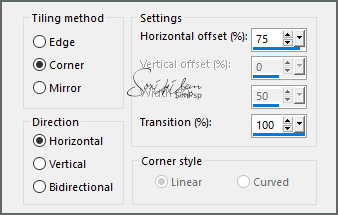
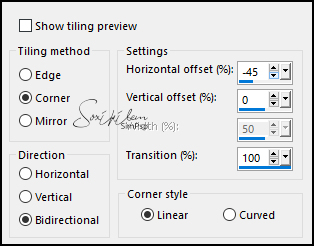
9 - Effects > Image Effects > Seamless Tiling.
10 - Layers > New Adjustment Layer > White Balance. Just change the Blend Mode General to Multiply and opacity to 50%
11 - Layers > New Raster Layer. Selections > Select All. Edit > Copy the Misted landscape. Edit > Paste Into Selection. Selections > Select None.
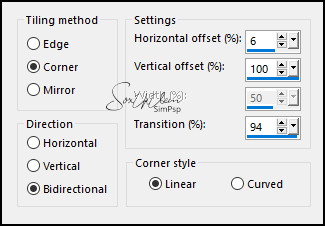
12 - Effects > Image Effects > Seamless Tiling: Side by Side.
Layers > Properties > General > Blend Mode: Hard Light.
13 - Layers > New Raster Layer. Paint this layer with the color #FFFFFF (white). Layers > New Mask Layer > From Image: NarahsMasks_1582. Layers > Merge > Merge Group. Effects > Image Effects > Seamless Tiling.
14 - Layers > Properties > General > Blend Mode: Overlay, Opacity 85%.
15 - Edit > Copy the face misted. Edit > Paste as New Layer. Position to the left. Layers > Properties > General > Blend Mode: Dodge, Opacity 50.
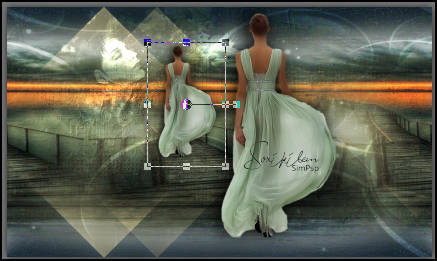
16 - Edit > Copy the Main Tube. Edit > Paste as New Layer. Position to your choice. Effects > 3D Effects > Drop Shadow: your choice
17 - Layers > Duplilcate. Image > Resize: 50%, all layers unchecked. Position as indicated or according to the landscape you are using.
18 - Layers > Properties > General: Opacity 50%.
19 - Layes > Merge > Merge All. Edit > Copy.
20 - Image > Add Borders: 1px color: background 10 px color: foreground
21 - Selections > Select All. Image > Add Borders: 50px > Any color. Selections > Invert. Edit > Paste Into Selection. Adjust > Blur > Gaussian Blur: 30.
22 - Effects > Plugin Virtual Painter 4: Filter Impasto, Material Stucco (Sand)
Adjust the values as desired in Adjust by clicking on the
hand.
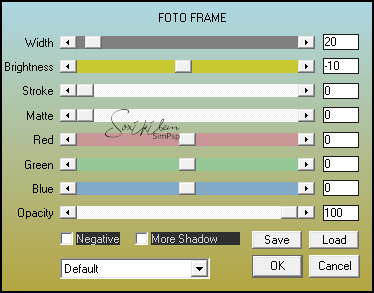
23 - Effects > Plugin AAA Frames > Foto Frame.
Selections > Invert.
24 - Effects > 3D Effects > Drop Shadow: 0, 0, 100, 40, color: #000000 (black). Selections > Select None.
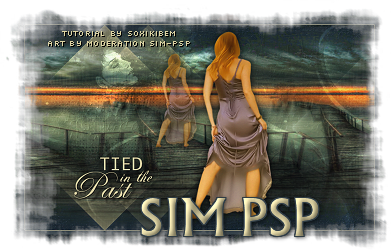
25 - Edit > Copy the titulo_tiedinthepastSoxikibem. Edit > Paste as New Layer. With the Pick Tool, position: Position X 180, Position Y 384.
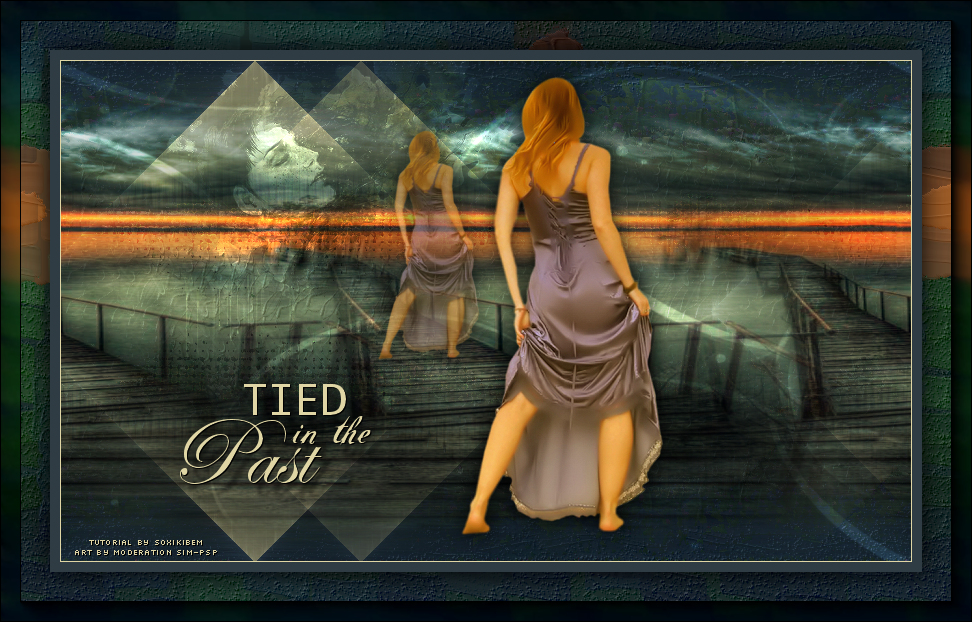
26 - If you wish, resize your work. Apply your watermark or signature. File > Export > JPEG Optimizer.
Feel free to send your versions.
|